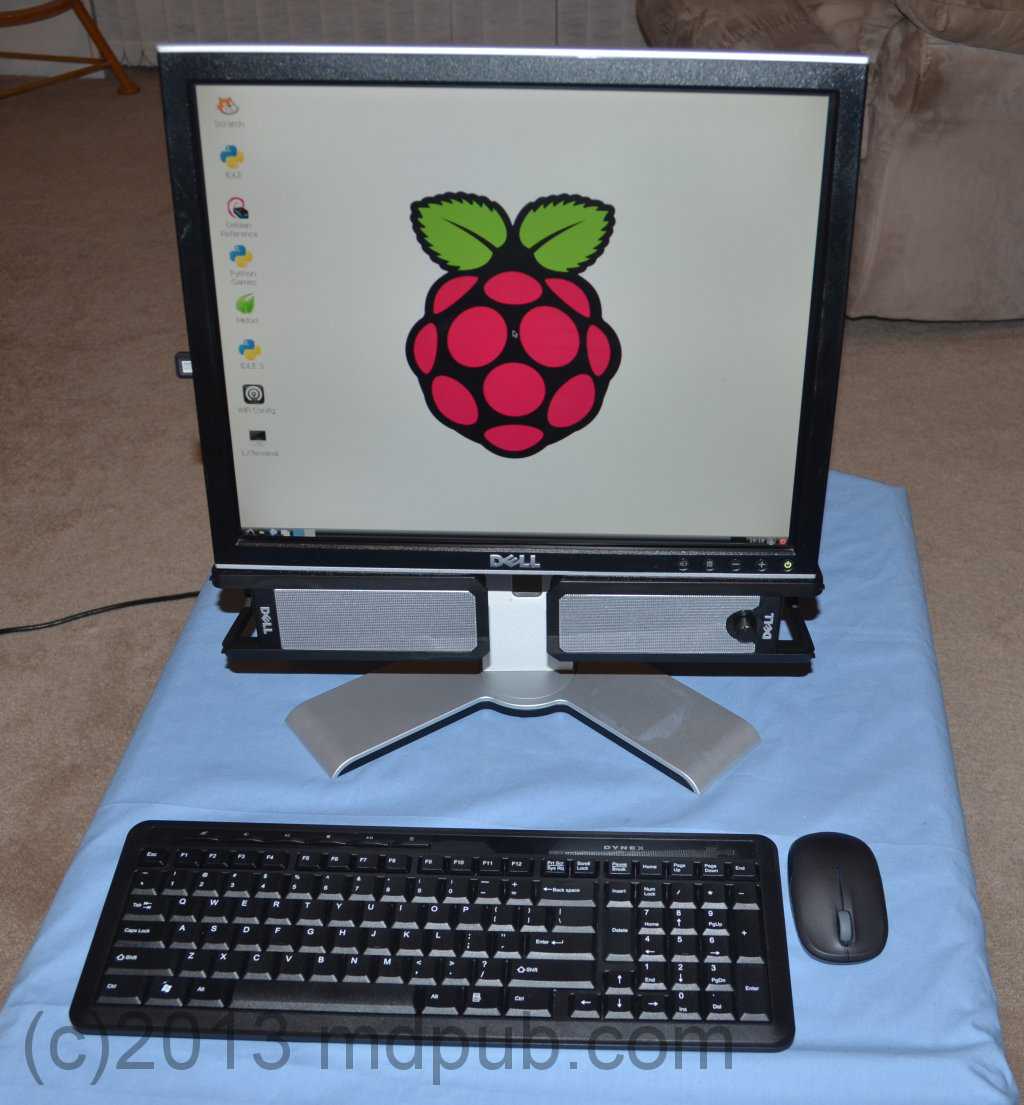
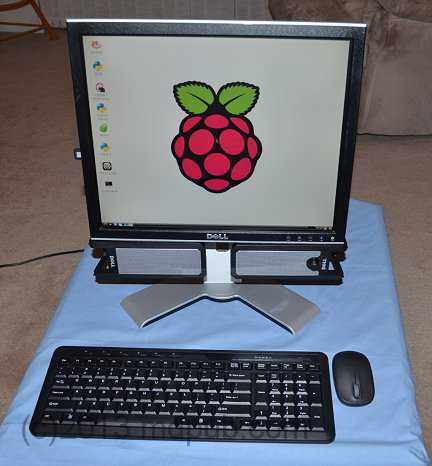
 This is an all in one desktop computer, based on the Raspberry Pi. The goal of this project was to produce a computer system, based on the Raspberry Pi,
with an absolute minimum of cable clutter. I think I have succeeded. Note the single power cord exiting the frame to the left. That is the only cable hanging
off of this system.
This is an all in one desktop computer, based on the Raspberry Pi. The goal of this project was to produce a computer system, based on the Raspberry Pi,
with an absolute minimum of cable clutter. I think I have succeeded. Note the single power cord exiting the frame to the left. That is the only cable hanging
off of this system.
This project was inspired by two recent events in my life. First, my office at work got new carpet. Everything had to be moved out of the office,
and then back in. I have four computers in my office. Even using a KVM switch so that I only have one monitor, mouse and keyboard to deal with,
it was still a nightmare rat's nest of tangled wiring that had to be dealt with. Secondly, my UPS system on my home computer setup died and had
to be replaced. Again, a lot of tangled wires needed to be dealt with (I have even more computers at home than at work). After all that, I was
fed up with wires. I wanted to see if I could build a computer that only needed one single power cord, and no other wires. I also wanted to see
if I could give my Raspberry Pi a better home than just sitting on top of my desk with more wires and cables sticking out of it than a patient
in an intensive care ward. This is the result.
Click on any photo for a larger version.
Below is a parts list for this build. Most of these parts came from Newark/Element 14. They have a large selection of
Raspberry Pi accessories.
Raspberry Pi model B computer
Enclosure for Raspberry Pi (mine is by Adafruit Industries)
USB Wi-Fi dongle
HDMI to VGA converter box#
Flat-Screen monitor with built-in USB hub (built-in speakers a plus)
Wireless keyboard and mouse
USB powered stereo speakers (not needed if monitor has speakers)
Short USB A to USB B cable*
Short USB A to micro USB cable*
Short VGA video cable*
Velcro
Cable Ties
# I already had an HDMI to VGA converter on hand. An HDMI to DVId converter could also be used for monitors with DVId inputs.
* By short I mean 8-12 inches. Such specialty short cables are available numerous places online. I bought mine on Ebay. Short cables aren't absolutely necessary,
but I didn't want to have a lot of ugly and bulky coils of excess cable strapped on the back of the monitor.
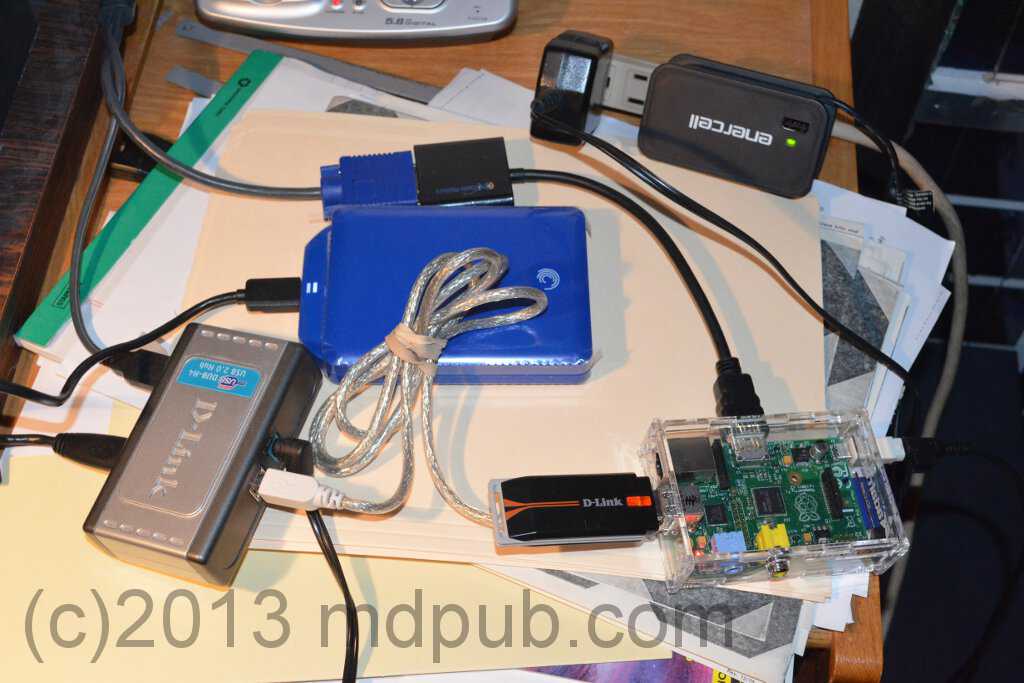
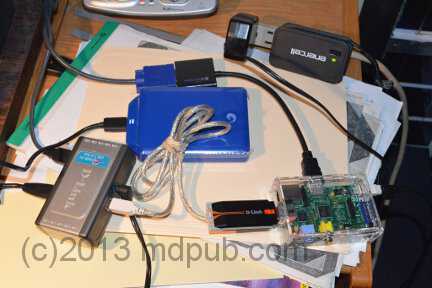 Here is a photo of my original set-up for experimenting with the Raspberry Pi computer. I had burned the Raspbian "wheezy" image to an 8GB SD card and
dived into experimenting with what the Pi could do. The setup consists of the Pi itself, in an acrylic enclosure, a powered
USB hub, an HDMI to VGA converter, a 1TB USB hard drive I occasionally attach to it, a Wi-Fi dongle, and a lot of cables. There are two separate
power supplies needed. One for the Pi and one for the USB Hub. There is a 3 ft USB cable connected the Pi to the Hub. The cable from my desktop
KVM switch connects to both the VGA port on the HDMI to VGA converter, and to a port on the USB hub. The Wi-Fi dongle plugged into the other USB
port on the PI.
Here is a photo of my original set-up for experimenting with the Raspberry Pi computer. I had burned the Raspbian "wheezy" image to an 8GB SD card and
dived into experimenting with what the Pi could do. The setup consists of the Pi itself, in an acrylic enclosure, a powered
USB hub, an HDMI to VGA converter, a 1TB USB hard drive I occasionally attach to it, a Wi-Fi dongle, and a lot of cables. There are two separate
power supplies needed. One for the Pi and one for the USB Hub. There is a 3 ft USB cable connected the Pi to the Hub. The cable from my desktop
KVM switch connects to both the VGA port on the HDMI to VGA converter, and to a port on the USB hub. The Wi-Fi dongle plugged into the other USB
port on the PI.
It is a workable system, but it isn't at all neat. In fact, the whole mess has nearly slid off the table and onto the floor a
couple of times. I needed to make it neater. That was difficult to do, short of putting it all in a big box.
There had to be a better way. So I decided to build the Ras-Pi all in one computer.
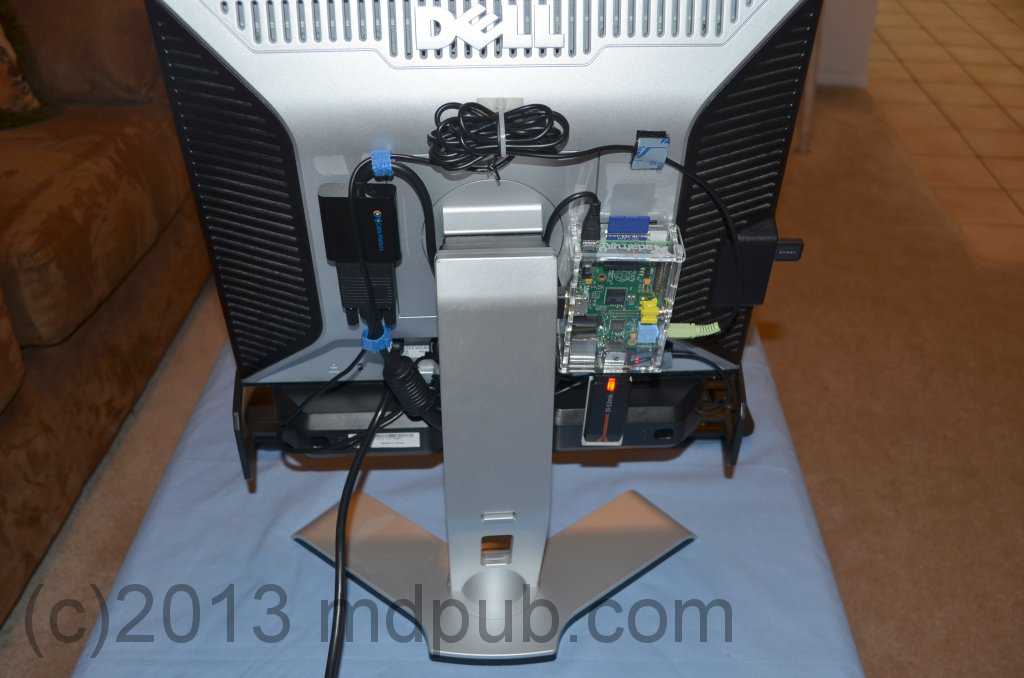
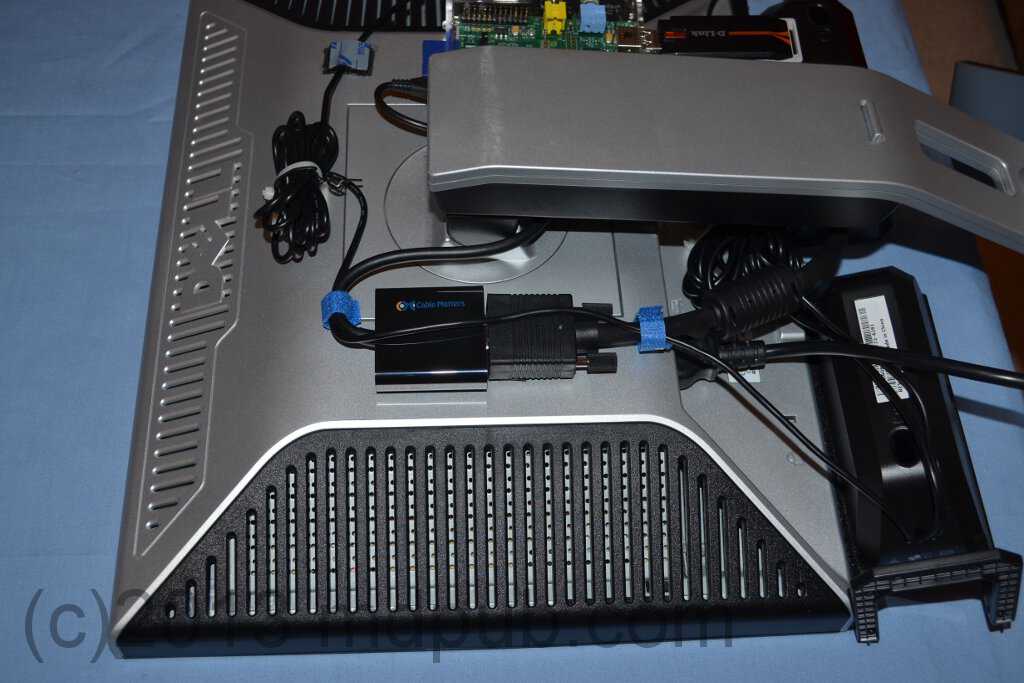
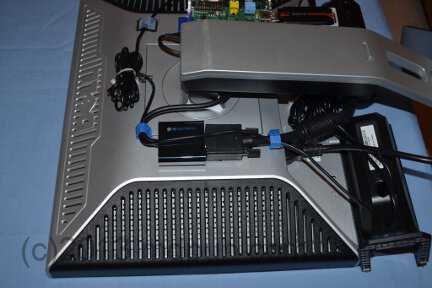
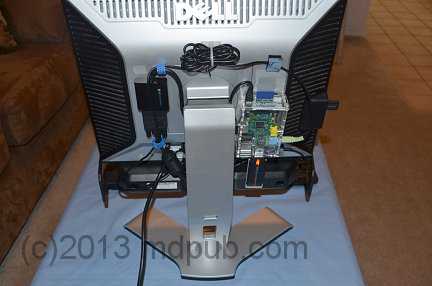 Here is a back view of the completed computer. The thing that really makes this project possible is the built-in, powered, USB hub in the monitor. It greatly
simplifies and neatens up the project,
and eliminates two power cords. The monitor has four USB ports, which is enough to connect everything needed to get a basic system up and running, and still
have one port left over for attaching accessories. Both bottom ports are used in this build, and one side port, leaving one side port for plugging in
accessories. The only way this monitor could have been better is of it had an HDMI input and built-in speakers. I already had this monitor though, and sometimes the
best part for a project is always the one that costs nothing.
Here is a back view of the completed computer. The thing that really makes this project possible is the built-in, powered, USB hub in the monitor. It greatly
simplifies and neatens up the project,
and eliminates two power cords. The monitor has four USB ports, which is enough to connect everything needed to get a basic system up and running, and still
have one port left over for attaching accessories. Both bottom ports are used in this build, and one side port, leaving one side port for plugging in
accessories. The only way this monitor could have been better is of it had an HDMI input and built-in speakers. I already had this monitor though, and sometimes the
best part for a project is always the one that costs nothing.
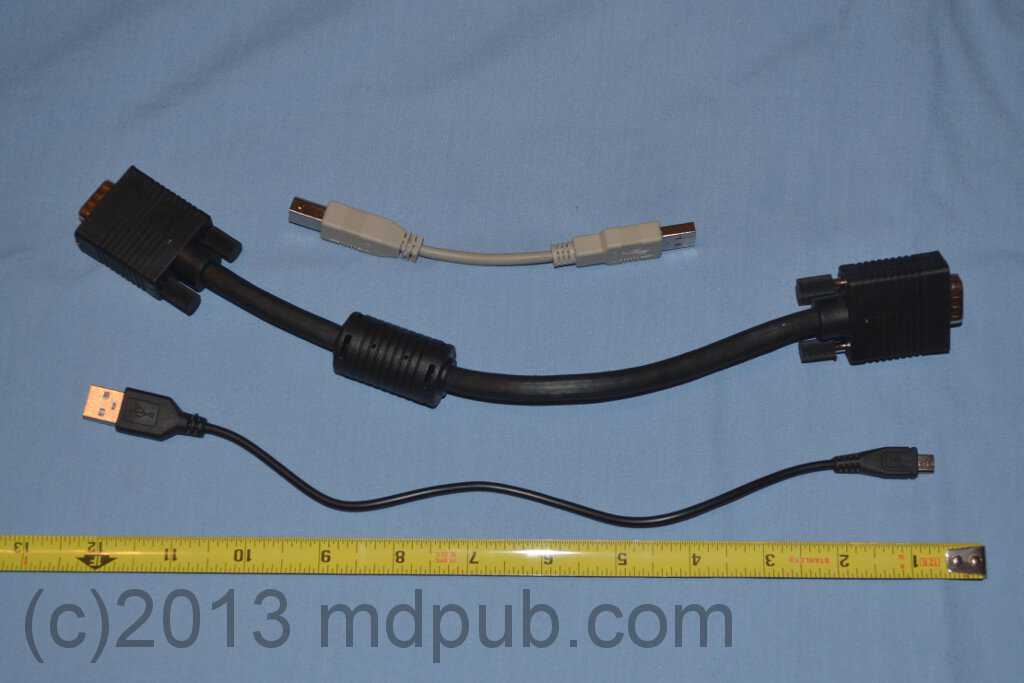
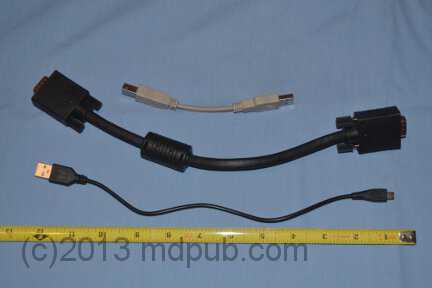 I did have to buy some things. Here is a photo of the special short cables I bought to make the build a little neater. I wanted to minimize the number of long
cables that would have to be coiled up and stuck to the back of the monitor. At the top is a short USB A to USB B cable. Below it is the short VGA cable. At the
bottom is the short USB A to USB Micro cable. I bought these cables on eBay. They were fairly inexpensive. I have also seen them for sale on Amazon.
I did have to buy some things. Here is a photo of the special short cables I bought to make the build a little neater. I wanted to minimize the number of long
cables that would have to be coiled up and stuck to the back of the monitor. At the top is a short USB A to USB B cable. Below it is the short VGA cable. At the
bottom is the short USB A to USB Micro cable. I bought these cables on eBay. They were fairly inexpensive. I have also seen them for sale on Amazon.
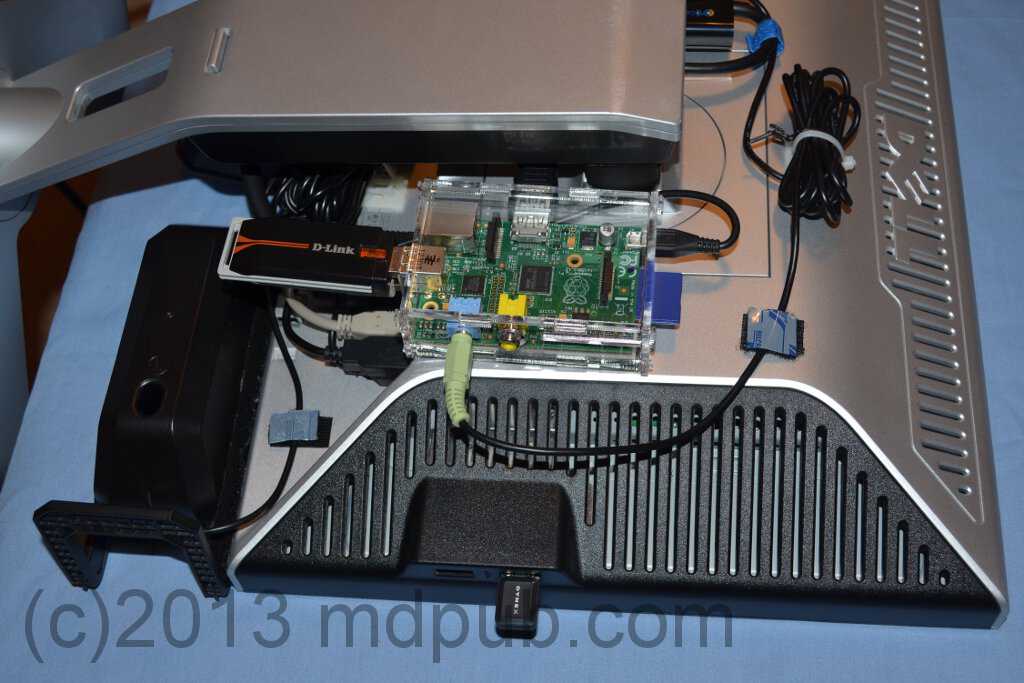
 The enclosure containing the Raspberry Pi was attached to the back of the monitor with industrial strength Velcro.
The short USB A to USB B connector goes from the Raspberry Pi to the monitor's USB hub. The Micro USB cable is plugged into the Raspberry Pi's power
connector and then into one of the two bottom ports on the monitor's USB hub. The Wi-Fi dongle plugs into the other USB port on the Raspberry Pi.
The audio connector from the speakers plugs into the audio port on the Raspberry Pi. Excess speaker cable is coiled up and attached to the back of
the monitor with cable ties.
The enclosure containing the Raspberry Pi was attached to the back of the monitor with industrial strength Velcro.
The short USB A to USB B connector goes from the Raspberry Pi to the monitor's USB hub. The Micro USB cable is plugged into the Raspberry Pi's power
connector and then into one of the two bottom ports on the monitor's USB hub. The Wi-Fi dongle plugs into the other USB port on the Raspberry Pi.
The audio connector from the speakers plugs into the audio port on the Raspberry Pi. Excess speaker cable is coiled up and attached to the back of
the monitor with cable ties.
 The HDMI to VGA converter box was then plugged into the Pi and secured in place on the back of the monitor with more Velcro. The short VGA cable was connected
between the converter box and the monitor's VGA input.
The HDMI to VGA converter box was then plugged into the Pi and secured in place on the back of the monitor with more Velcro. The short VGA cable was connected
between the converter box and the monitor's VGA input.
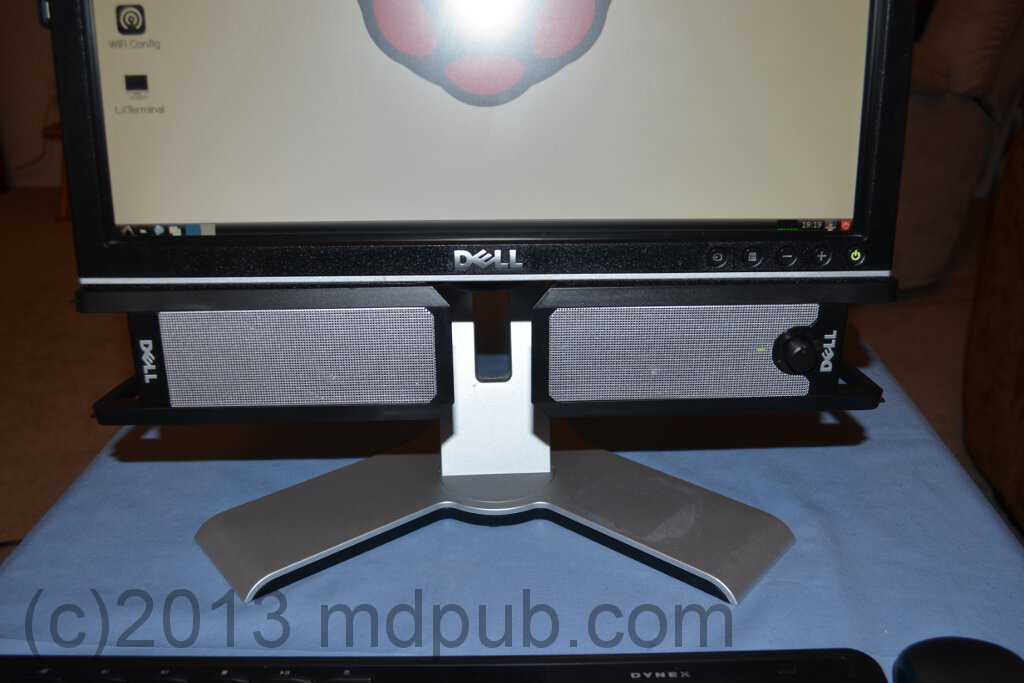
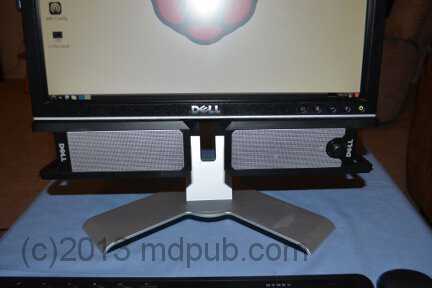 The USB powered speakers were mounted to the bottom of the monitor with more industrial strength Velcro. I wanted to keep them in a fixed position and not
have to deal with their cables spilling across the desk. The power cable from the speakers plugs into the remaining USB port on the bottom of the monitor.
The audio cable plugs into the audio out port on the Raspberry Pi. The excess speaker cable is coiled up and attached to the back of the monitor with
adhesive-backed cable ties. This is the one area where I had to deal with excess cable. If I were more ambitious, I would break out my soldering iron and
shorten the cables.
The USB powered speakers were mounted to the bottom of the monitor with more industrial strength Velcro. I wanted to keep them in a fixed position and not
have to deal with their cables spilling across the desk. The power cable from the speakers plugs into the remaining USB port on the bottom of the monitor.
The audio cable plugs into the audio out port on the Raspberry Pi. The excess speaker cable is coiled up and attached to the back of the monitor with
adhesive-backed cable ties. This is the one area where I had to deal with excess cable. If I were more ambitious, I would break out my soldering iron and
shorten the cables.
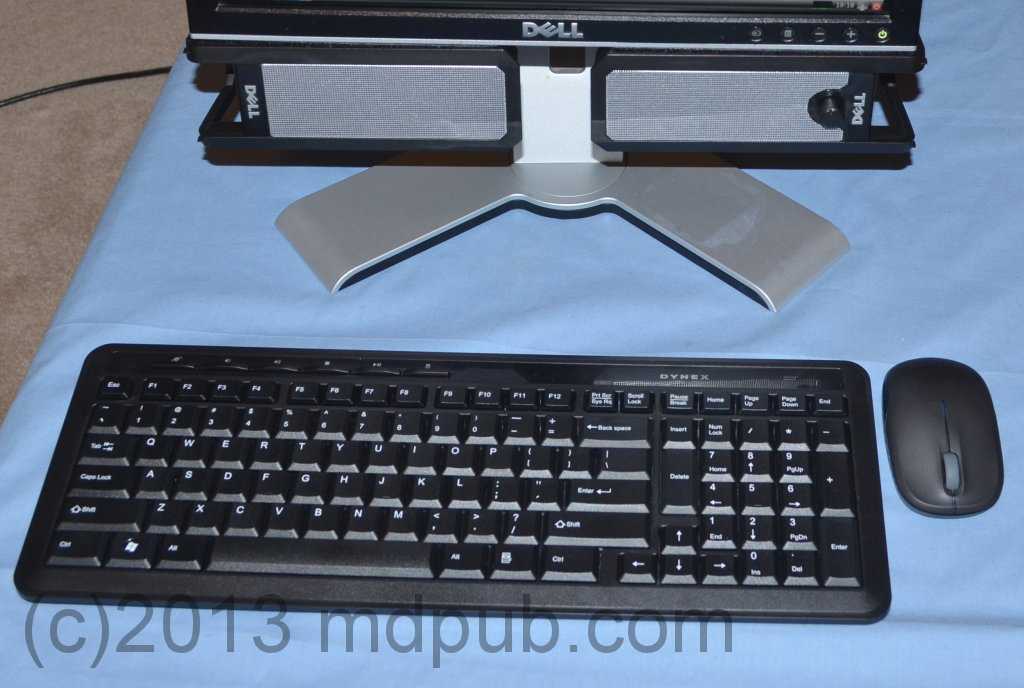
 I bought a cheap wireless keyboard and mouse combo for use in this project to eliminate two more wires. It only cost about $25 at a local big-box electronics
store.
I bought a cheap wireless keyboard and mouse combo for use in this project to eliminate two more wires. It only cost about $25 at a local big-box electronics
store.
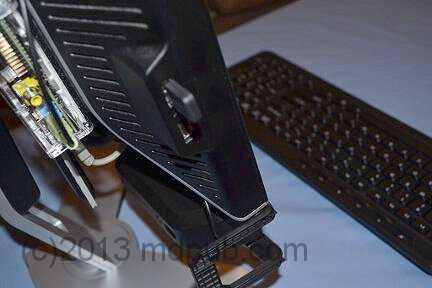 The Bluetooth dongle for the keyboard and mouse plugs into one of the side USB ports on the monitor. The remaining side USB port is available for plugging
in USB accessories like thumb drives.
The Bluetooth dongle for the keyboard and mouse plugs into one of the side USB ports on the monitor. The remaining side USB port is available for plugging
in USB accessories like thumb drives.
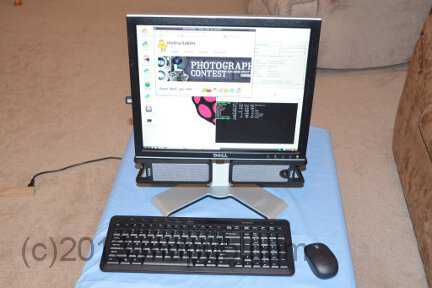 So, here it is, up and running. This is a lot neater than the mess I had in the beginning. Only one power cord, and no cable clutter. The power button on
the monitor turns the whole system on and off. This will make working and experimenting with the Raspberry Pi
a lot easier. The system is also quite portable. I can take it from my home office to my living room to my workshop, or wherever I want to try out something
new.
So, here it is, up and running. This is a lot neater than the mess I had in the beginning. Only one power cord, and no cable clutter. The power button on
the monitor turns the whole system on and off. This will make working and experimenting with the Raspberry Pi
a lot easier. The system is also quite portable. I can take it from my home office to my living room to my workshop, or wherever I want to try out something
new.
Stay tuned for further updates on this project, and new Raspberry Pi based projects in the future.