
My girlfriend gave me a web cam for my birthday. Naturally, the first thing I did with it was take it apart and modify it into something else. Fortunately she is quite understanding and used to that sort of thing from me.
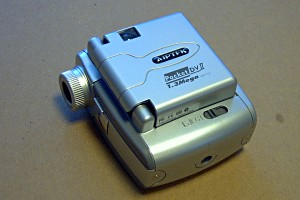
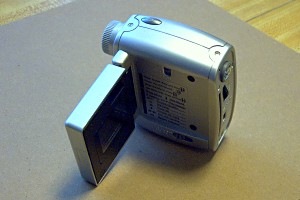
The camera is actually much more than just your garden variety web cam. First off it is a 1.3 megapixel camera, which is much higher resolution than your average web cam. The camera is also capable of operating as a stand-alone still or video camera with its built in LCD screen, as well as being tied to a computer as a dedicated web cam. The camera has 16 meg of built-in SDRAM and can take memory cards to increase it's memory to 512 meg. The camera will run off of power from the USB port when connected to a computer, which means the batteries can be removed making the camera very light. These features made it seem like a natural for astrophotography.
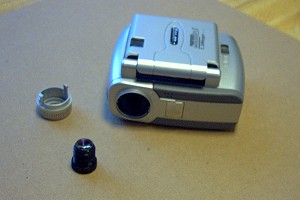
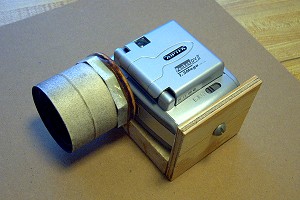
To use this (or any web cam) for astrophotography, it is necessary to remove the built-in lens. You don't need it and it is just in the way. For astrophotography, the telescope is the lens. The third photo shows the lens removed. On my camera, the lens could be unscrewed from the body of the camera after simply removing a plastic retaining ring and focusing knob (Your model will probably be different).
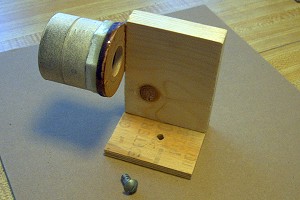
Now I needed a way to attach the camera to the telescope. Fortunately, this model camera has a standard 1/4-20 screw socket in its base for mounting on a tripod. This gave me a way to mount the camera in an adaptor fixture that I could mount on a telescope. The fixture is just a couple of pieces of wood that I could bolt the camera to. To mount it on a telescope, I attached a 1.5 inch ID PVC plumbing fitting that had an outside diameter just a hair shy of 2 inches. Adding a few wraps of masking tape around it makes it a good fit in a 2 inch eyepiece holder. After I epoxied the PVC fitting onto the wood fixture, and screwed the camera into the fixture with a short 1/4-20 screw, I was ready to test.
I had the camera ready to go for the opposition of Mars. Unfortunately, the observatory was mobbed with people for weeks around closest approach and I had no opportunity monopolize the telescope and test the camera. Then there was a stretch of bad weather. Finally, almost 2 weeks after closest approach, I had the telescope to myself and a clear sky.
The Mars photo below is from the very first test run of the camera. This photo was made with the camera attached to the 16 inch Schmidt-Cassegrain telescope in the Carol Samuels Observatory. I used a 2X Barlow lens between the camera and the telescope to get an effective focal length of 8000 mm. The photo shows a wealth of detail including, Syrtus Major, the Hellas Basin, Hellespontus, Sabaeus Sinus, Meridini Sinus, and of course the very prominent South Polar Cap. Not bad for a hacked web cam.
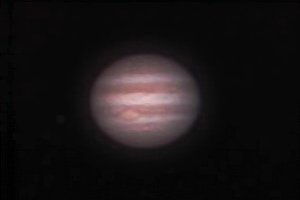
The next photo is of Jupiter as it was on 03/26/05 a week before opposition. The seeing was poor that night and the images I got weren't too good. I took half dozen thirty second videos at 17 frames per second. Then I let RegiStax grind away on each video stacking the individual frames in each video and making a composite image.This is the best of the lot. I want to try again soon while Jupiter is near opposition. All I need is better weather and the free time.
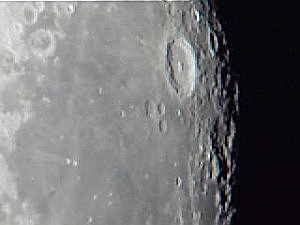
The next to last photo was taken on the same night as the above Jupiter photo. It was not an ideal night for shooting the moon as it was low in the sky, nearly full and the seeing was bad. However I couldn't resist since it was only a few degrees away from Jupiter. The photo is centered on Mare Fecunditatis with the interesting double crater Messier at the lower left and the large crater on the upper right is Langrenus.
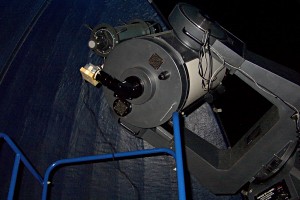
The last photo shows the camera attached to the 16 inch Schmidt-Cassegrain telescope at the Carol Samuels Observatory. My laptop computer is sitting on top of the blue ladder just out of view in the bottom of the photo. As you can see by the blackness out the door slit, it was night and I was taking pictures.
More photos will be posted here in the near future.