How to build a foundry to melt aluminum, brass and bronze
It was easy. You can do it too
This is not my first foundry, I've built several, but it is by far my best one yet. So I thought I'd share the design with anyone else interested in building a foundry. I have built several others
that have eventually failed. Sometimes after a depressingly small number of firings. The main problem I had was that I was trying to make my own refractory material. I tried several
different formulations. They all eventually cracked and/or melted and the foundries became unusable. Eventually I decided to do it right and build a foundry that would last
more than a few firings to very high temperatures. So I gave up on my home-grown refractory solutions and bought a roll of Inswool fiber insulation to line it. The resulting
foundry has survived many firings to high temperature for melting brass, and many more to aluminum melting temperature and still looks pretty darn good.
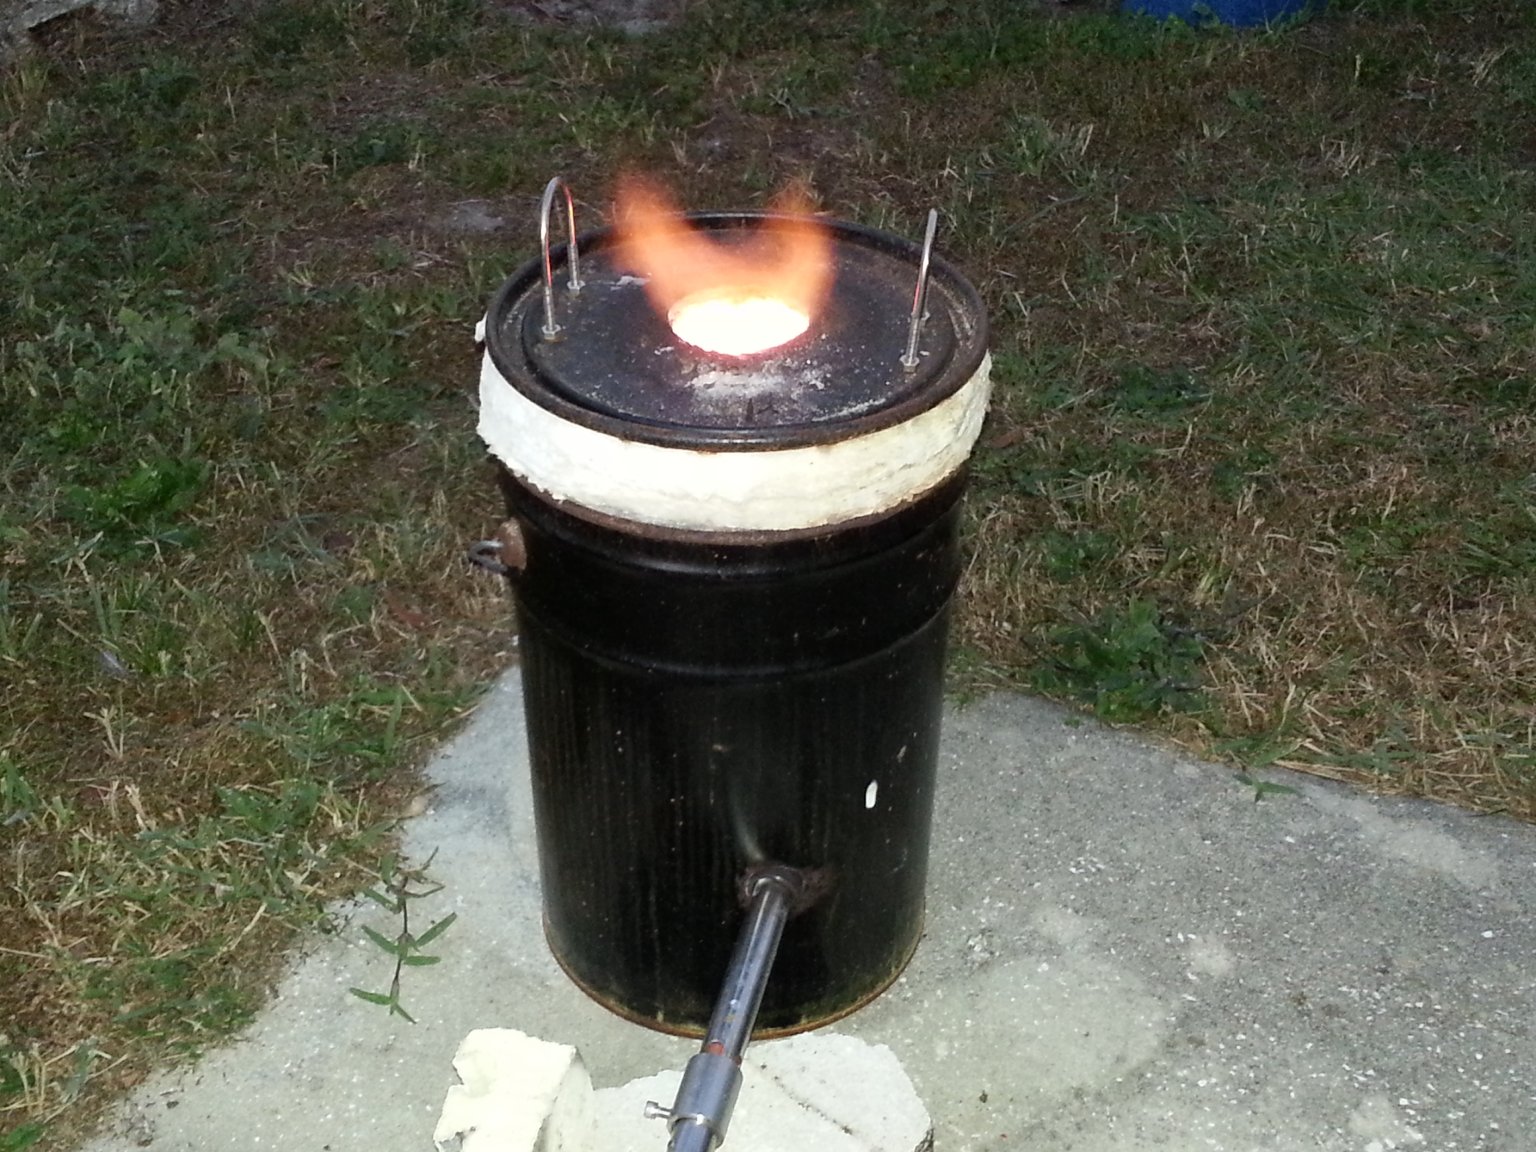
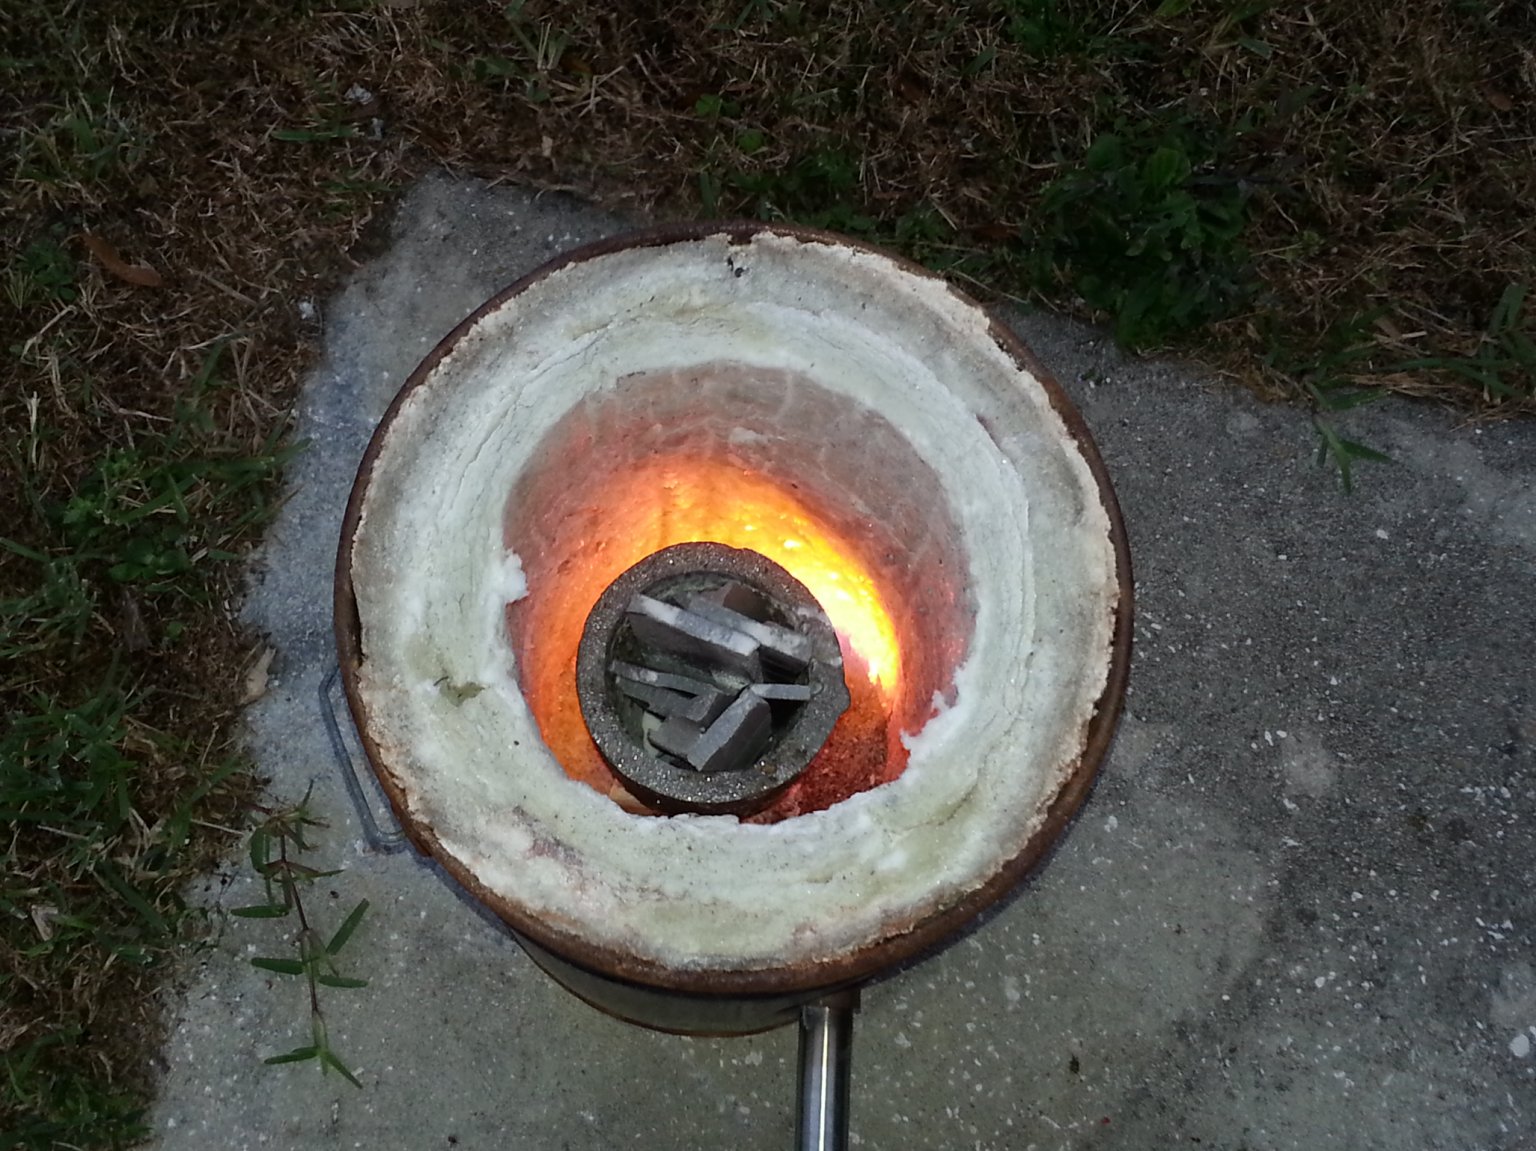
So here is a photo of the foundry in operation melting down some aluminum. It really works great. It melts aluminum quickly, and doesn't take much longer to melt down a load of brass or bronze.
It was super easy to build and almost anyone ought to be able to duplicate it.
Click on any photo for a larger view.
Here is a video of the first firing of the foundry when it was brand new. It melted down a load of scrap aluminum very quickly. The outside of the foundry stayed relatively cool, even though
the inside was glowing bright orange. The Inswool fiber insulation lining the foundry is amazing stuff.
Sitting next to the new foundry is my older foundry that is no longer in use and will eventually be rebuilt in the same manner as this new foundry.
Below are the steps involved in building this new foundry.
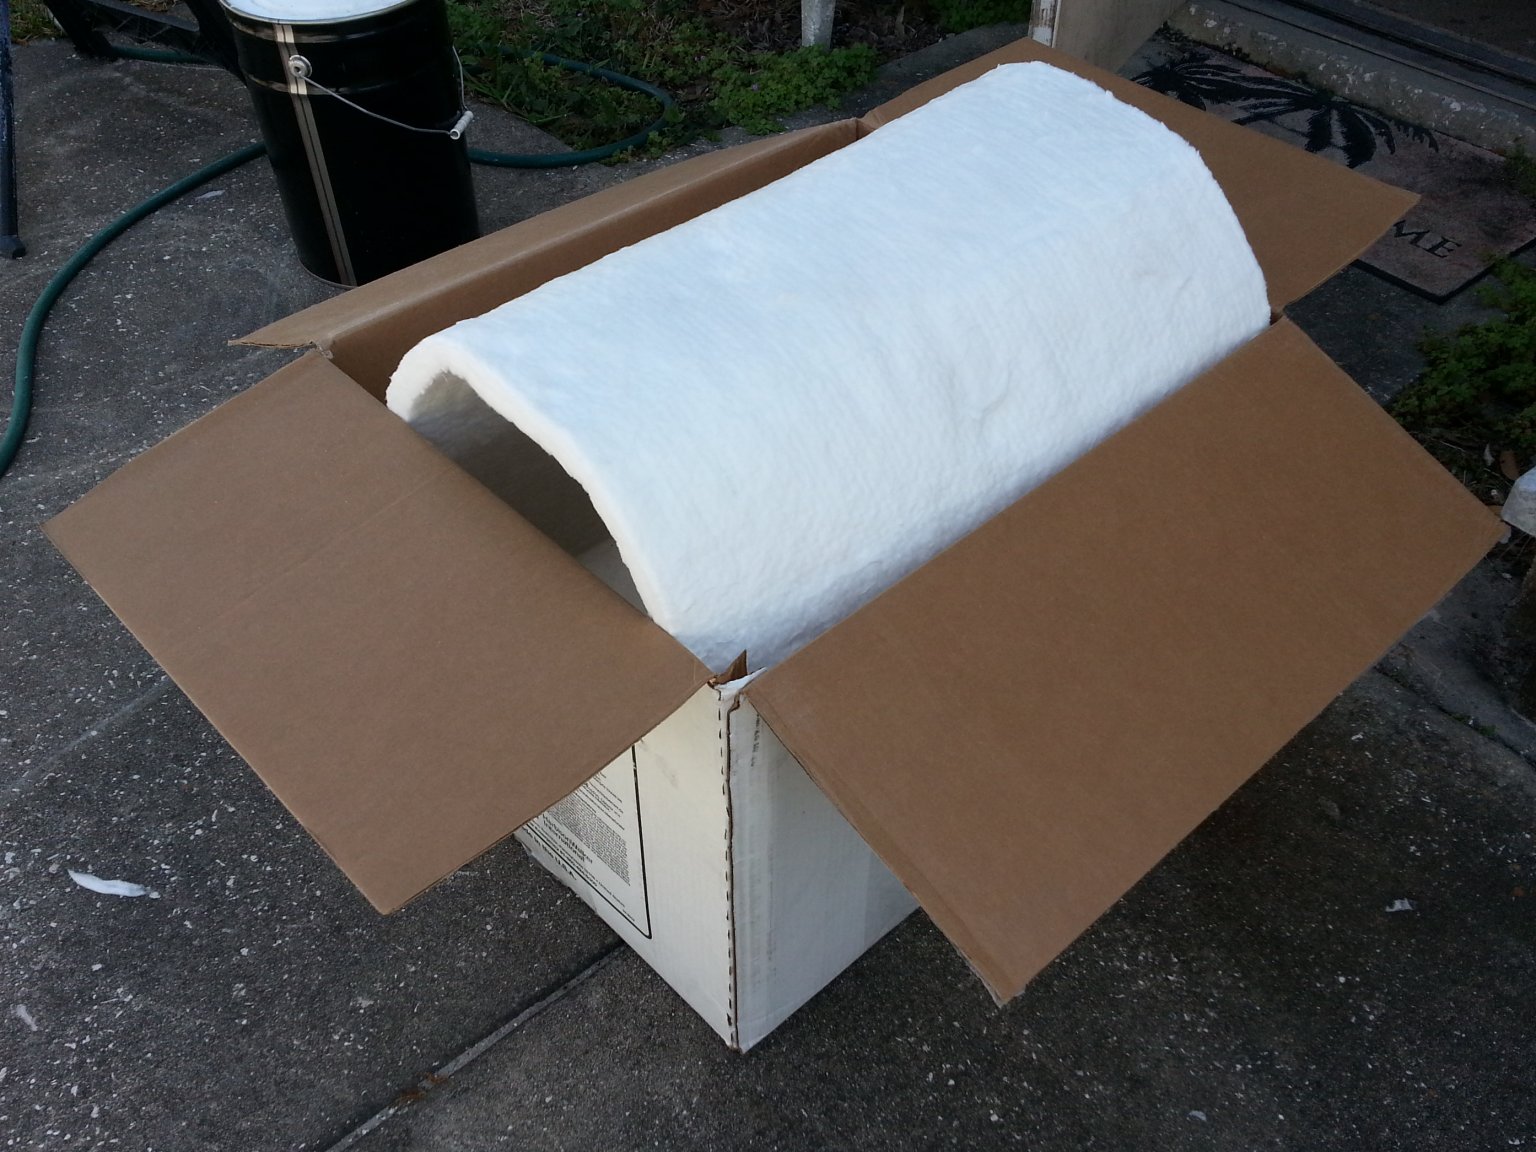
If I am perfectly honest about it, I should have just done this this way in the beginning. Here is a photo of the box of Inswool fiber insulation I bought to line this foundry. I was trying to
save money my earlier foundries by experimenting with various home-made insulation solutions. They all eventually failed. The amount of time and effort I put into those failed foundries make the
Inswool a bargain, even if it is a little pricey. I bought a roll of 1 inch thick refractory fiber blanket that is rated for 2400 degrees F. That's more than hot enough to melt
aluminum, brass, bronze, copper, and a variety of other metals. It won't quite handle iron or steel, but that's ok. I wasn't planning on using this foundry for melting those
metals.
Inswool is an alumina-silicon woven fiber blanket that comes in various thicknesses. One inch thickness isn't ideal for this project, but I have other uses for it with my
glass working endeavors. Using two layers to double up the thickness to two inches makes for a great layer of insulation in the foundry.
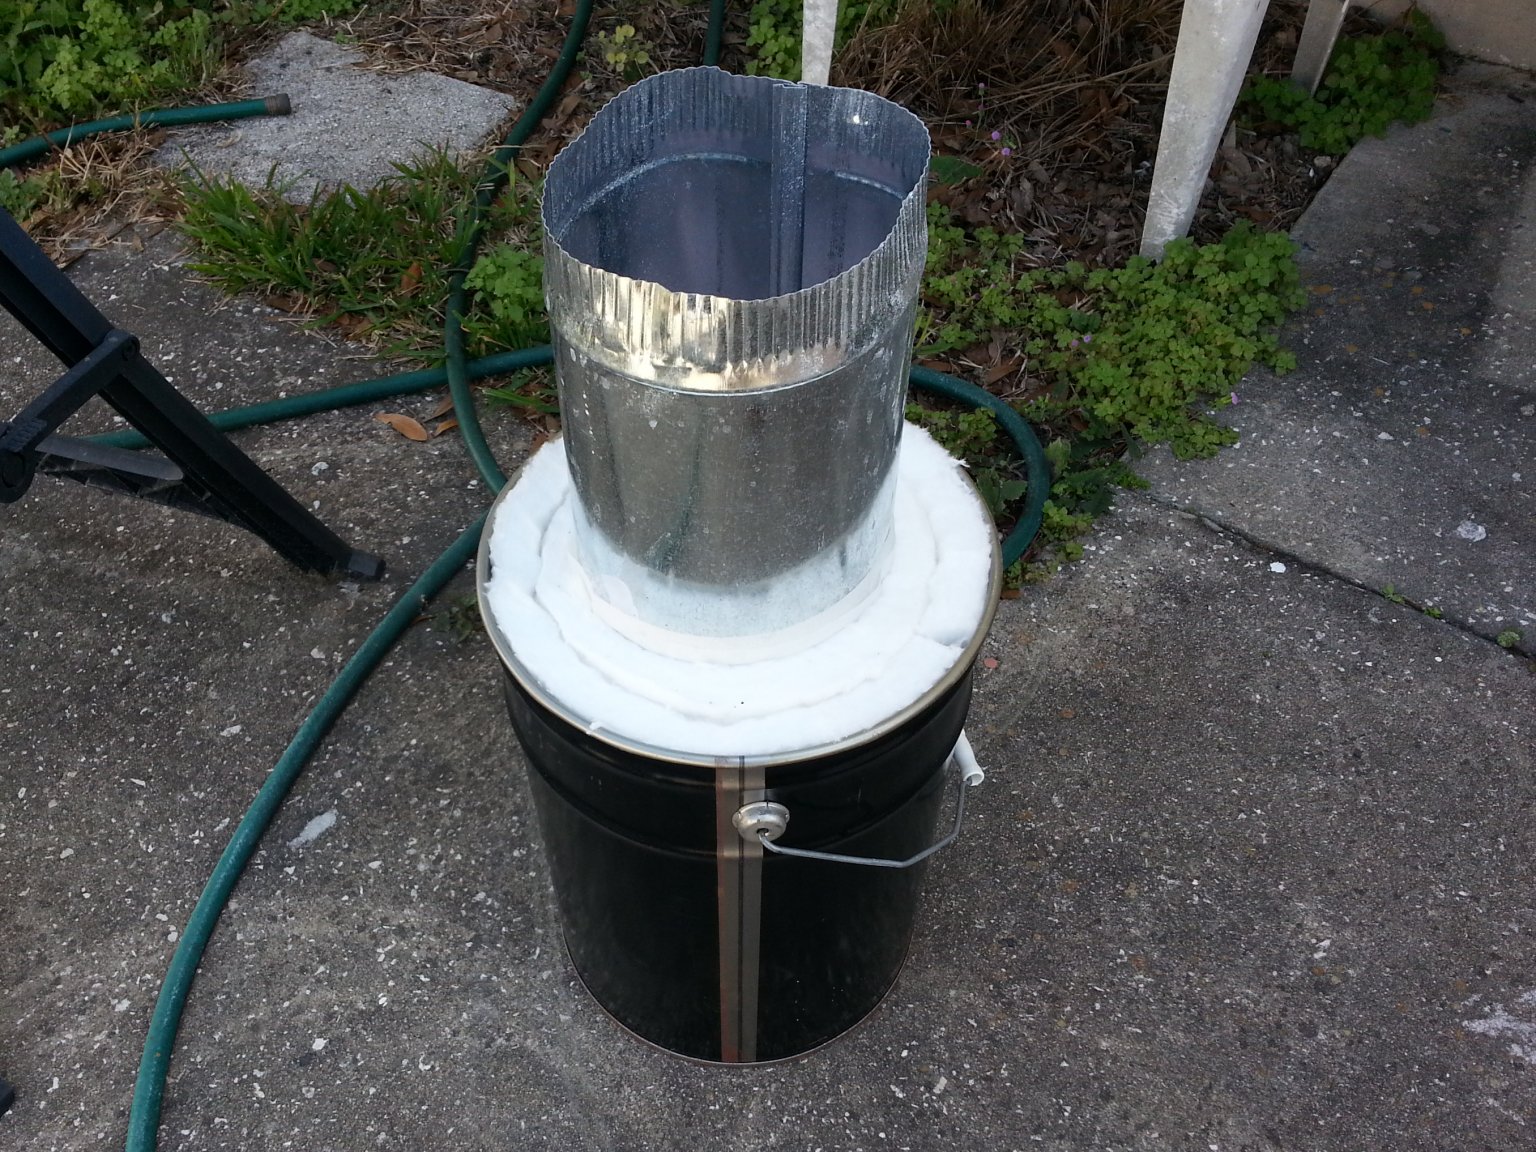
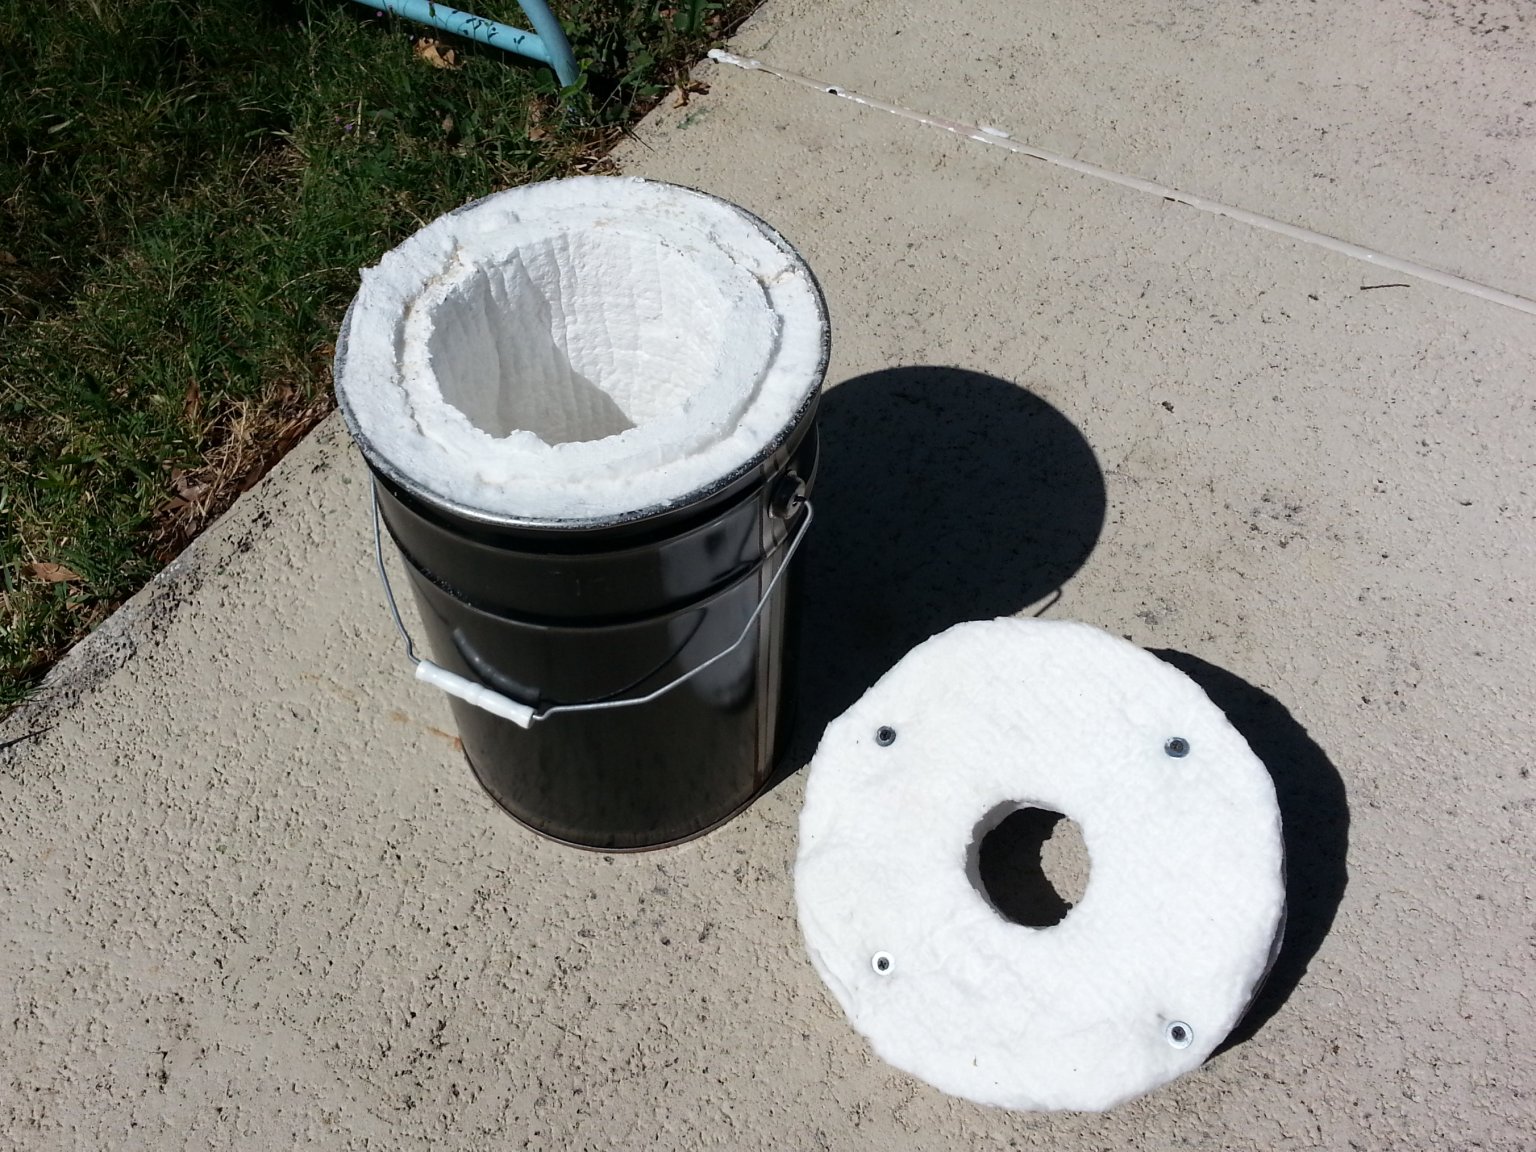
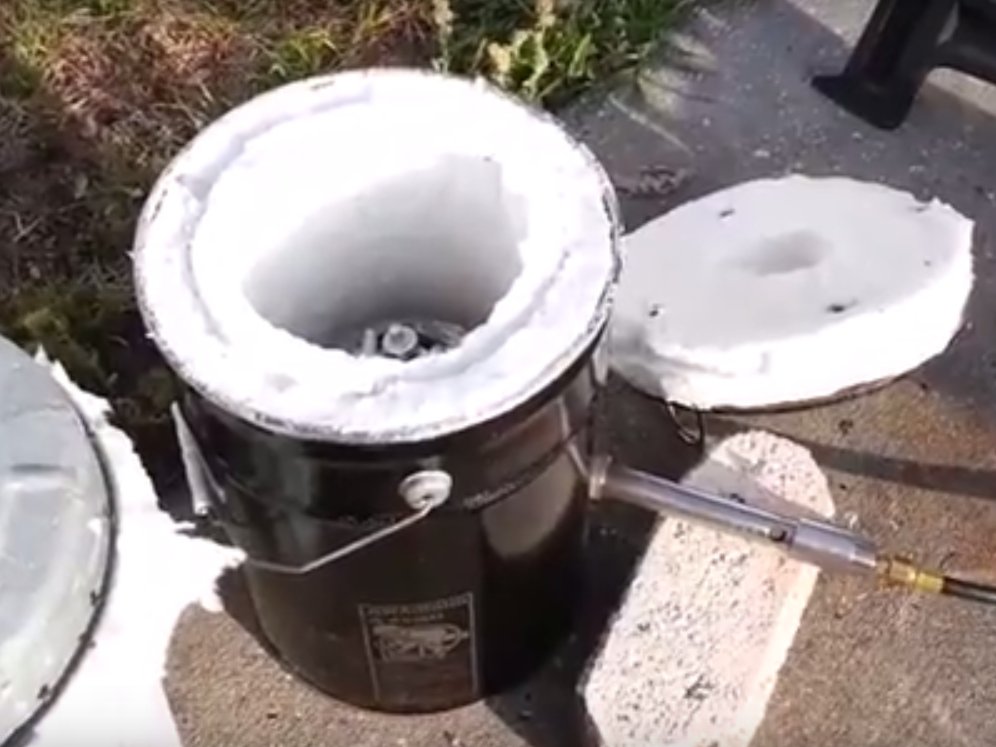
I started with a 5 gallon steel pail. I then wrapped two layers of the Inswool around a mandrel made from a 7 inch diameter piece of HVAC duct and stuffed the whole thing
down into the pail. This made for a snug fit inside the pail and the insulation kept its shape when the mandrel was pulled out (see below).
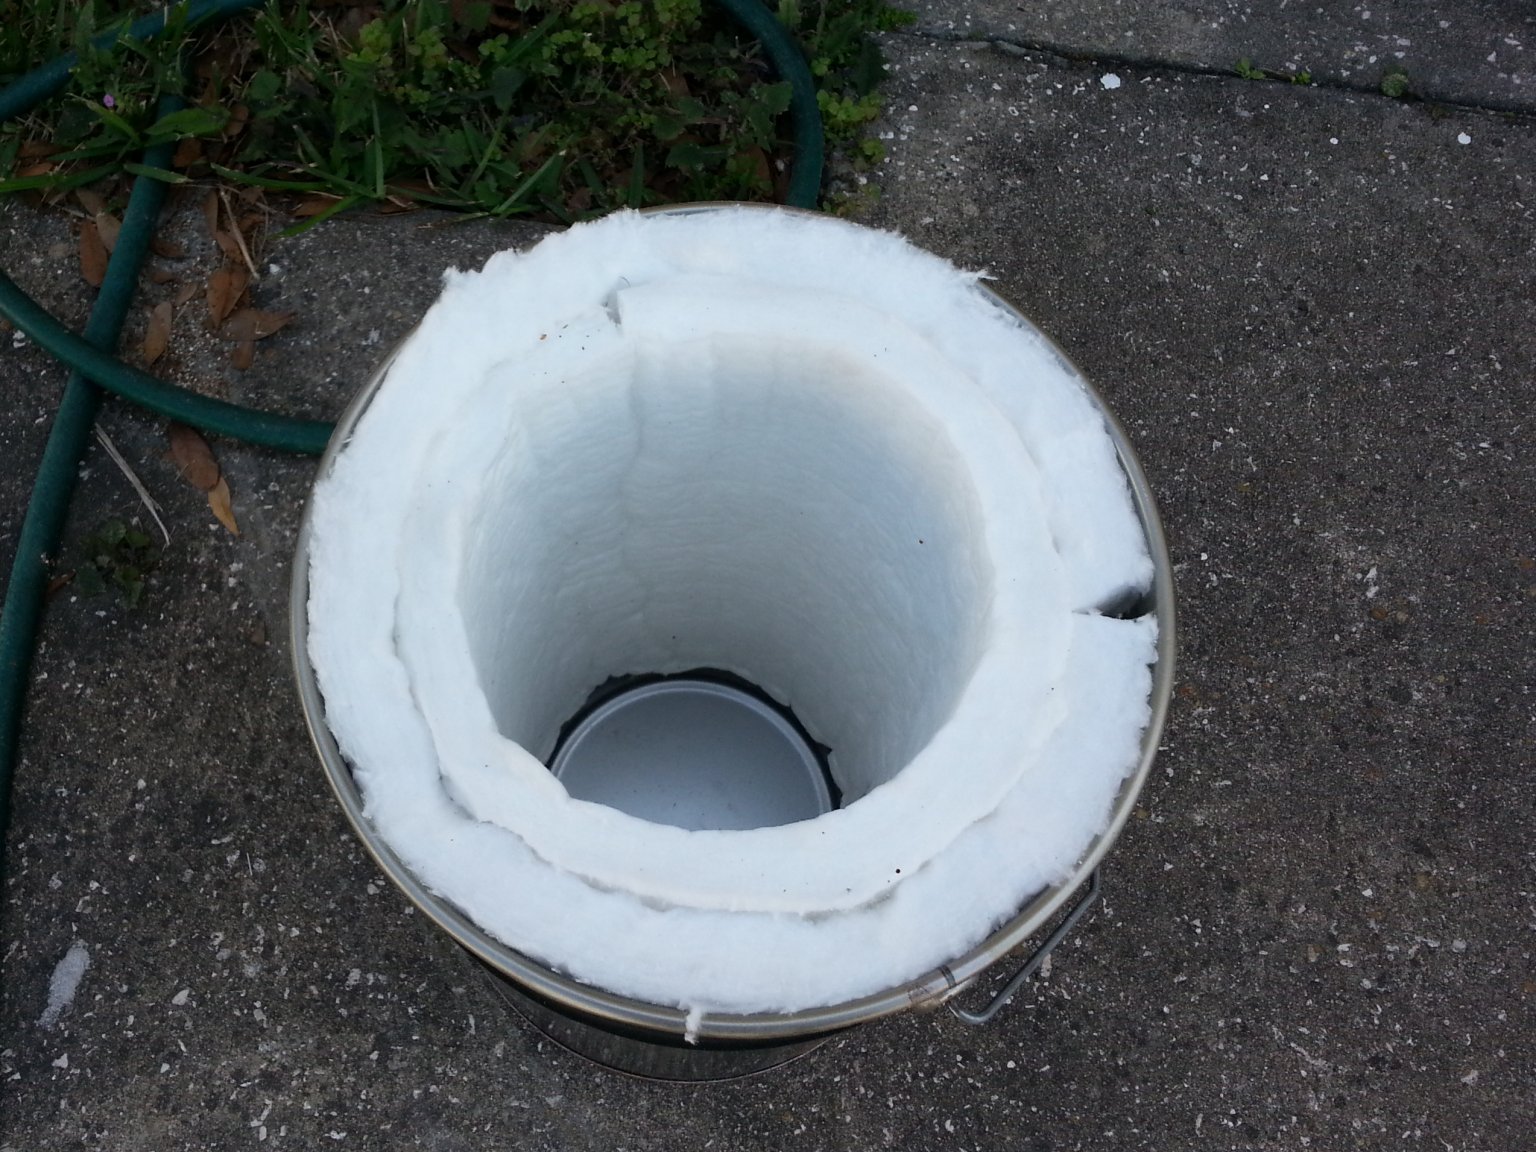
Here is a view of the newly insulated foundry after the mandrel was removed. The two wedge shaped gaps where the ends of the fiber blankets don't quite close were filled by
pouring dry sand into them up to the top.
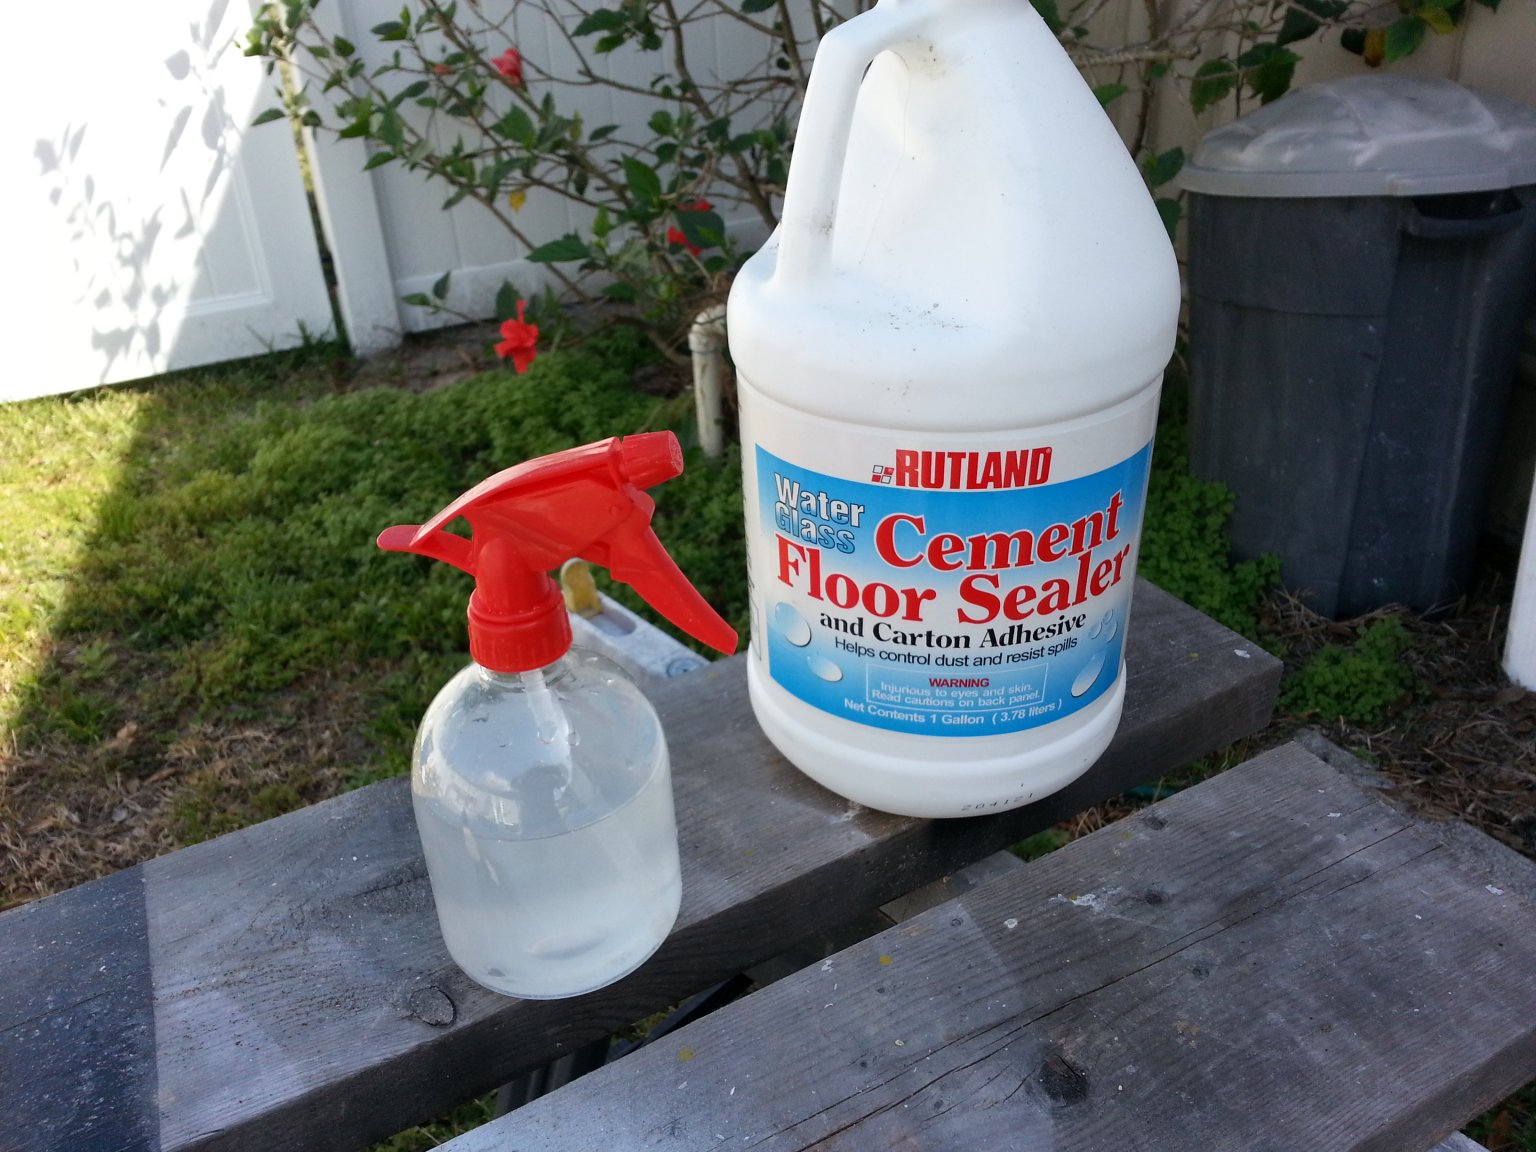
The insulating fiber is soft and easily damaged, so I rigidized it with some sodium silicate solution. I mixed up about a 50/50 mix of sodium silicate concrete sealer with water
and saturated the fiber with it using a spray bottle. I then left the foundry out in the sun to dry for several hours. Two such treatments resulted in the fiber becoming much
more rigid and resistant to abrasion.
To protect the floor of the foundry I dampened some sand with the 50/50 mix of sodium silicate solution and water. I then rammed in a layer of sand roughly three inches thick
at the bottom of the foundry to make a sturdy and heat-resistant floor. Gentle application of a propane torch to the floor of the foundry caused it to firm up rock hard on
the surface in only a few minutes. Full hardening to the bottom could take several days, or will happen the first time the foundry is fired
I cut a four inch diameter hole in the center of the lid of the pail. Then I cut out two donuts of insulating blanket and used long screws and washers to attach them to the underside of the lid to
insulate it.
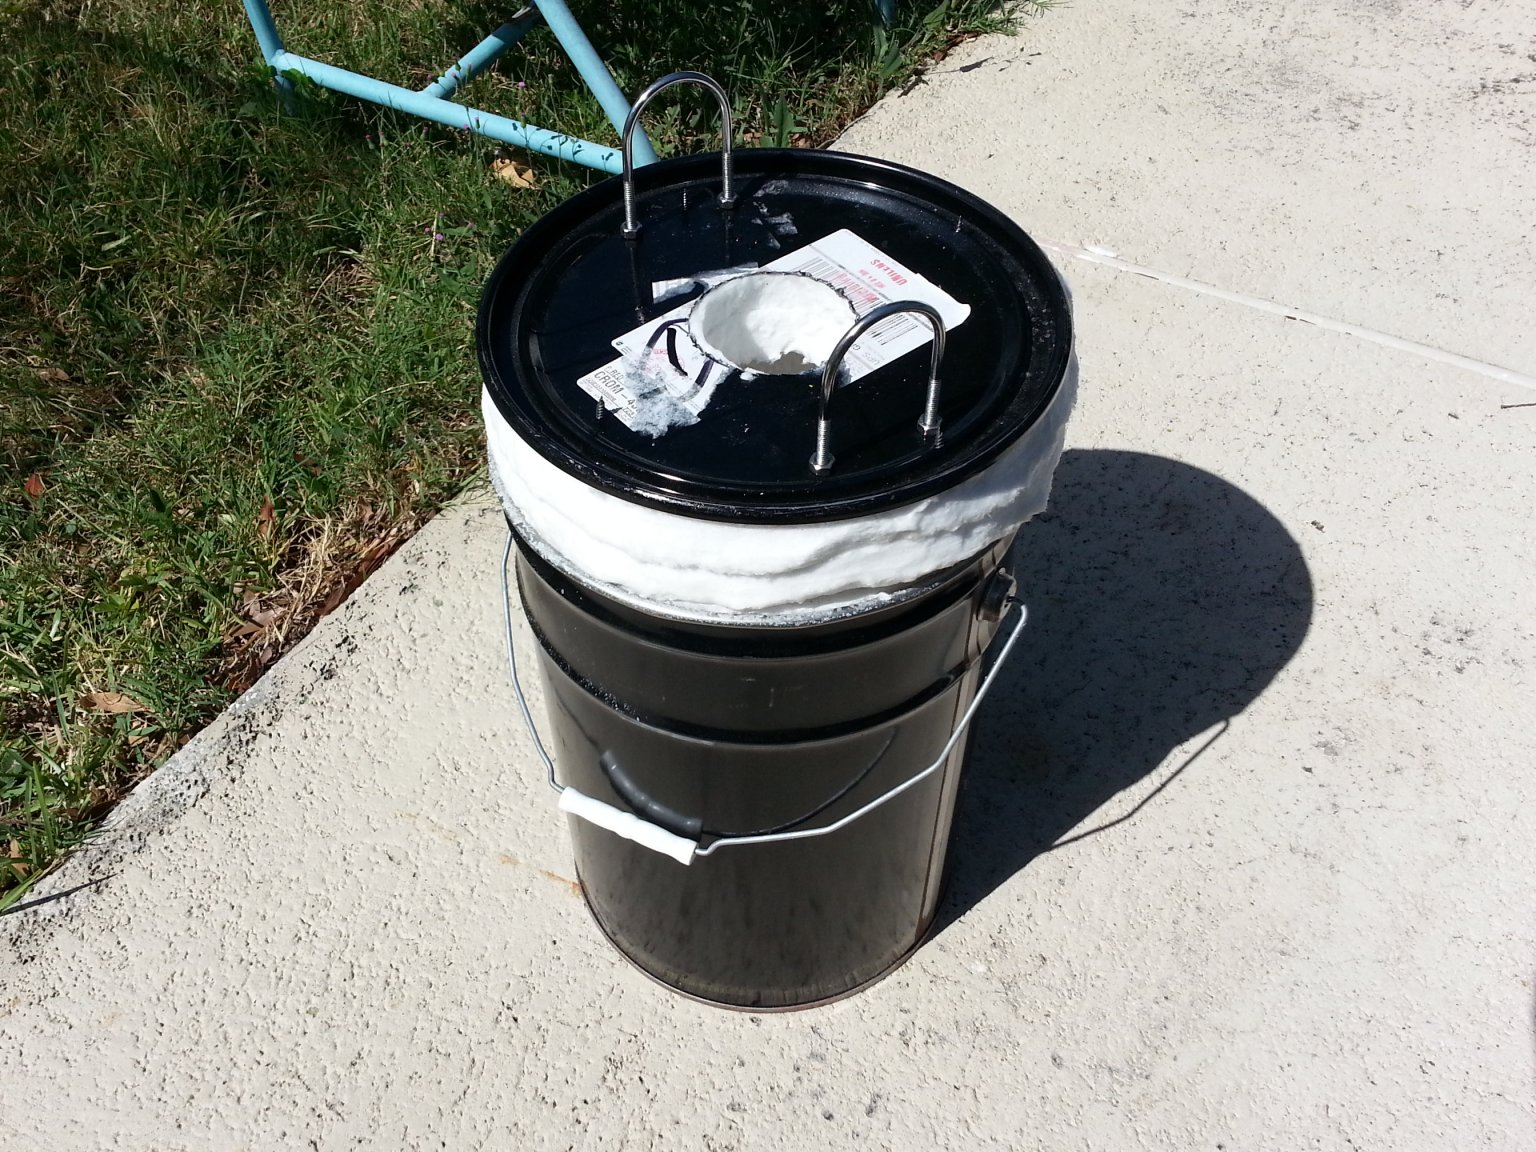
Here is a photo of the finished foundry. I attached a couple of U-bolts to the lid before attaching the insulating blankets to serve as handles. The lid just sits on top of the foundry and gravity
holds it in place. The insulation on the lid has been rigidized in the same way as the foundry itself.
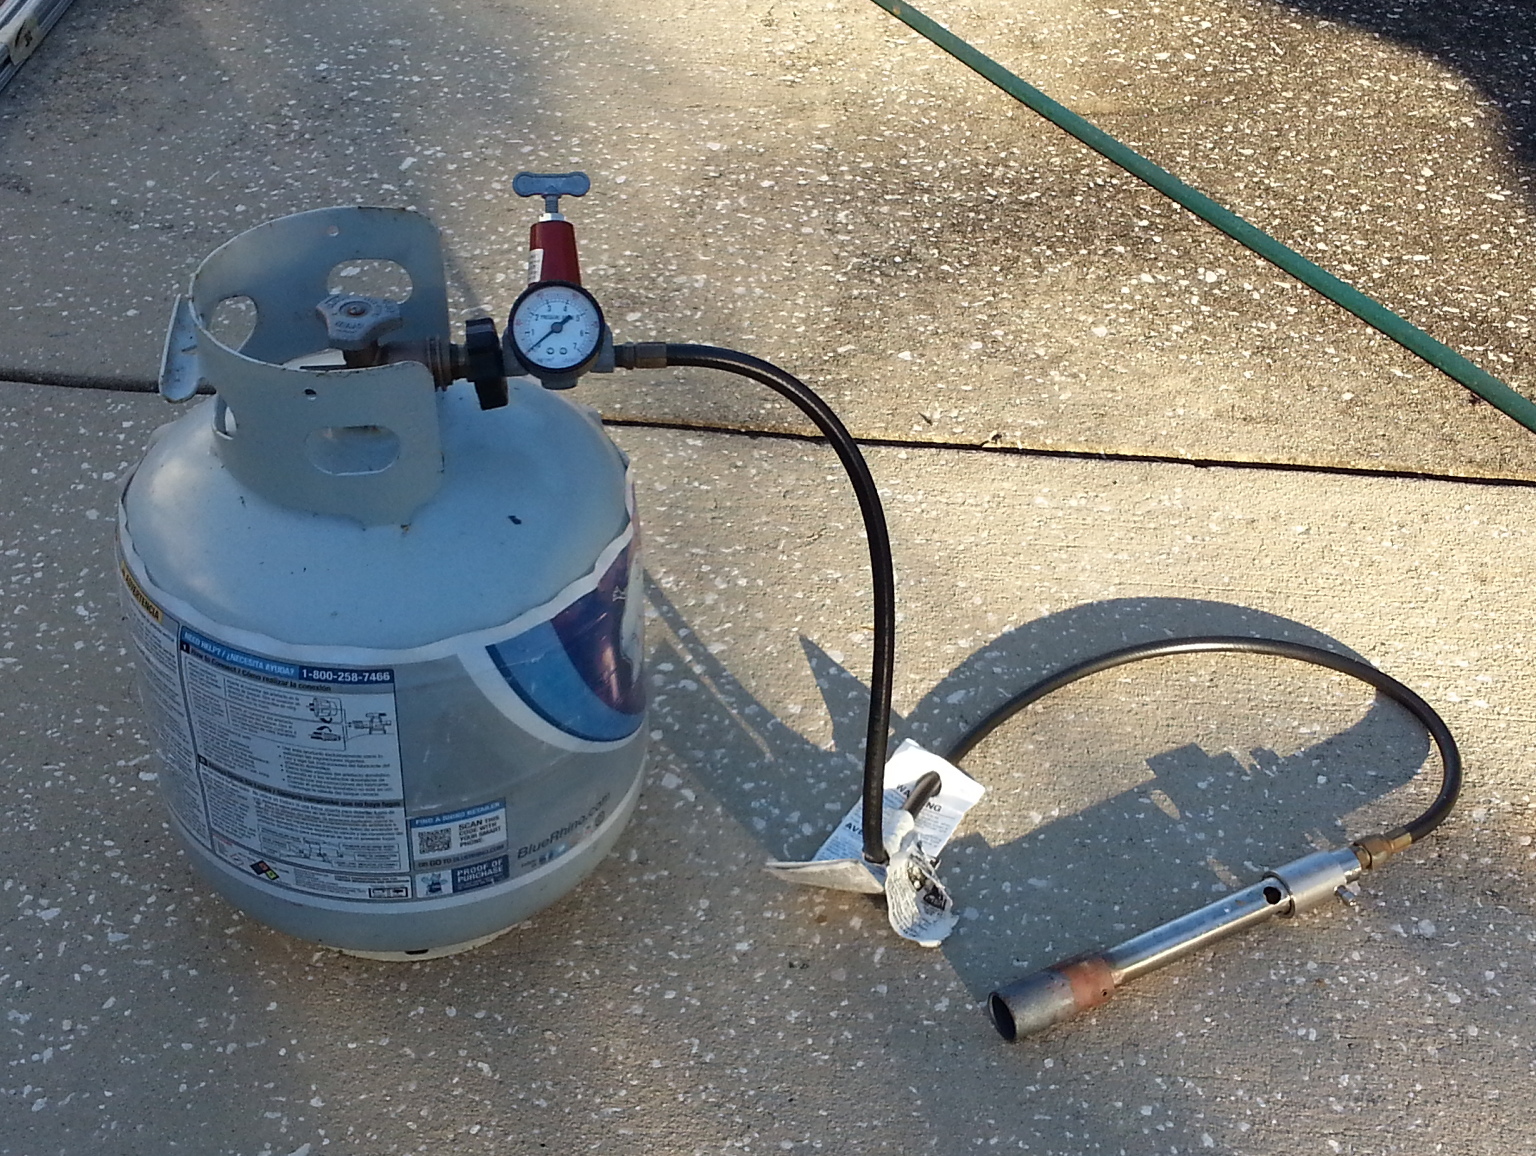
This is the propane burner for the foundry. I bought it from Amazon.com. Several sellers provide similar burners for use in forges and foundries. It came with an adjustable pressure regulator
that goes up to 40 psi, but it only takes a few psi of propane to heat the foundry up. I can get several melts from a 20 lb tank of propane like the one shown. More melts of aluminum, fewer of brass
due to its higher melting point and longer runs needed. I have several tanks so I can swap them out quickly if one runs dry during a firing.
A hole the diameter of the burner was drilled through the side of the foundry and through the rigidized insulation into the central chamber. The hole was located a few inches above the floor level of
the foundry and drilled at a tangent to the wall of the inner chamber so the flames will swirl around the chamber and heat the melting crucible more or less evenly. I use a paver or brick to support
the part of the burner sticking out of the foundry to keep it horizontal.
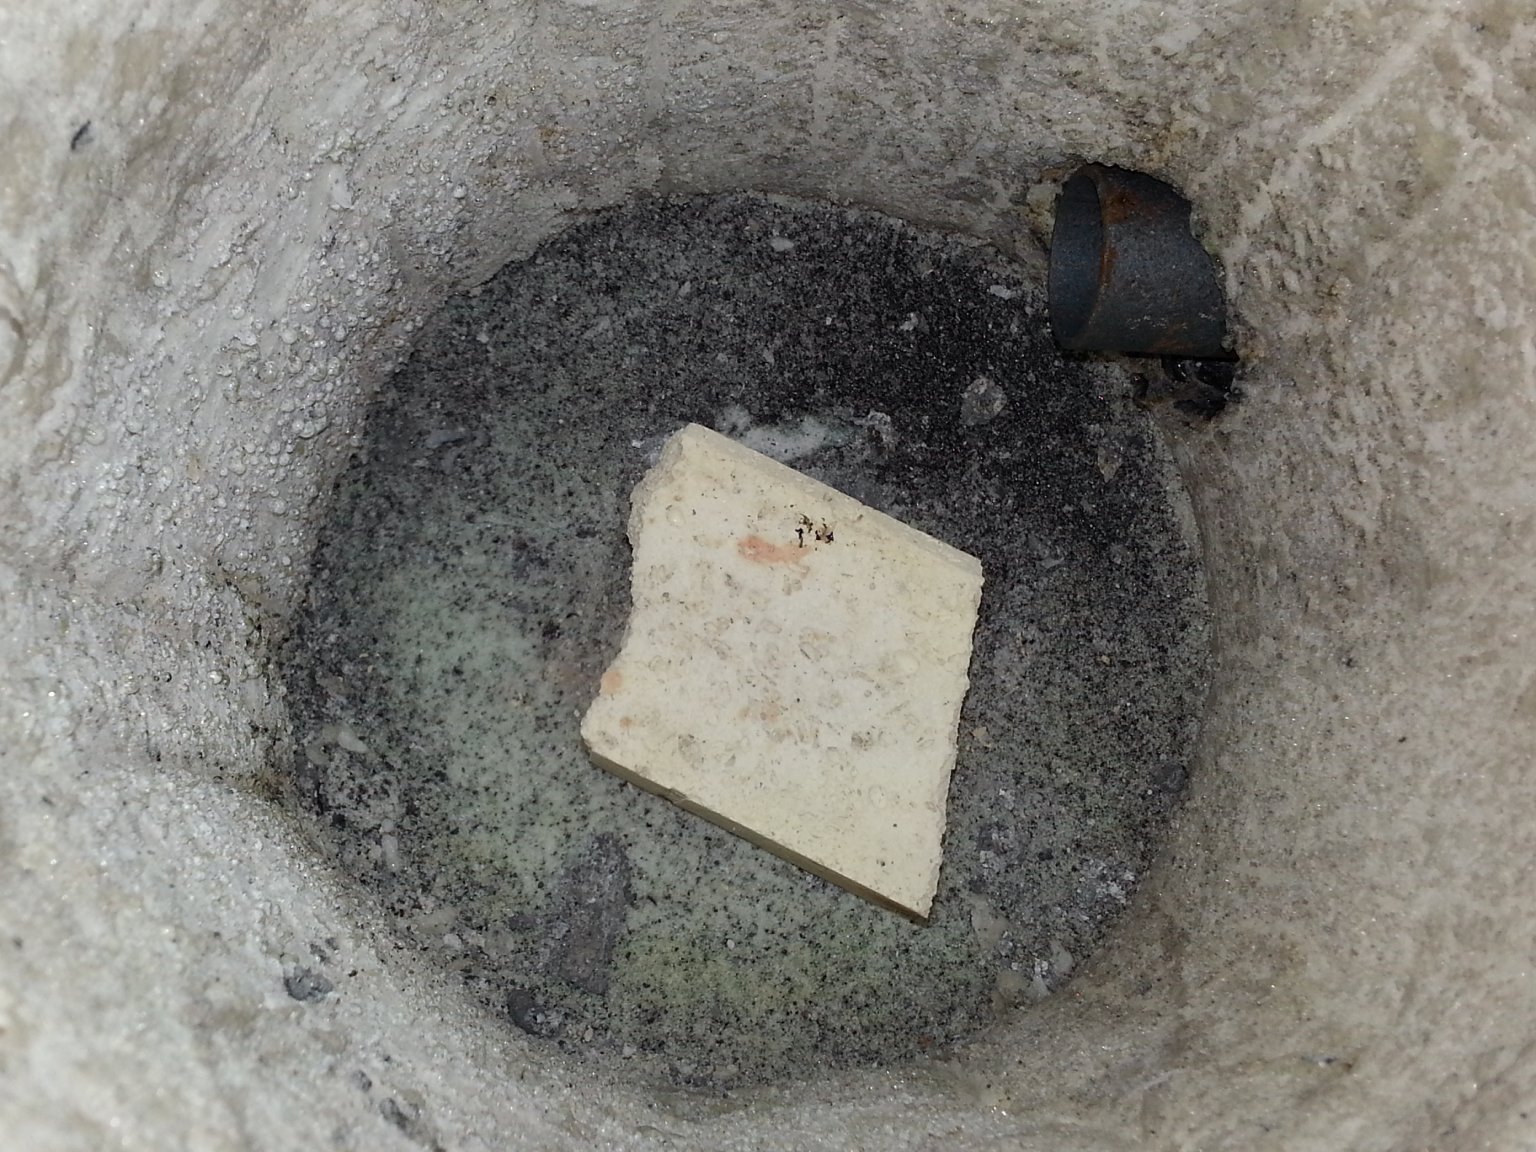
Here is a view down into the foundry. A plinth made of a chunk of kiln brick several inches tall is placed on the floor of the foundry and the melting crucible sits on top of the plinth.
The burner flame impinges on the plinth and swirls around the inner chamber
heating the crucible fairly evenly. Crucibles can crack if overheated too strongly in one area. So I like to have the kiln brick plinth take the brunt of the flame from the burner.
Sometimes the crucible sticks to the plinth and both come out when I remove the crucible from the foundry. This is most likely to happen if flux has run down the outside of the crucible and onto the
bottom of the crucible. Sprinkling a little dry sand on the plinth helps prevent them from sticking together.
This photo shows a better view of how the burner is installed at a tangent to the inner chamber of the foundry creating a swirling effect wrapping the flame around the inside of the foundry and the crucible.
The foundry is cold here and the lid is off, so the flame hasn't evenly heated everything yet. The lid helps keep the heat in and reinforces the swirling effect.
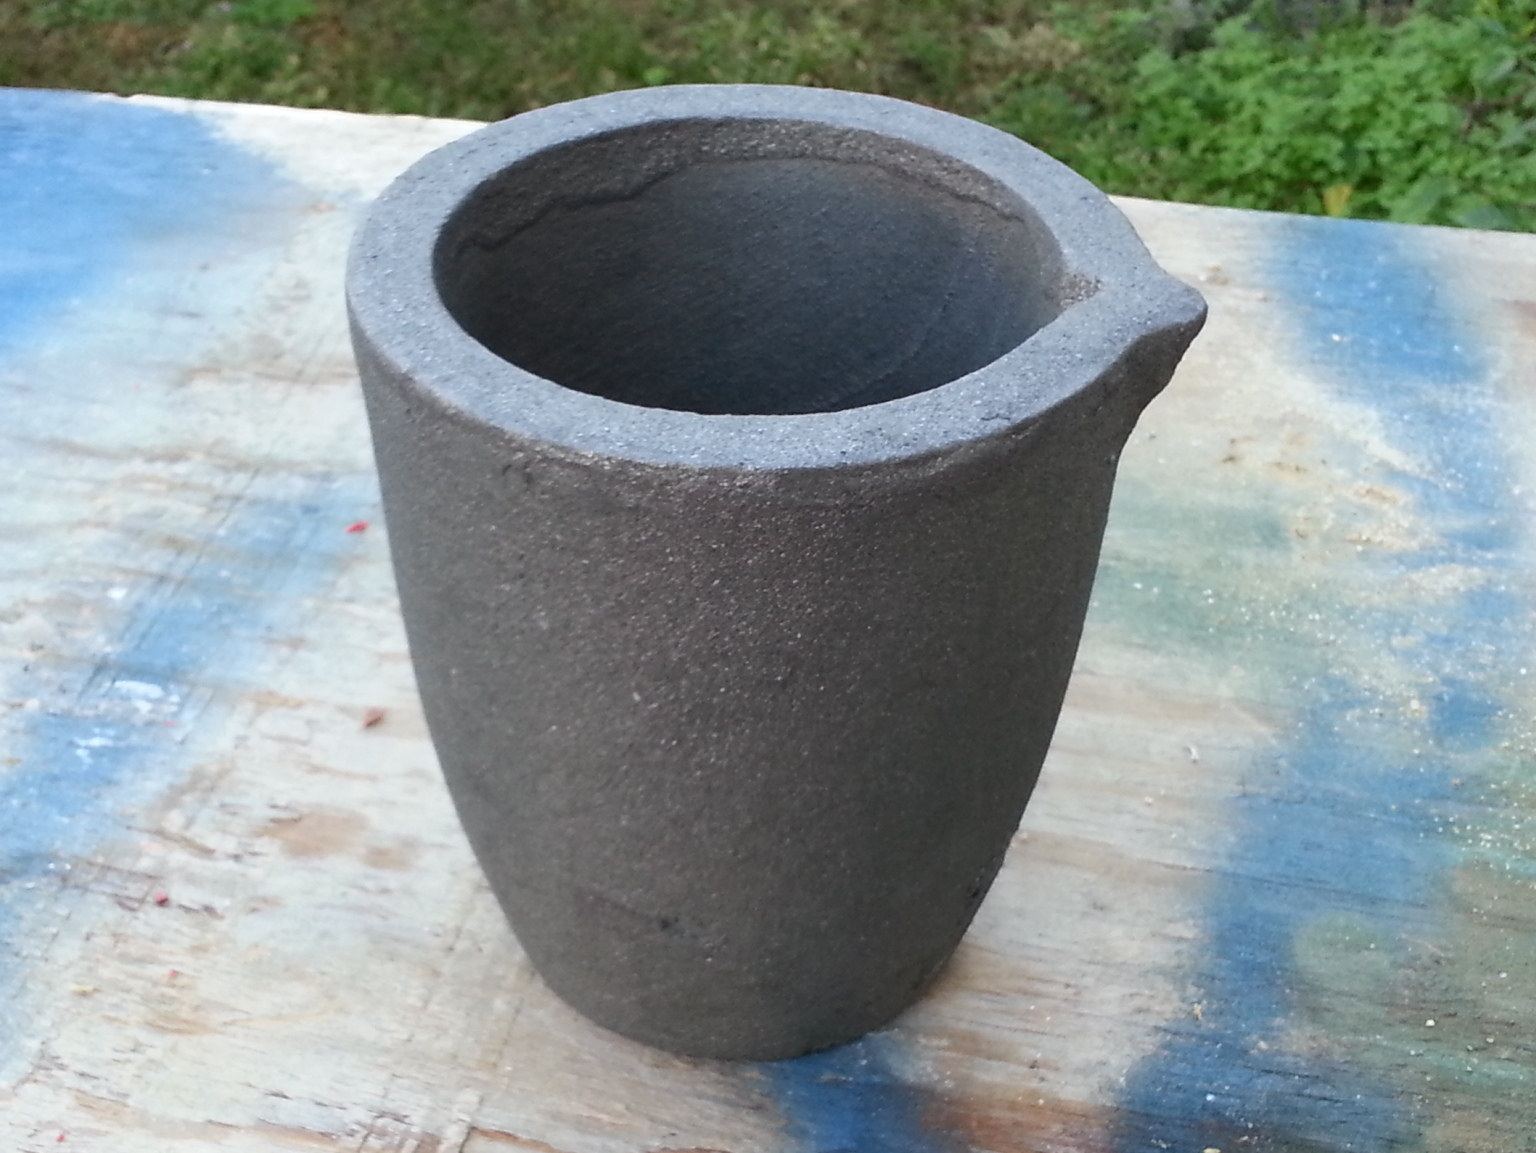
Here is one of several clay-graphite melting crucibles I bought for use in the foundry. I use a different one for each different metal I melt. I'm not sure if that is really necessary, but I stick with it
anyway. The crucible sits on a plinth made of kiln brick that is on the floor of the foundry. I have had trouble with the crucible sticking to the plinth, especially if melted flux runs down the side of the
crucible and onto the plinth. I have found that sprinkling a little dry sand on top of the plinth before setting the crucible on it helps prevent sticking.
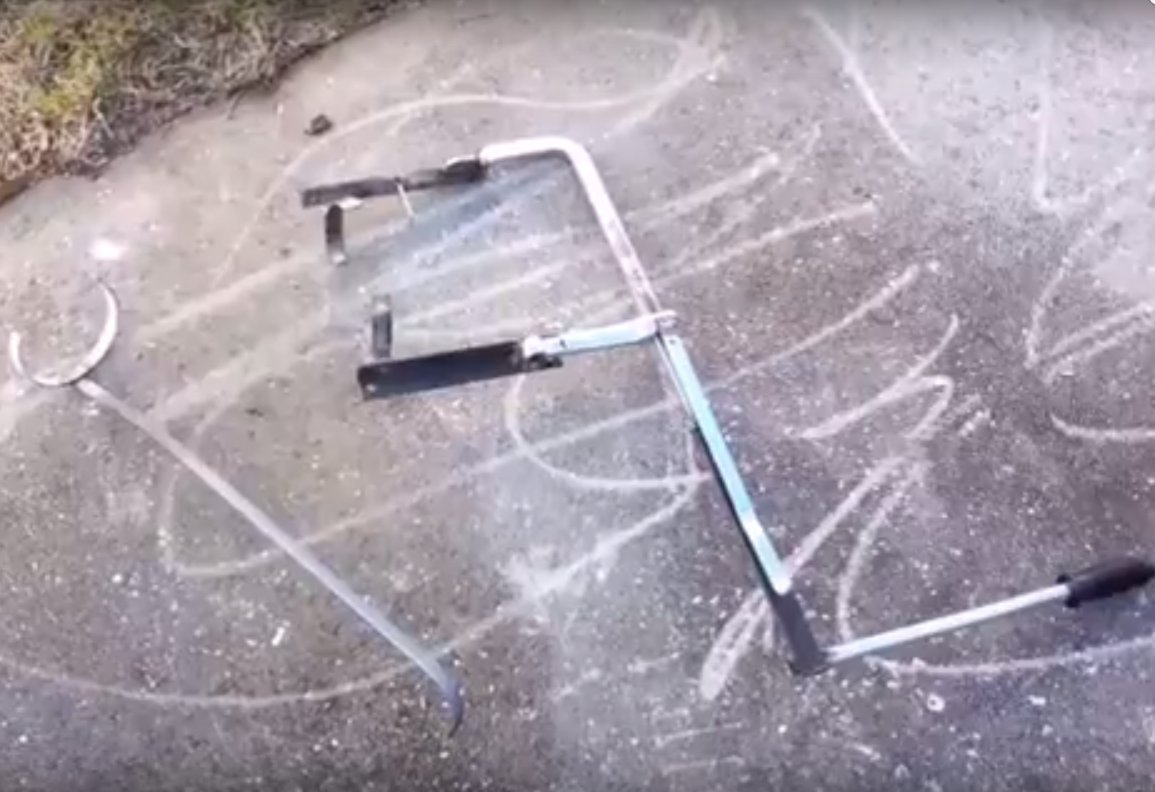
Here is a set of tongs I made for handing the red hot crucible. You can see them in use in the videos embedded in this page. The one on the left is for getting the crucible in and out of the
foundry. The one on the right is for picking up and pouring the crucible. Both were made mostly from scrap steel. Another useful tool is something to skim the dross off the top of the
molten metal. I use an old steel slotted spoon clamped in the jaws of Vicegrips to extend the handle and provide something easier to grip in bulky gloves. Long handles are a must for all
your tools. The amount of radiant heat from the hot crucibles is amazing. You can't get close to them without risking serious burns. The part of your tools touching the crucibles or
molten metal is also going to get super hot and start conducting heat down its length. So the longer the handles the better.
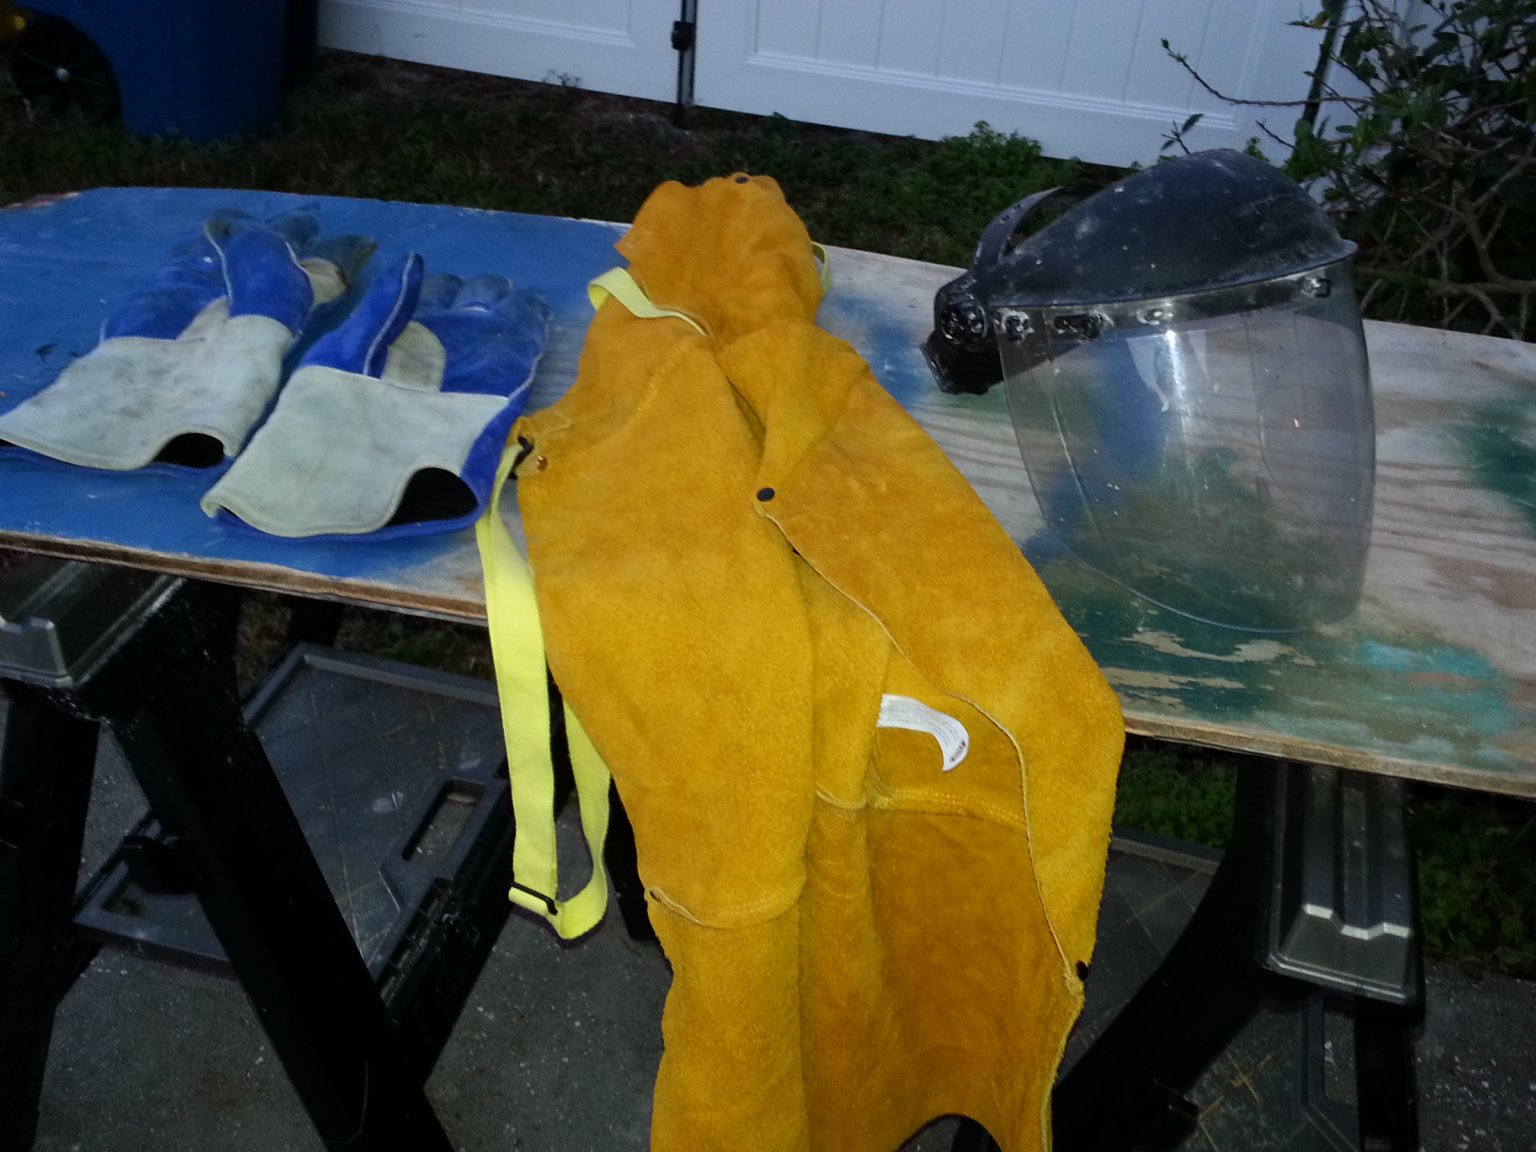
I need to give the obligatory talk about safety. This is dangerous! You need some personal protective equipment to prevent serious injury or even death. At a minimum your PPE
should include long and thick leather gloves that go well up your forearms, a face shield, a leather apron, and leather boots to protect yourself from radiant heat, hot handles
and splashed molten metal. That is the minimum. You probably can't go overboard on personal protection. A mask or resperator would also be a good idea to protect your lungs
from the fumes given off when melting some metals. Also be aware of your surroundings. This isn't something you want to do on a wood deck or near a lot of dry grass or other
flammable material. Radiant heat or splashed metal will start fires. And speaking of splashed metal. Be careful adding scrap metal to a hot ingot full of molten metal. Drop it
in gently to avoid splashing Also if there is any moisture on the scrap there could be a steam explosion when you drop it in the crucible which could blow molten metal all over
you and the surroundings. It is always best practice to pre-heat scrap on the top of the foundry to ensure it is thoroughly dry before adding it to a hot crucible.
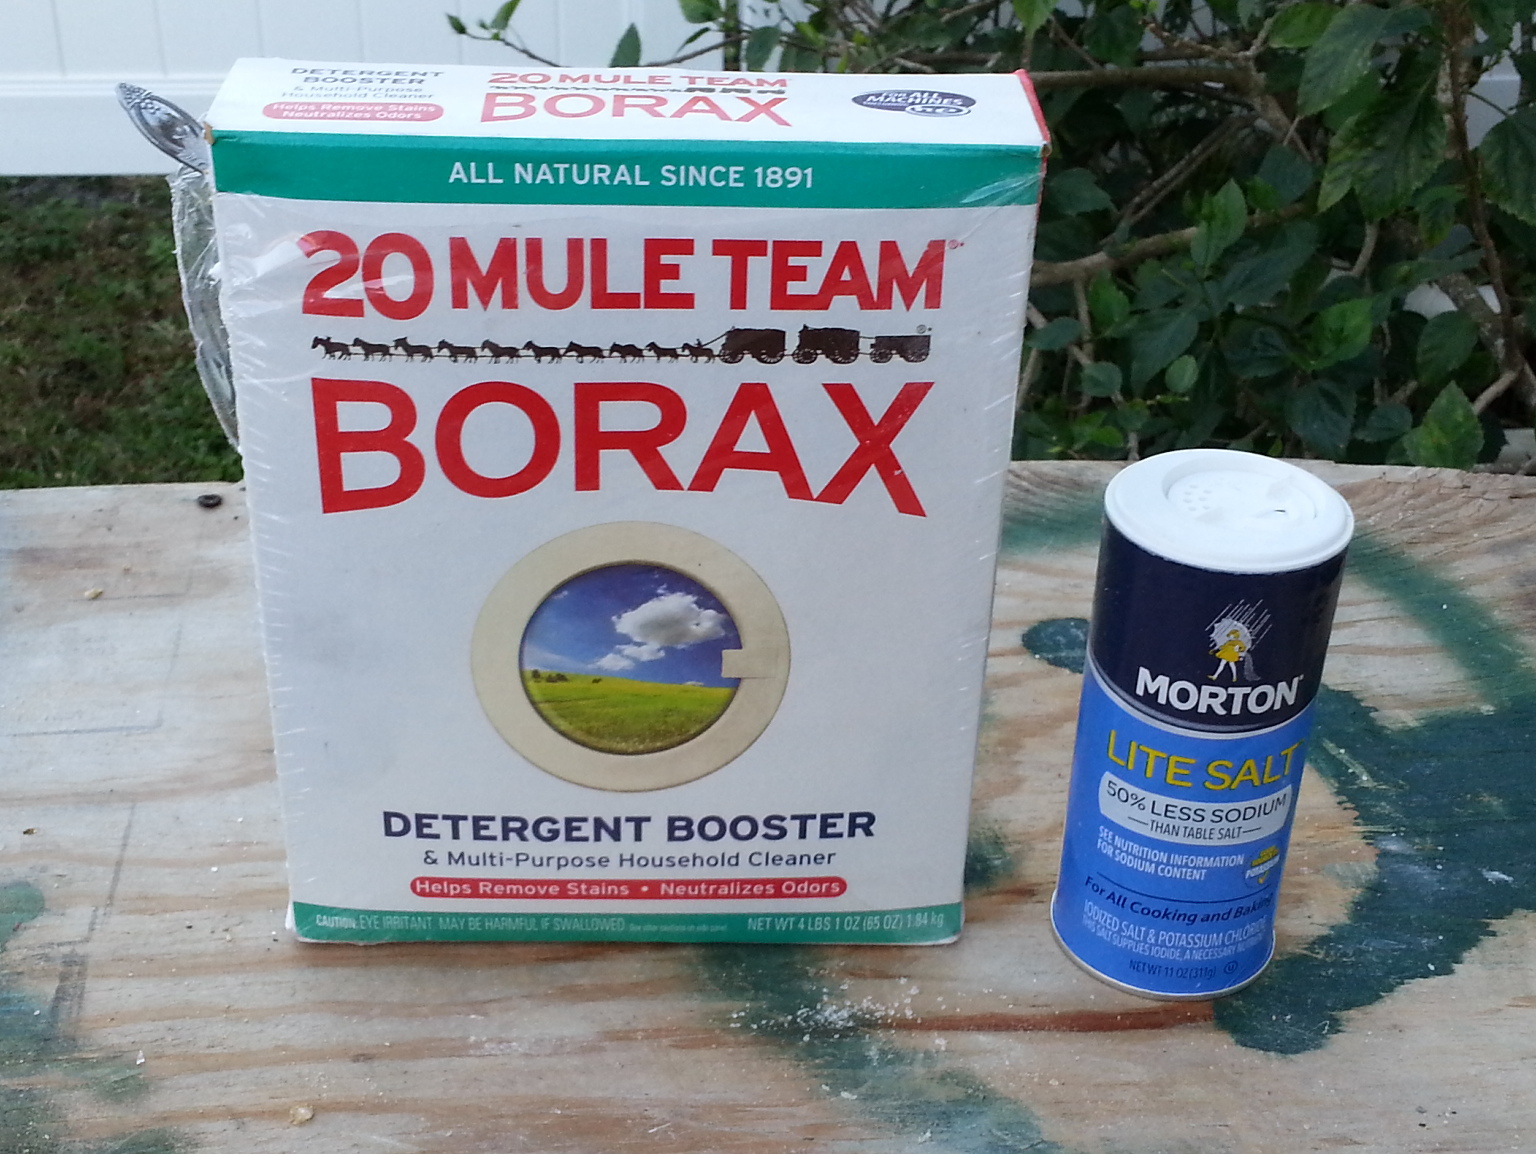
Here is a photo of two different fluxes I use. I use the borax for brass and bronze melting. I use the Morton light salt for aluminum melting. These are melting fluxes that melt and float on top of
the surface of the molten metal protecting it from oxidation by the air. There are other kinds of fluxes that are useful for degassing the metal before casting. I have not yet explored their use.
A few pinhole size gas bubbles in the sort of castings I make are not really an issue. The melting fluxes really do help. The amount of dross is reduced and the metal is shiny and clean
in the castings.
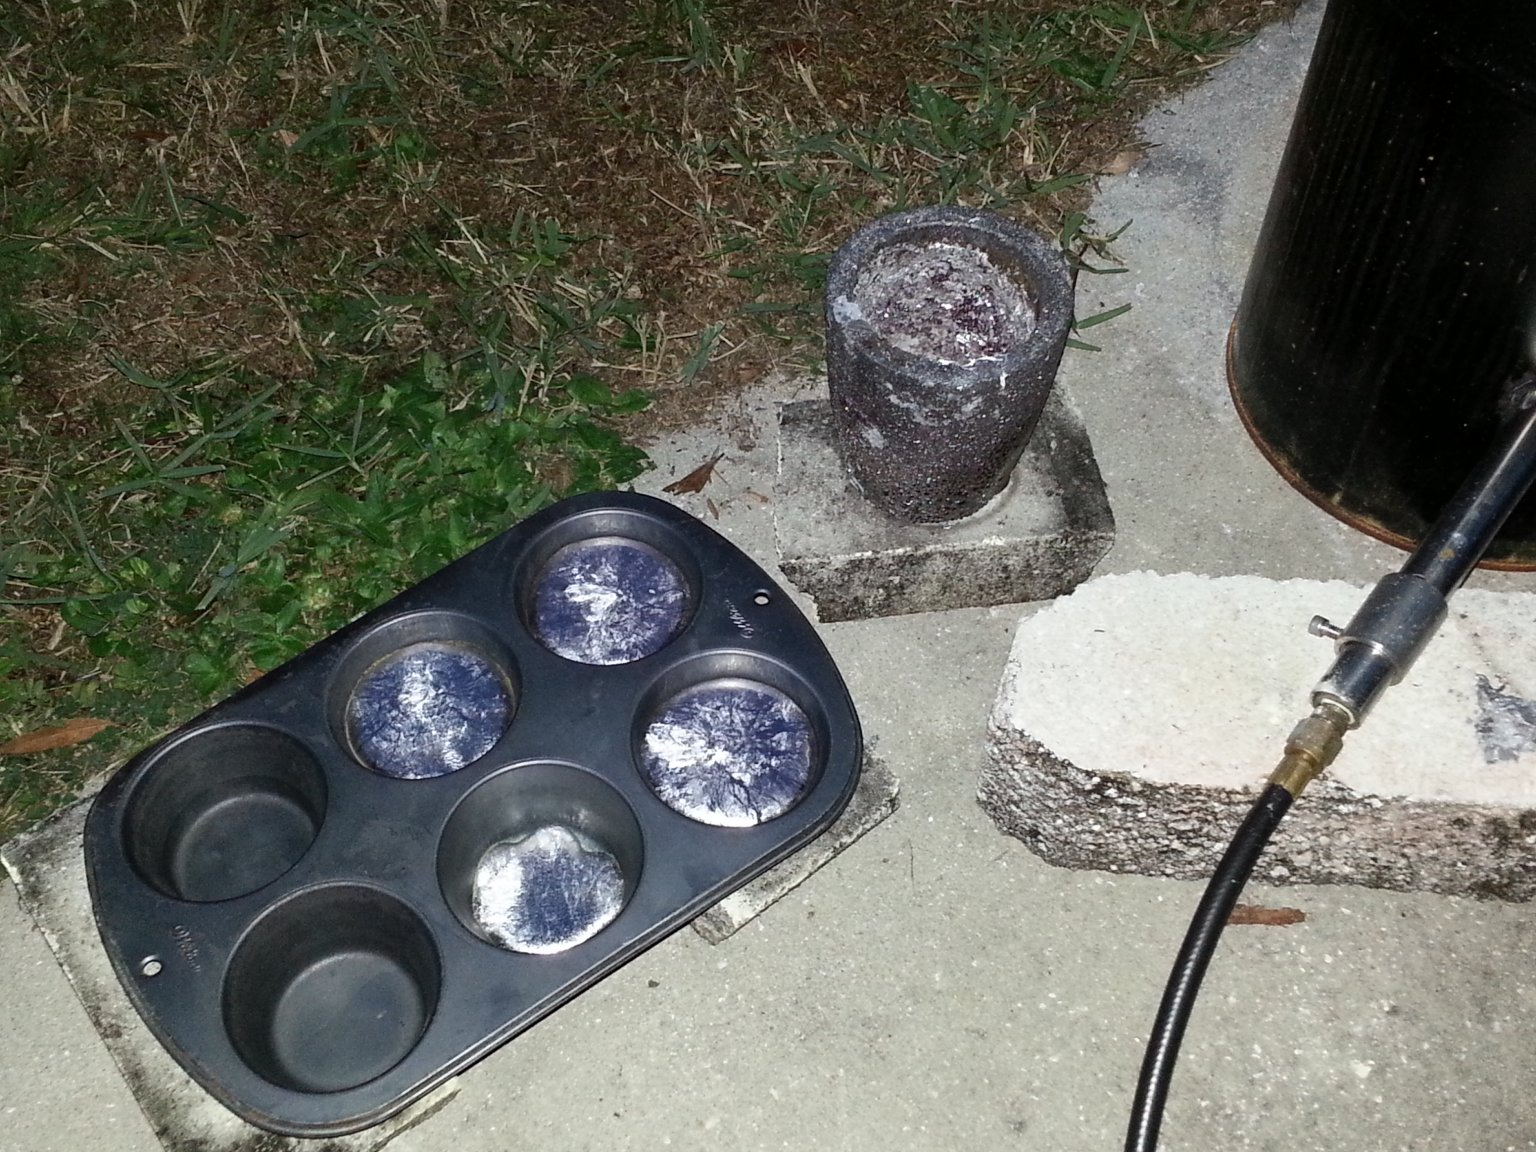
Good old muffin tins are useful for casting ingots. I'll melt down misc. old scrap aluminum or a bunch of brass bullet casings and plumbing parts, and skim off the nasty dross and dirt,
then cast nice clean ingots in the muffin tin for use in future projects. Also any left over metal in the crucible after a casting gets poured into to muffin tins to make ingots
for future use. Just remember that the muffin tins need to be either steel or cast iron to survive the heat. I like to spray down the wells with a little aerosol graphite lube. It makes the
ingots fall right out every time.
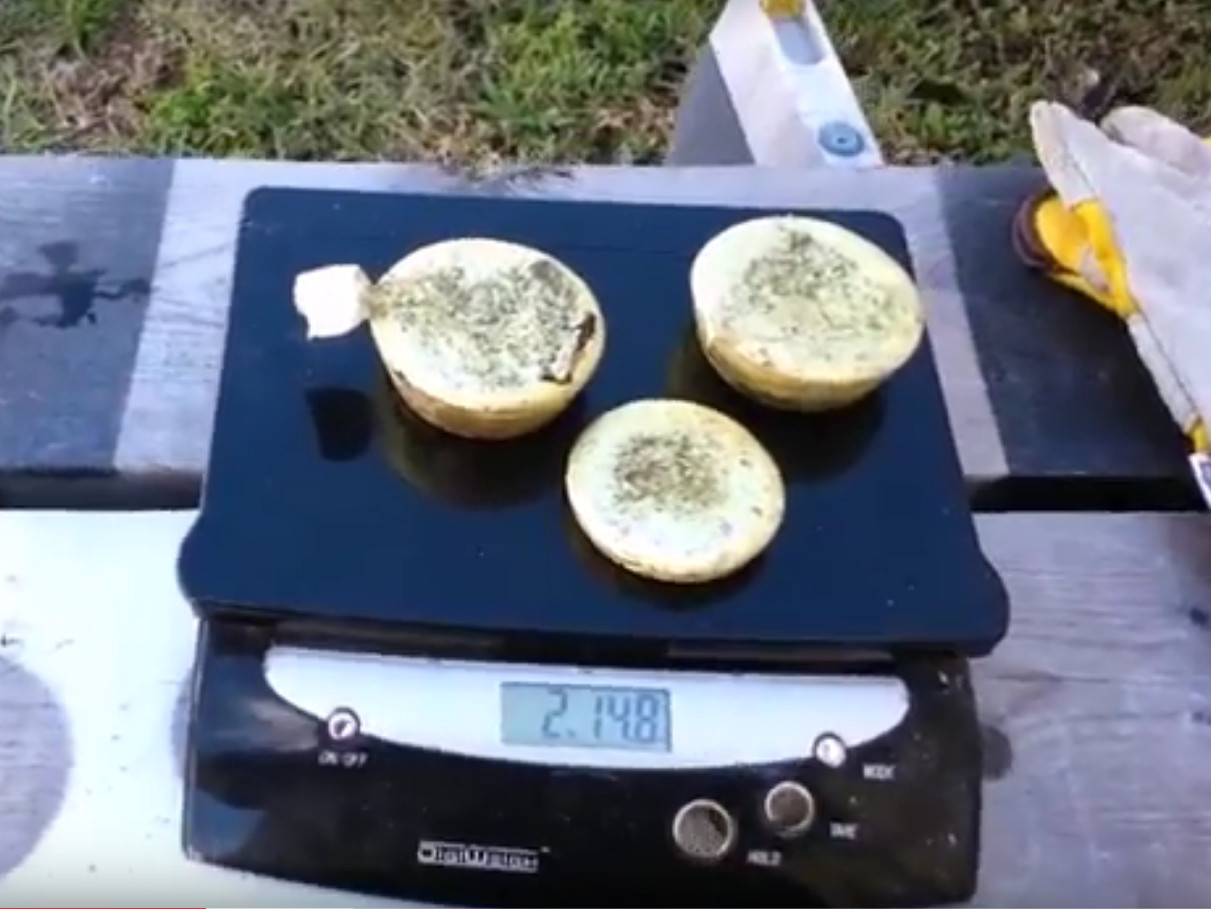
Here are three nice, clean ingots of brass totaling almost three pounds in weight made by melting down a bunch of brass bullet casings. The casings were dirty with lots of
powder residue, corrosion and primer caps made from some other metal. All that stuff got skimmed off the top of the molten metal with the dross, leaving nice clean and shiny
brass for use in future projects.
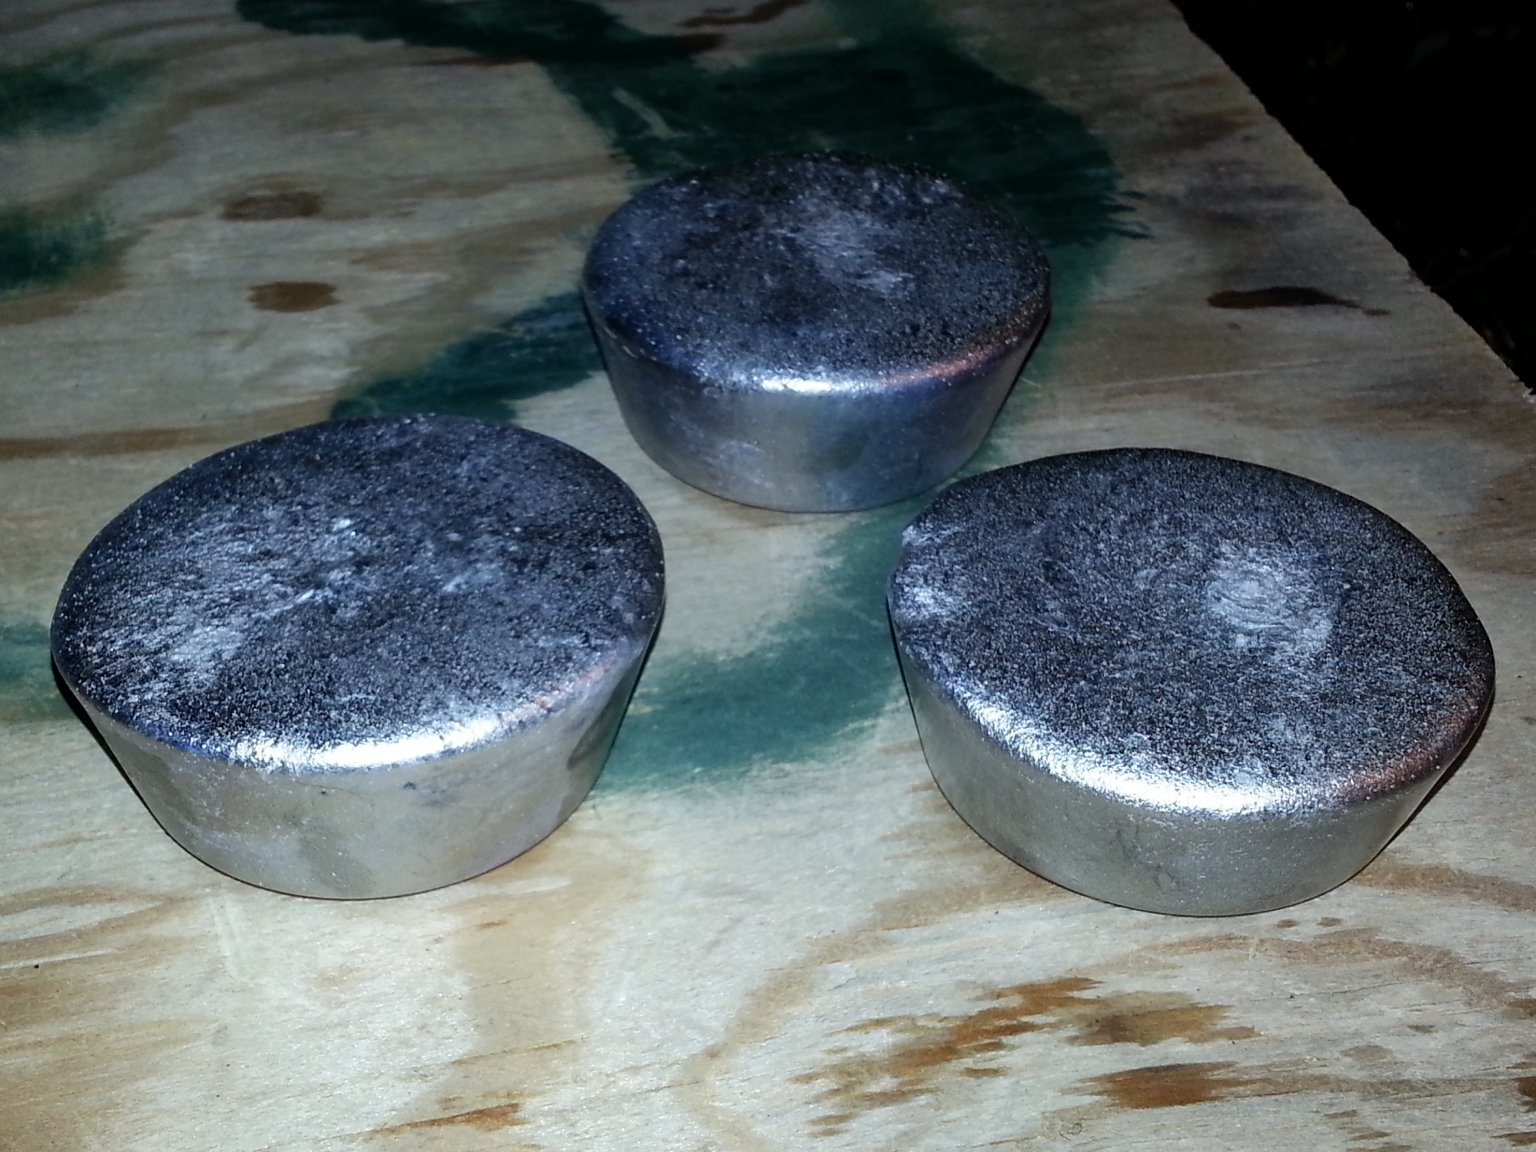
Here are some aluminum ingots cast in the muffin pan. People ask why I bother making ingots rather than just melting down the amount of scrap metal needed when I want to cast
something. There are a couple of reasons. First the scrap metal doesn't usually fill the crucibles very efficiently. It is all kinds of awkward shapes and full of voids.
It can take a long time adding charge after charge of scrap a bit at a time to the crucible to melt it all down and fill the crucible to a to a decent level with molten metal.
The ingots fill the crucible much better and will melt down quicker. I can process the scrap metal into ingots when I have free time and melt the ingots down quickly when I am in
a hurry to complete a project.
Second the scrap metal tends to be dirty. I can clean it up a lot by melting it with the proper flux and skimming off the dross. I can then pour ingots of nice clean metal
That I stockpile for future use. I can weigh out the amount of metal ingots I am going to need for a project and know they will melt down to a known volume of metal with very little
loss to dross.
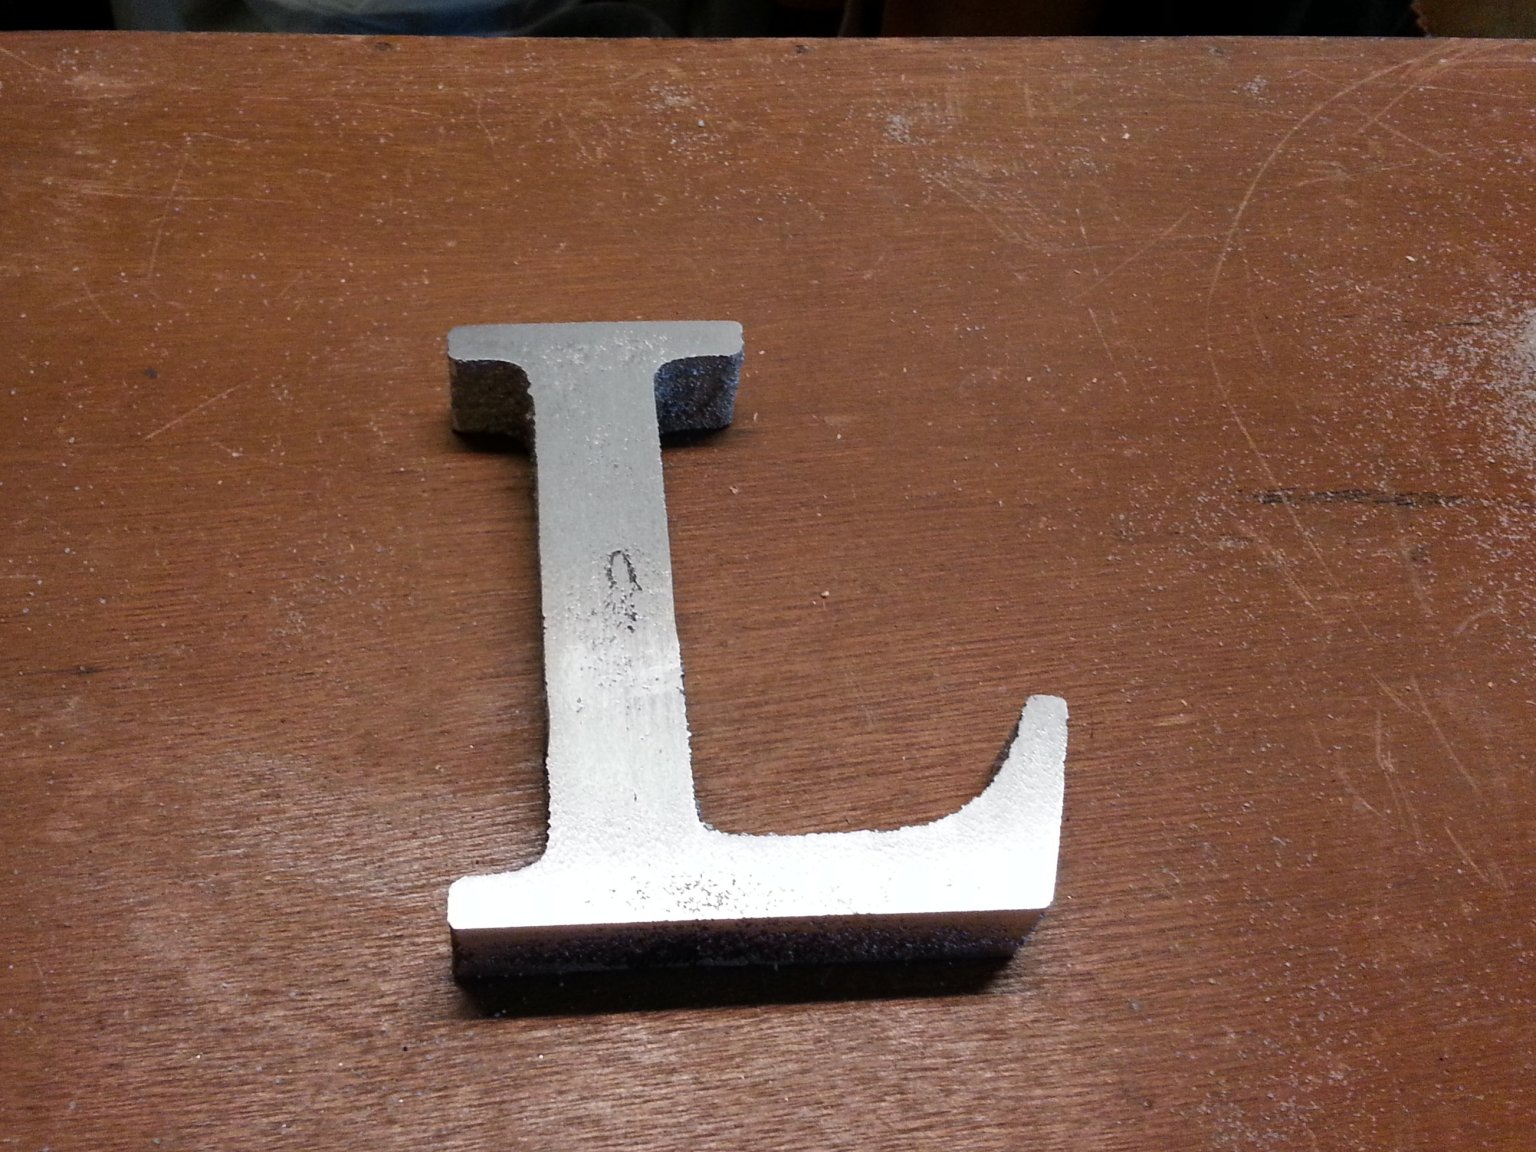
Ok, enough about how to build the foundry and all the ancillary equipment needed. so what can you do with it besides cast ingots? How about some lost foam metal casting? My first
project was casting some large letter Ls. This photo
shows a large letter L cut from foam. I wanted to make a large L for my girlfriend for her birthday since her name starts with L. I cut the L out of a block of foam with my CNC
router.
Here I have hot melt glued a sprue of scrap foam onto the back of the L. I have packed a wooden mold box with a couple of inches of damp sand and leveled off the surface. Then
I set the L face down on the sand with the sprue sticking up.
Here the foam mold has been buried in more damp sand and it has been tamped down tightly. The sprue has been left sticking up out of the sand. I have found through experience
that it is best to pack the sand in such a way as to leave a low point around the sprue and higher around the walls of the mold box. That helps the molten metal run down the hole
as the sprue vaporizes and prevents it from puddling against the wooden mold box and burning it.
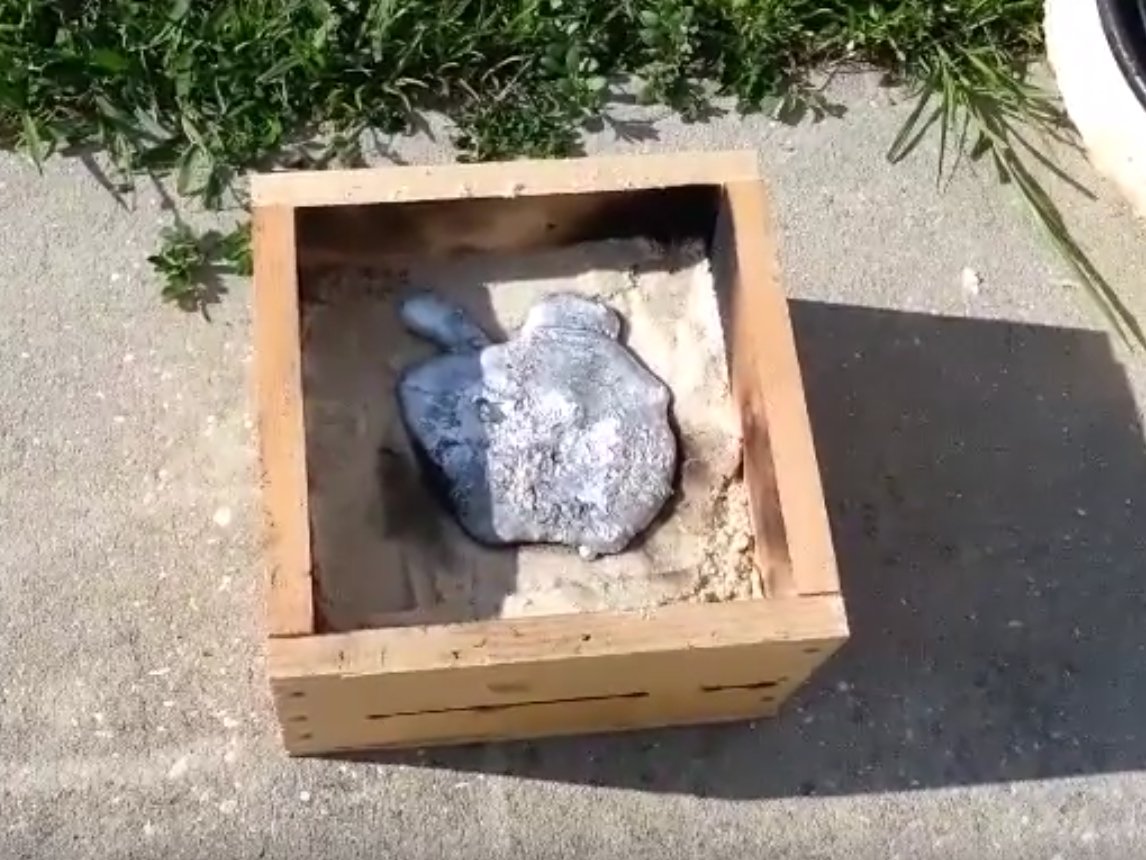
Here the molten aluminum has been poured into the mold. There was much smoke and flame as the foam vaporized and was displaced by the aluminum. I heated the aluminum hotter than would
be normal for casting. The aluminum needs to be heated well above its melting point because it has to be hot enough to vaporize the foam and still be fluid enough afterward to fully
fill the resulting void. Aluminum just heated barely above its melting point may begin solidifying before fully vaporizing the foam.
Now it is just a waiting game to allow the metal to fully solidify before trying to demold the part.
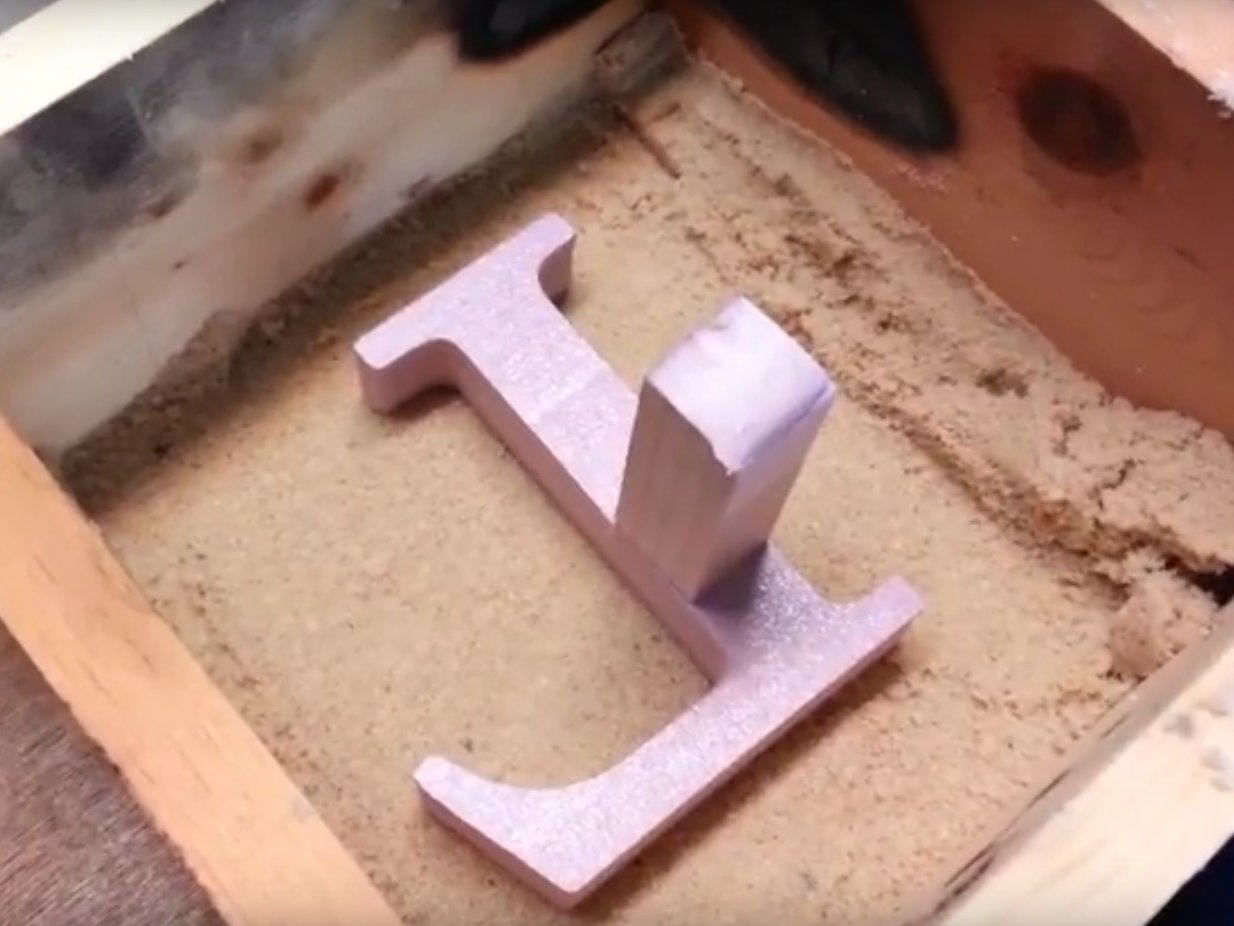
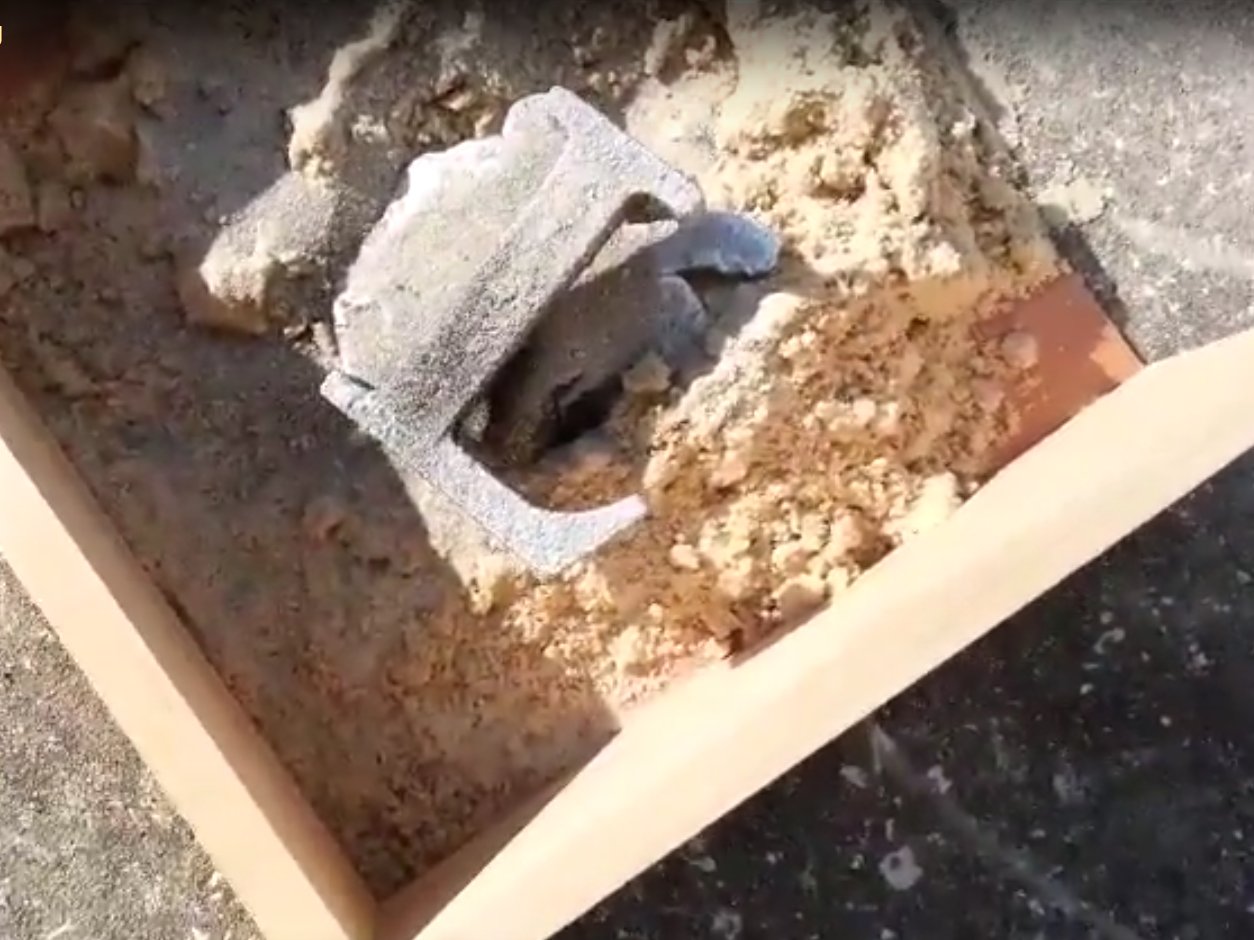
Here I am shaking the cast part out of the sand. I was very excited to see that I had actually produced a passable looking L on my first try. I suspected it was just
beginner's luck, but then I did it again and it worked just as well. I made two Ls and finished the better looking of the two, keeping the other one in reserve in case
I screwed it up somehow.
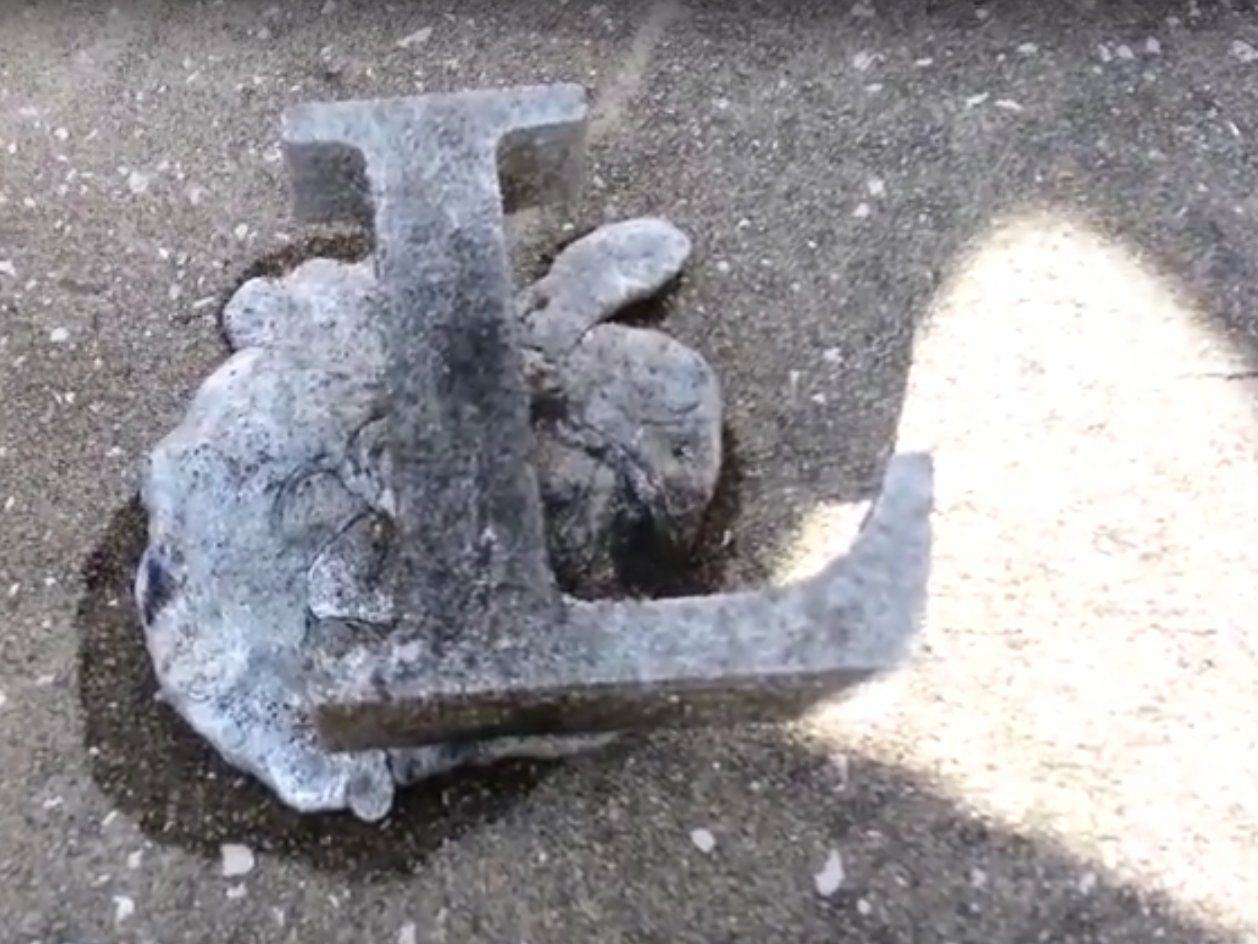
Here I have quenched the casting in water to make it cool enough to handle. The sprue and a big blob of excess metal are still attached to the back of the L. The casting
is also dirty with soot created as the foam vaporized and burned off.
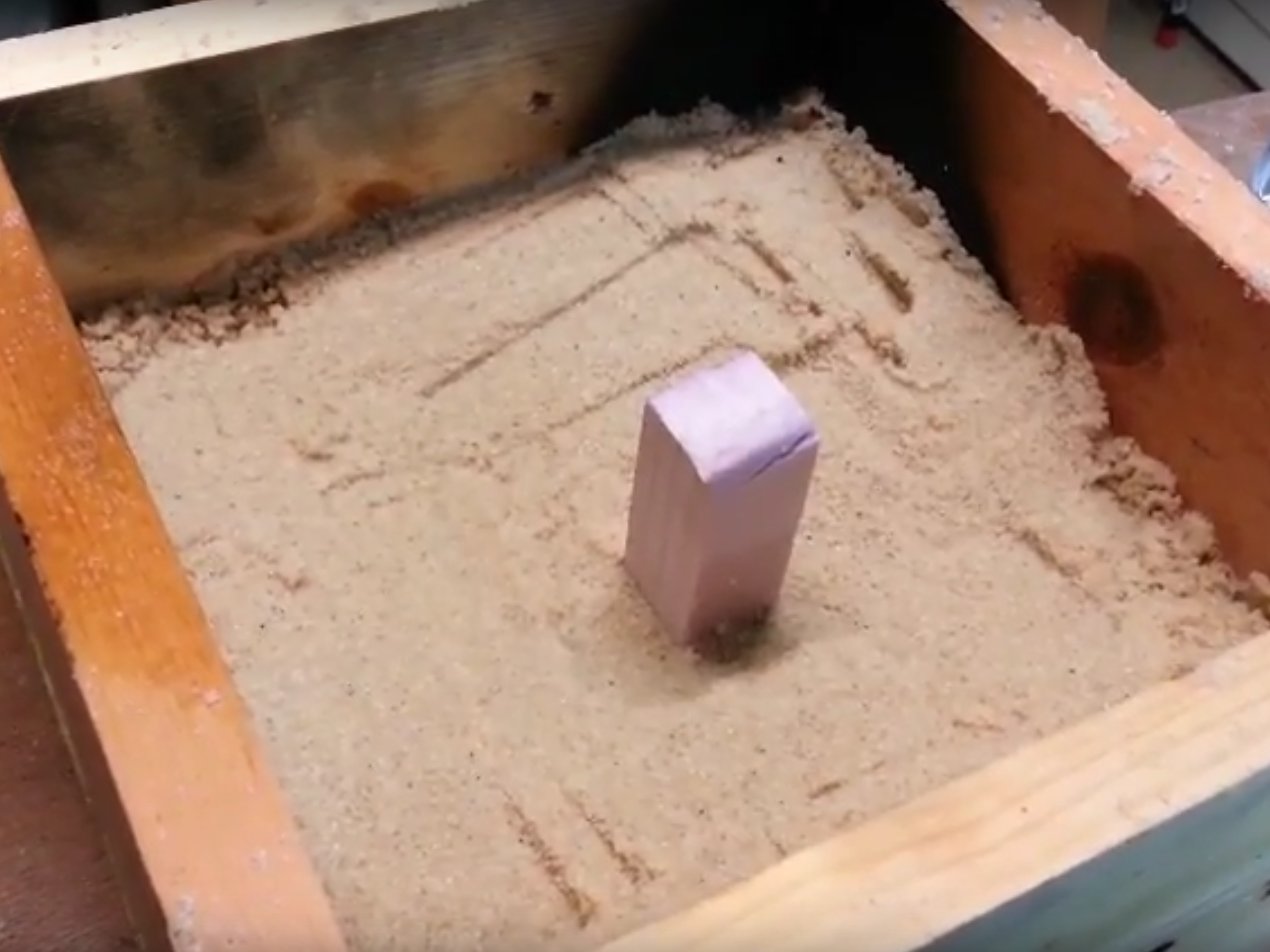
Here is a photo of the rough casting after cutting off the sprue and leftover aluminum. The surface has a rough sand-cast texture, but is amazingly good for how simple and
easy the lost foam process is.
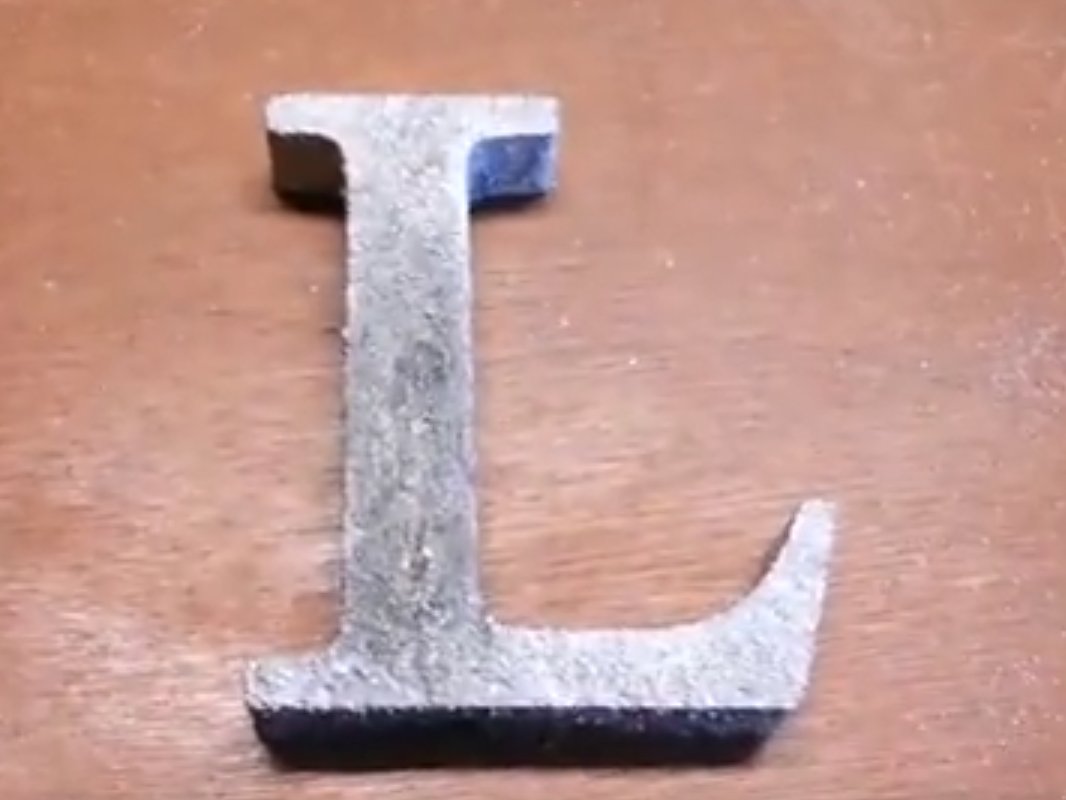
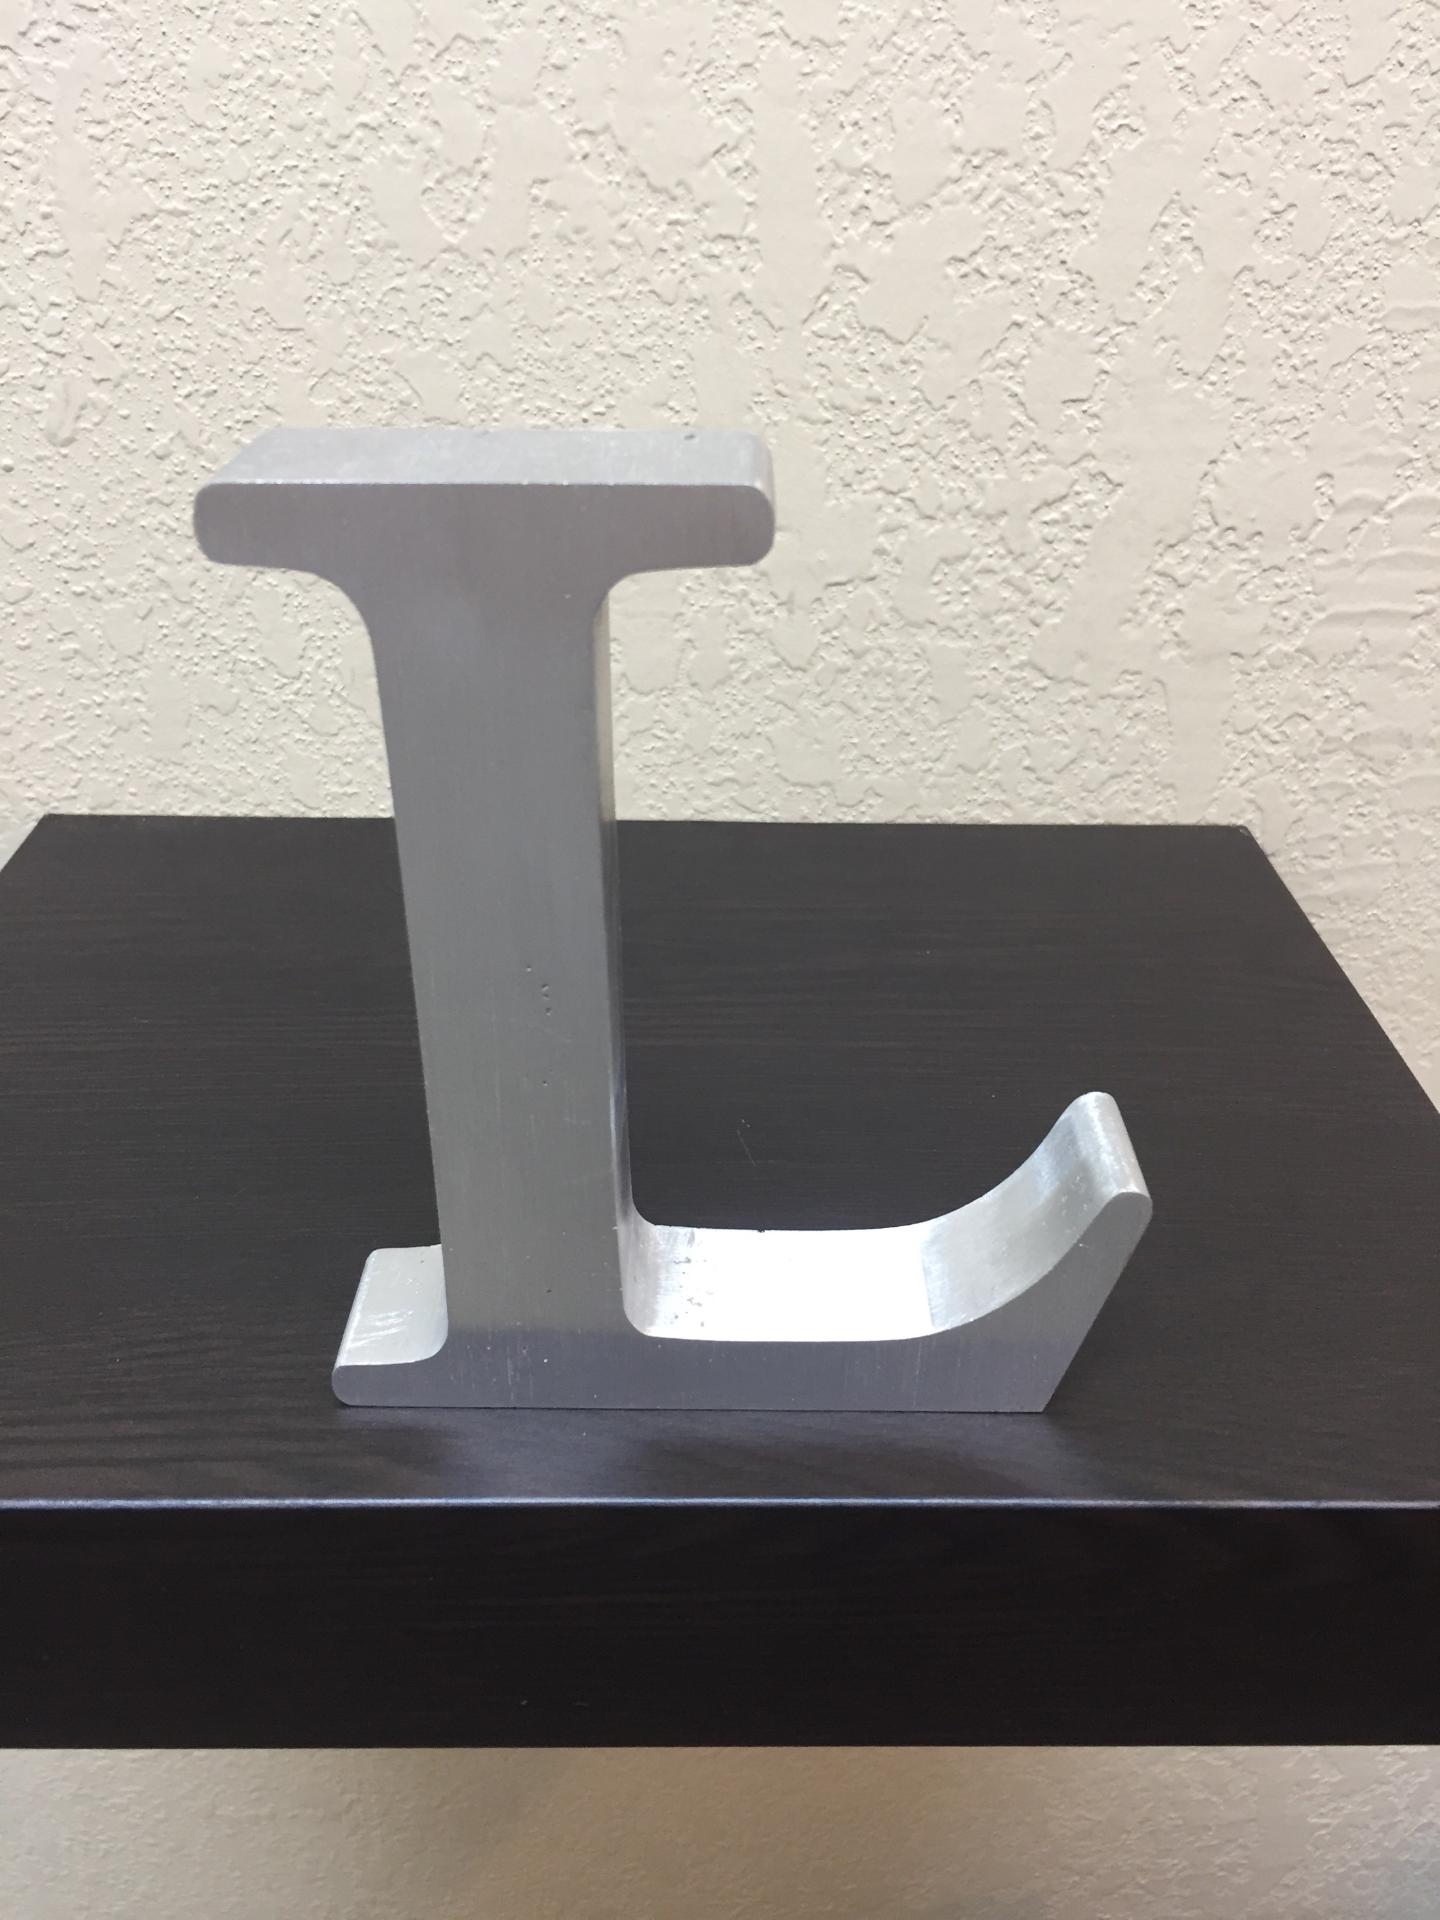
Here is a photo of the L after only a few minutes of sanding on my belt sander with rough grit to smooth out the rough sand-cast texture. My plan was to clean it up on all surfaces
with rough grit belts and then go through progressively finer grits to produce a nice looking surface finish. Even after only a few minutes with a rough grit belt it is really
starting to look nice.
This video shows my first attempts at lost foam casting. Surprisingly it went very well. Usually I screw it up a few times before getting the hang of something new. Not this time. My
very first attempt turned out amazingly well. The second time worked just as well, so I wasn't just beginner's luck. This is actually quite easy. The results aren't perfect. The castings
are rough, but salvageable. I am already working on ways to make future castings even better. But these first results are so good that I will definitely be doing a lot more casting
in the future.
Here is a photo of the finished L being proudly displayed on a shelf in my girlfriend's office. She loved it. I'm pretty happy with the way it turned out too.
Ok, not bad for a first effort at lost foam casting. Time to make something a little more complex. See below.
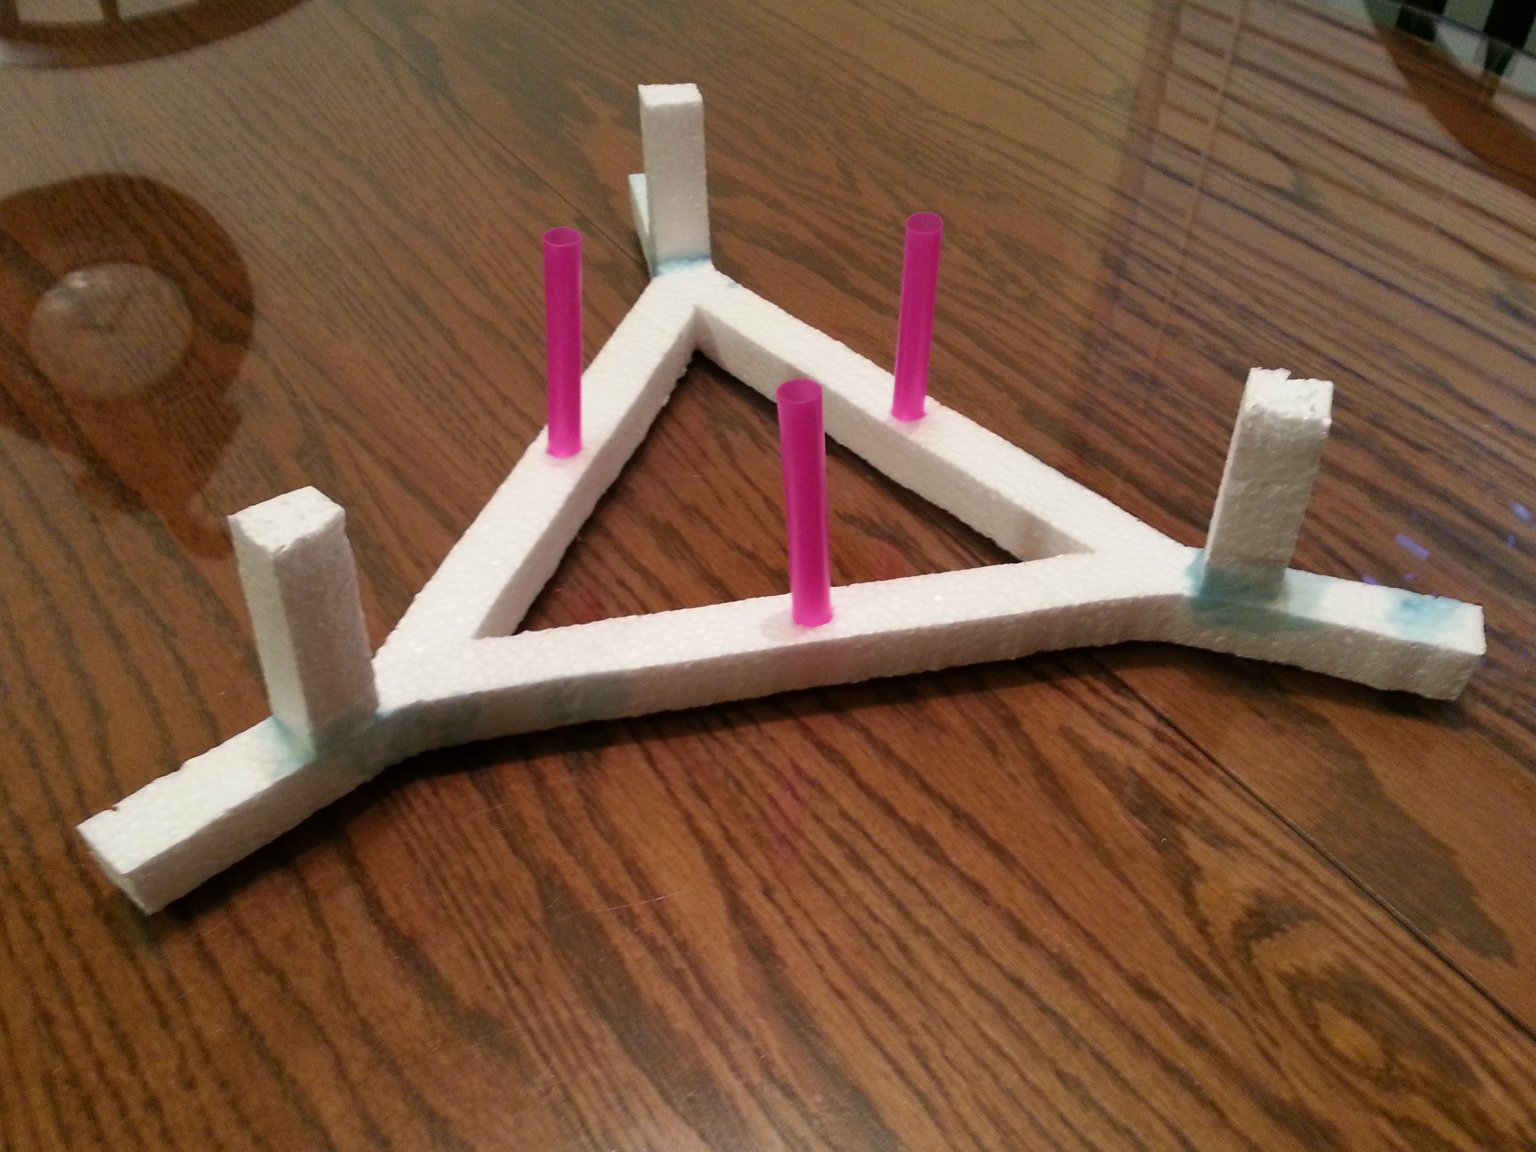
My next real casting project was making parts for a telescope mirror cell. I needed to make a triangular piece of aluminum with arms at each corner. This time I cut the foam mold
from 3/4 inch thick polystyrene foam (Styrofoam). I added three sprues and three risers from soda straws to vent the gases from the vaporizing foam. I used hot-melt glue
to glue the pieces together. Then I painted some melted wax on in various areas to smooth out the shape and fill voids. Like with the Ls above, I made
two of these to ensure I got at least one good one. The design of the two molds were slightly different. So the casting in the photos below doesn't look exactly like this photo.
I buried the mold in dry sand with the sprues and risers just sticking above the level of the sand. Yes, I have switched to dry sand for this casting. I have found that dry sand
works about as well as damp sand and and is easier to work with. It fills all the voids around the mold without needing to ram it in hard. Then I poured the aluminum down one of the
sprues. It worked better than I expected.
The Styrofoam is a lot less dense than the other foam I was using, but has a rougher texture. Being less dense the hot metal vaporizes and displaces it easier allowing for the creation
of larger and more complex castings, but at the cost of a rougher surface finish. I don't really care about surface finish in this application.
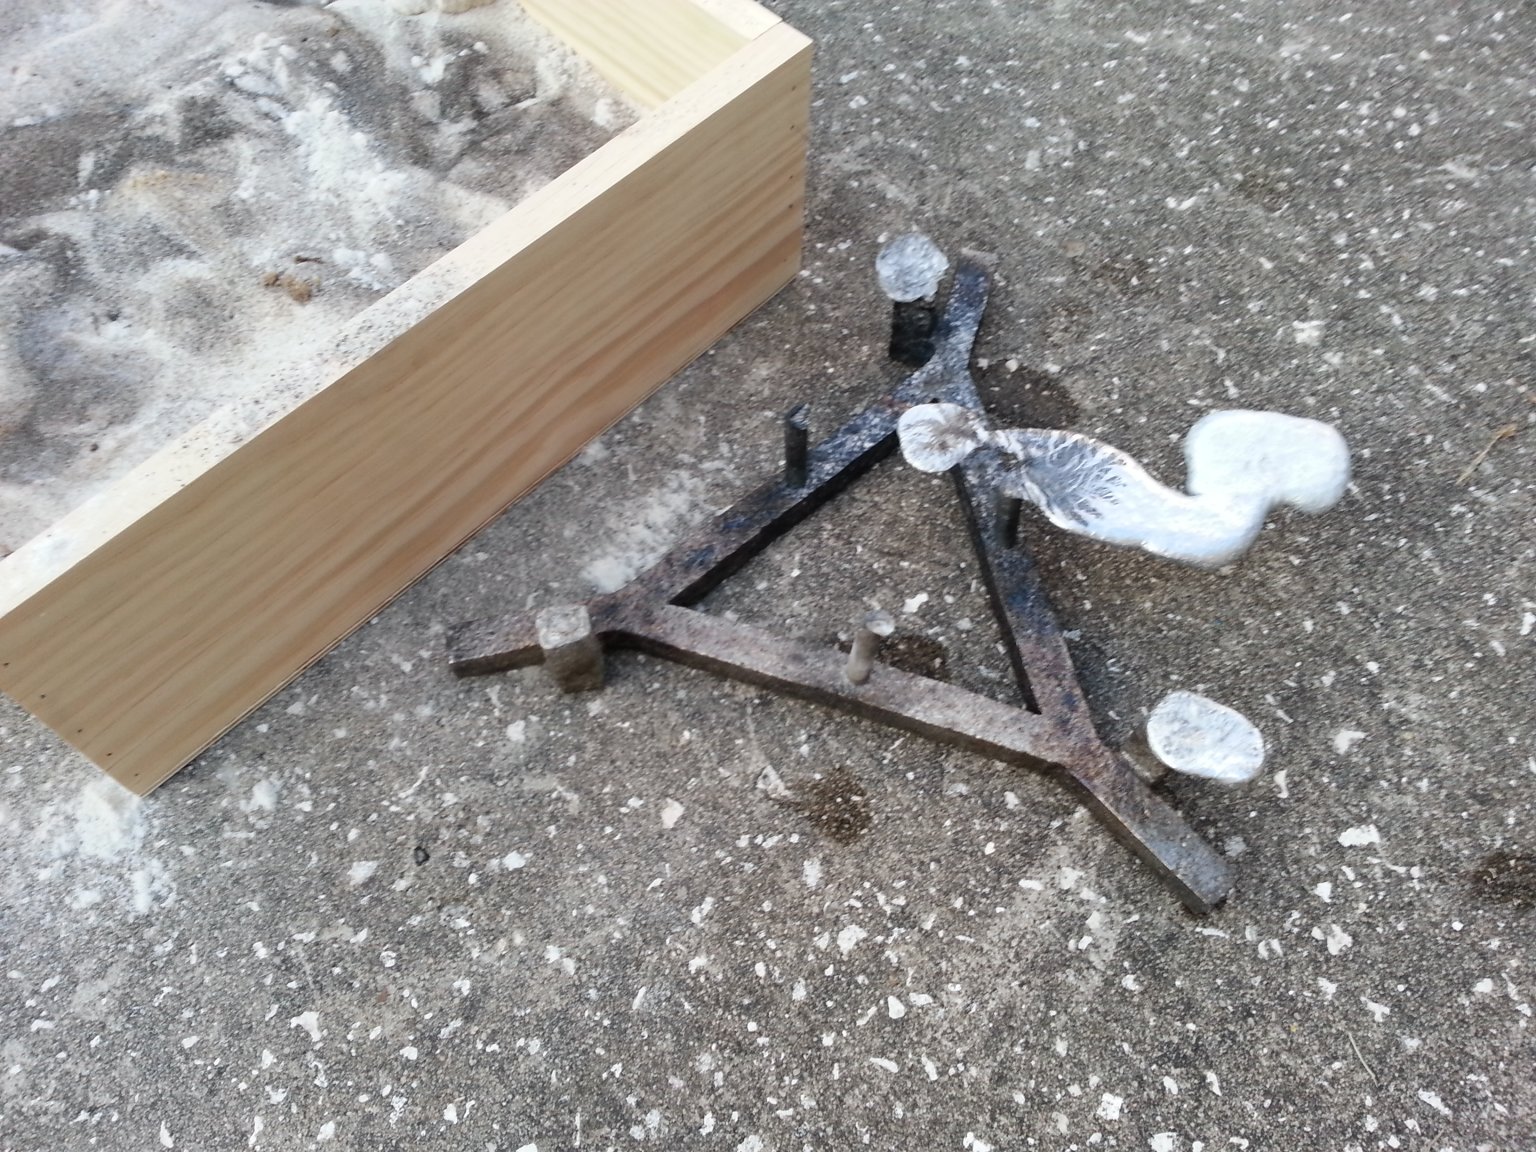
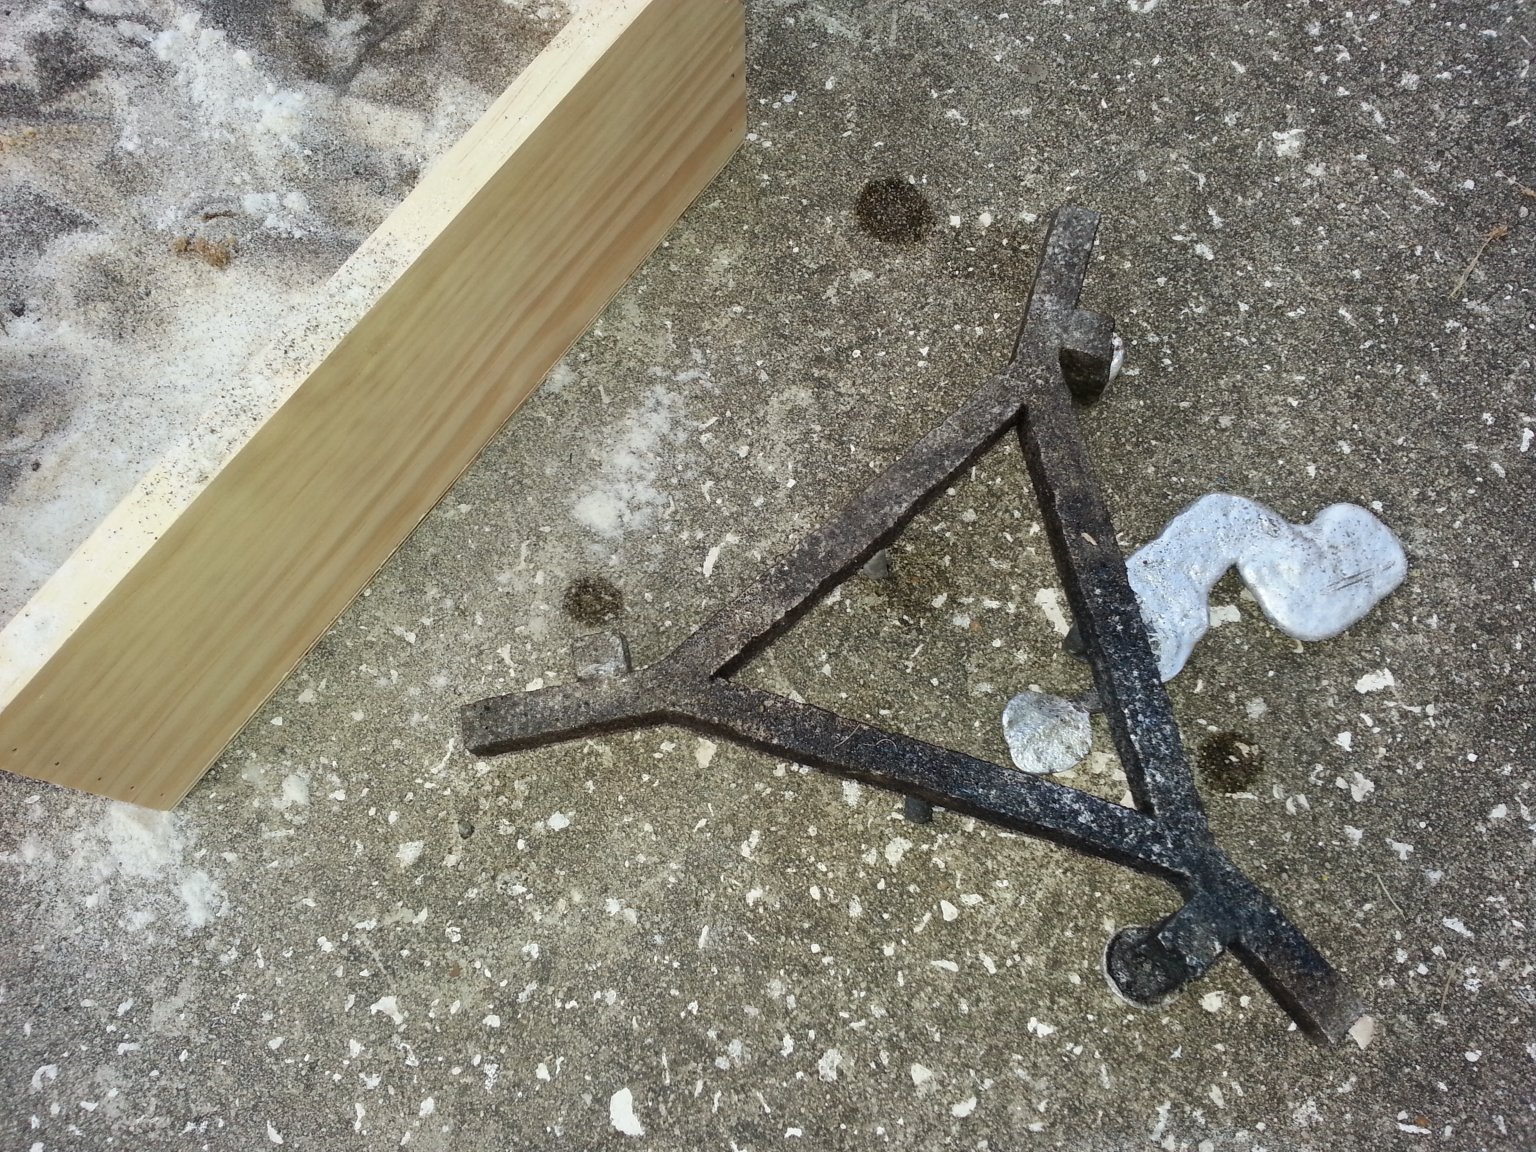
Here is the casting just out of the sand, still hot, and with the sprues, risers and excess metal still attached.
Here is a look at the other side. It is covered with soot and has a lot of sand stuck to it, but otherwise is a nearly perfect replica of the Styrofaom mold.
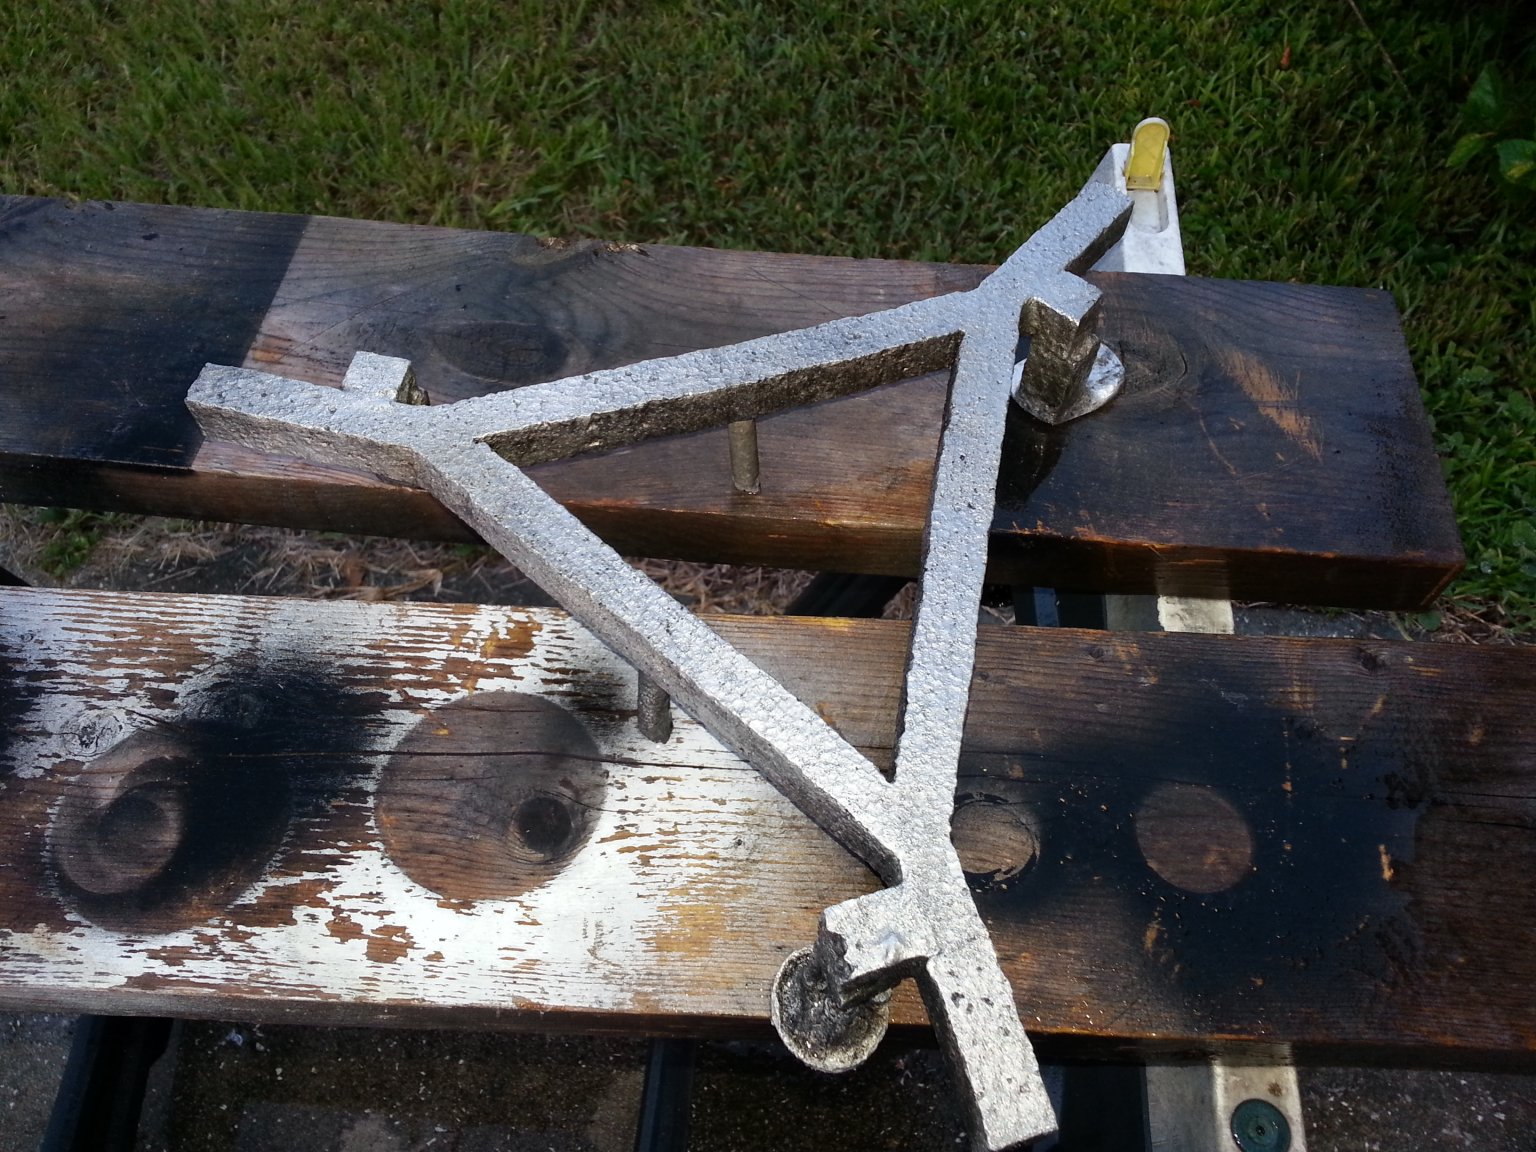
Here is the casting after wire brushing off the soot and sand stuck to it. The detail captured by the casting process is amazing. The texture of the original Syrofoam mold is
clearly visible in the full size image. I couldn't be happier.
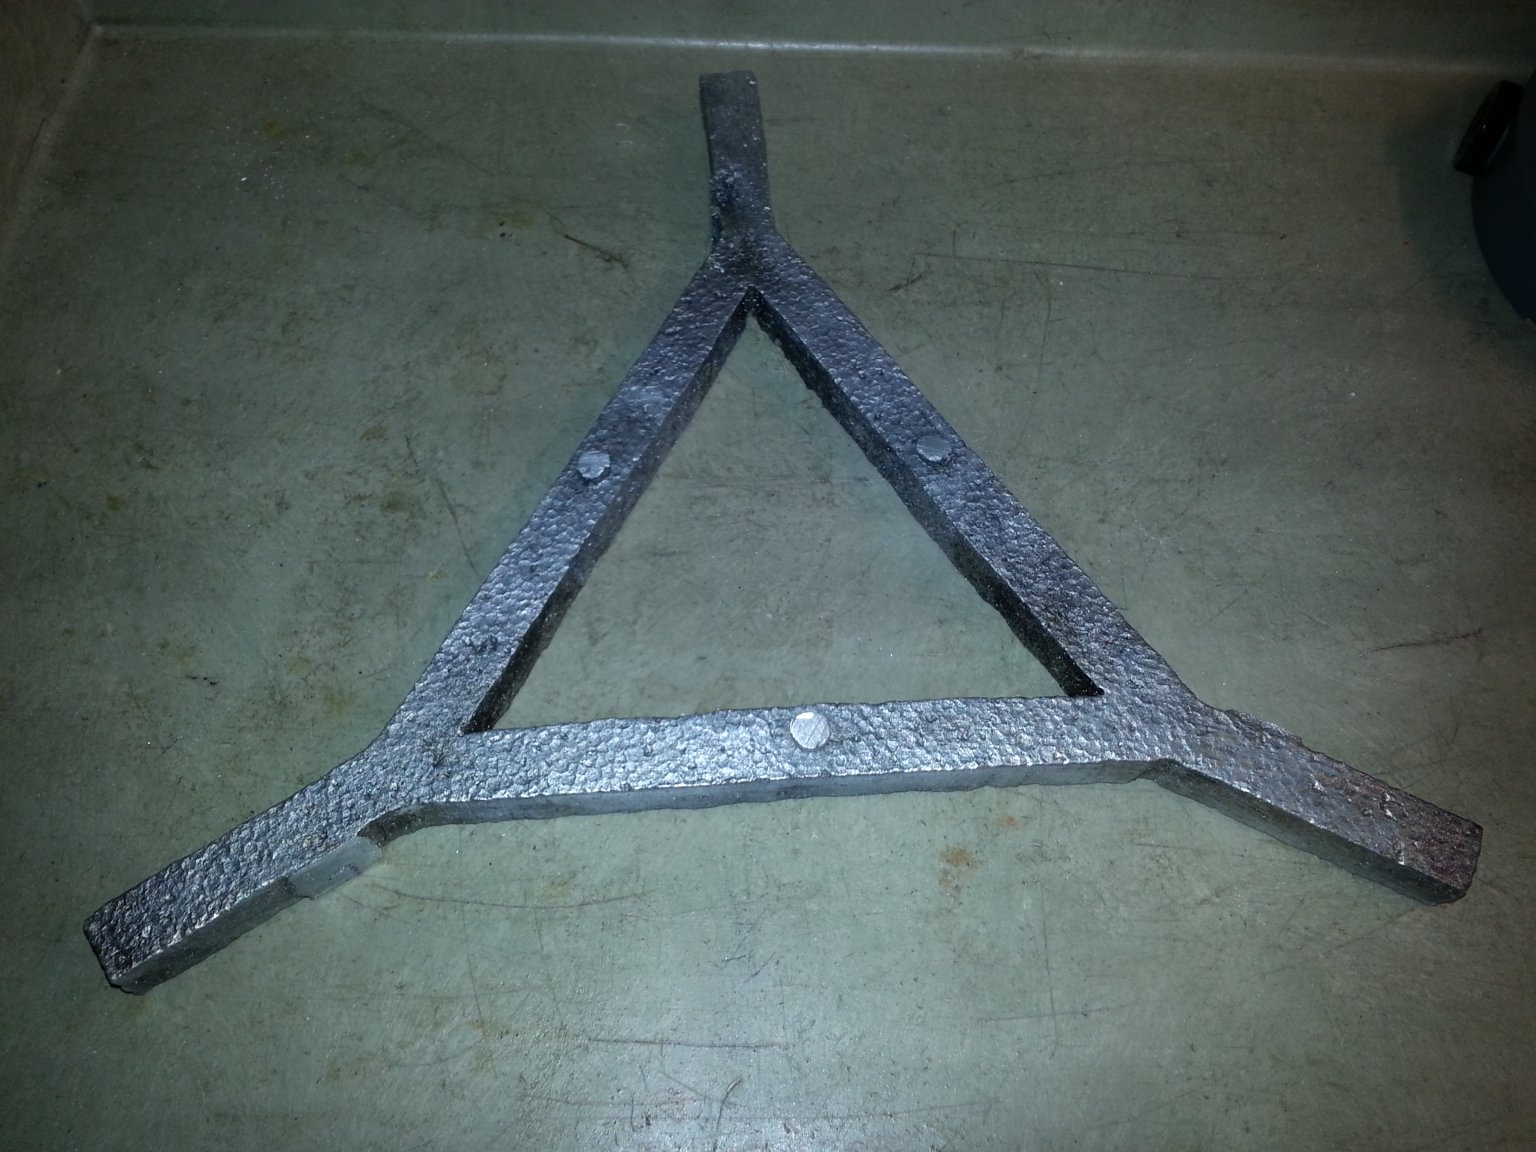
Here the sprues, risers and excess metal have been cut off the casting. This photo really shows how faithfully the original Styrofoam texture was reproduced in the casting.
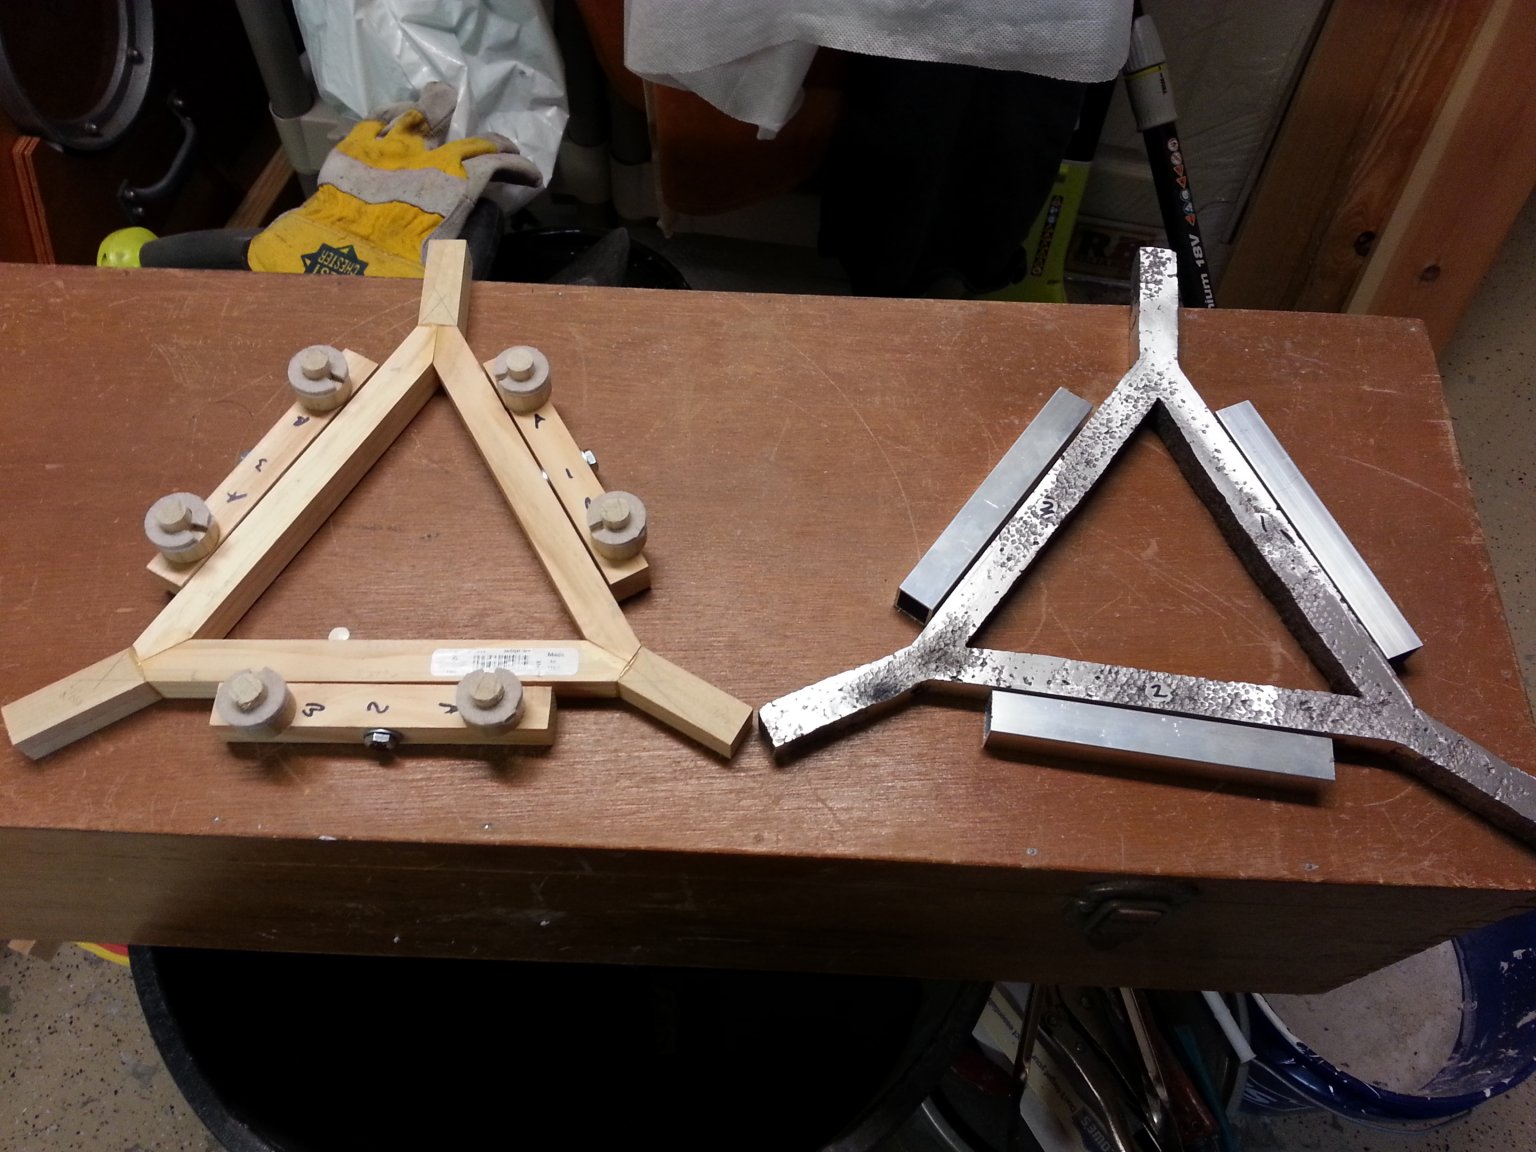
On the left is the wooden prototype of the telescope mirror cell. On the right is an aluminum production piece taking shape from the triangular casting and some square tubing.
It's not done yet, but it is well on the way thanks to my home-made foundry and lost foam casting.
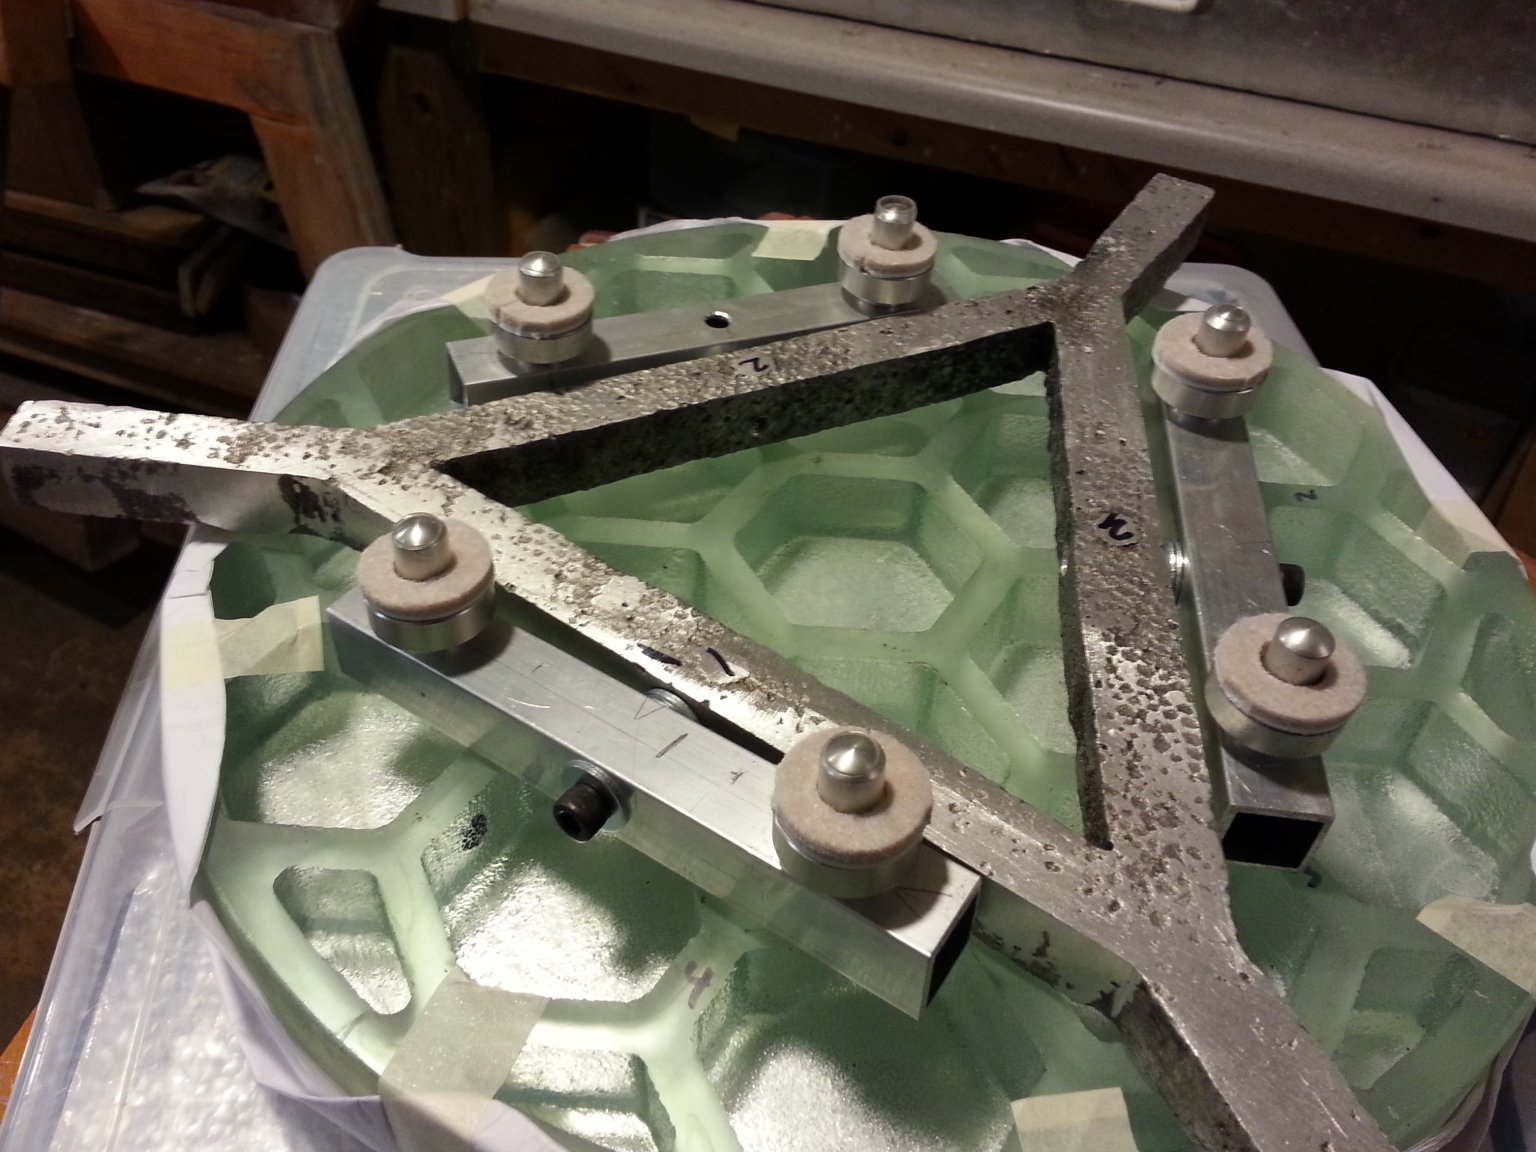
UPDATE: Here is a view of the essentially complete mirror support frame for the mirror cell. The cast triangular piece is the core of the unit.
It is sitting upside down on the back of the mirror to show off the six mirror support points.
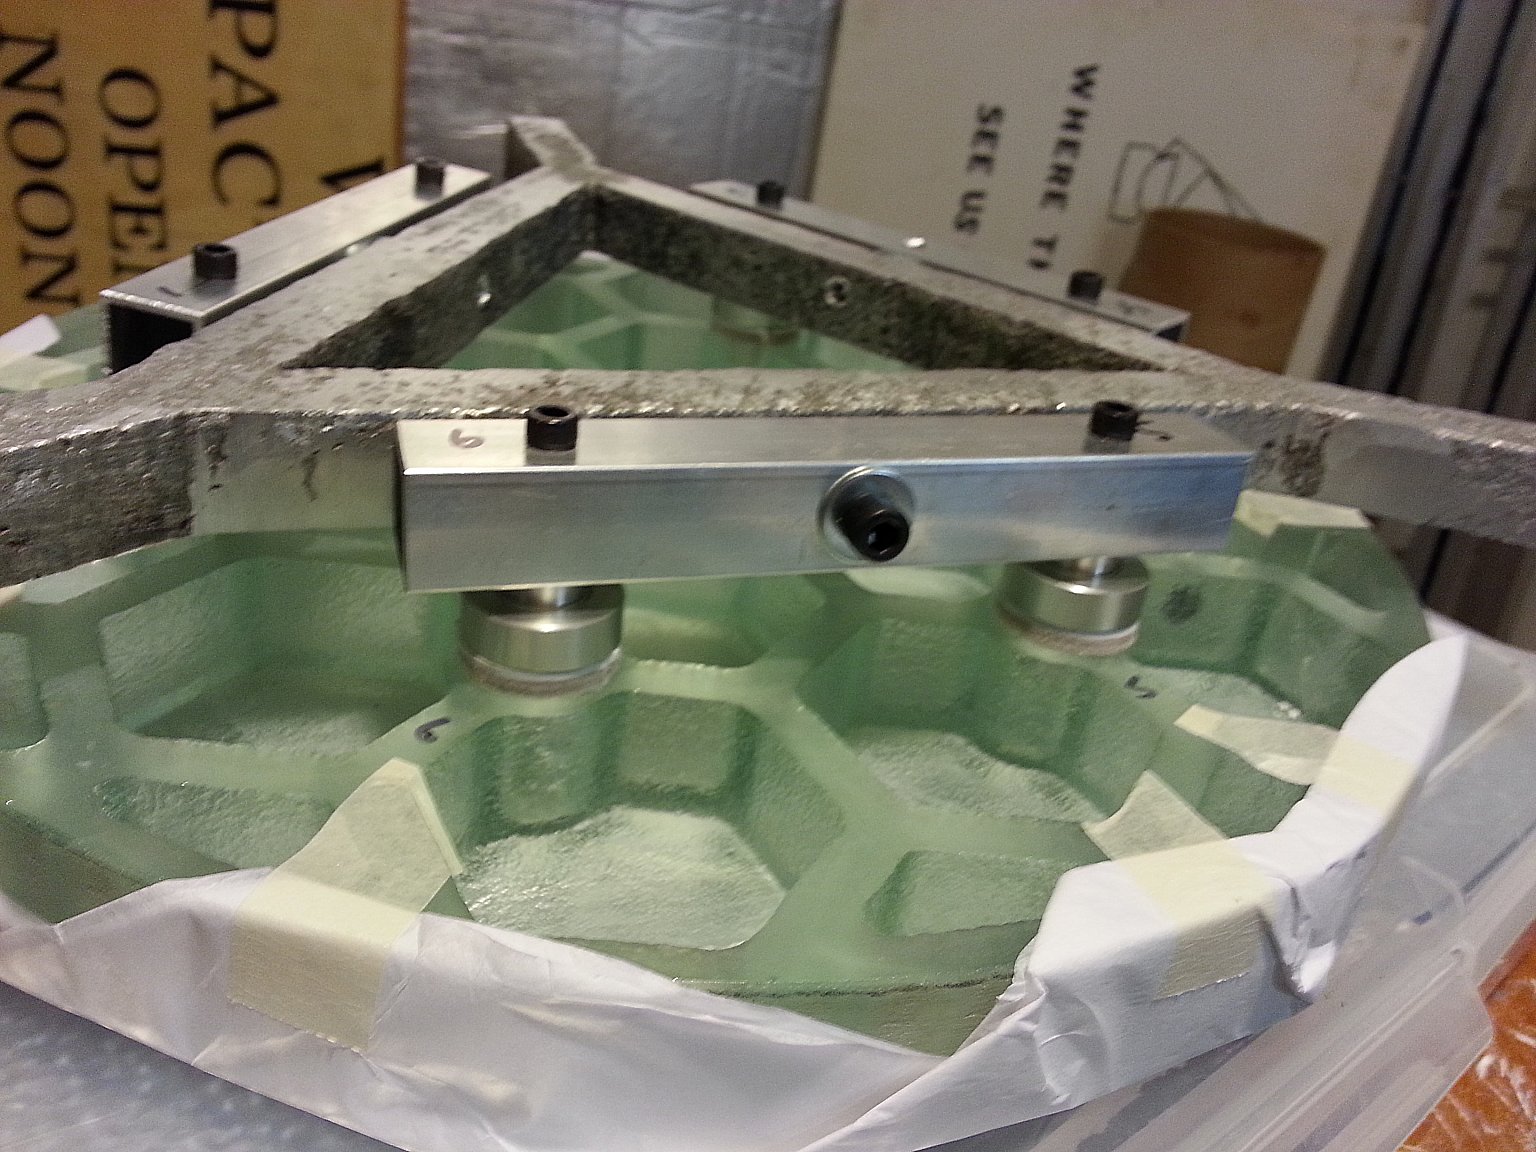
Each support point has a central alignment pin and a felt covered support ring. The pins fit into sockets in the mirror. Pairs of support points are mounted on hinged arms so that
each point will pivot and take an equal share of the load of supporting the mirror.
Here is a view of the unit in place correctly on the back of the mirror. The alignment pins are inserted into the sockets cast into the back of the glass mirror and the mirror support rings
are sitting on the felt covered support rings on the frame. I like it. The glass and the aluminum mate perfectly. It turned out exactly as I envisioned the whole thing.
The next step is to fabricate a support ring for the triangular frame that will complete the rear of the mirror cell and allow collimation and locking screws and compression springs to bear
against the bottom of the frame. I haven't decided yet if I am going to try to cast the ring or roll it out of aluminum stock. Maybe I will try casting it and see how that goes.
Stay tuned for further adventures in molten metal. I hope this information helps get others started in their own metal melting and casting projects.